Onewheel is the ultimate personal electric vehicle
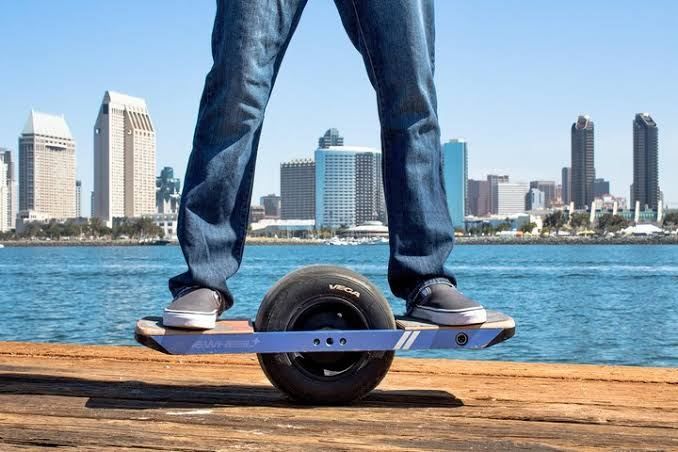
If you haven’t heard of a Onewheel, it’s like a skateboard and a unicycle mixed together. The riding experience is touted as being like Snowboarding, but on pavement or dirt.
I’ve been interested in Onewheels for many years, but I was always worried about falling off and hurting myself, and, I had my e-bike which was easier and faster to ride long distances.
My interest has renewed lately because:
- There’s only one very short bike path near my house, and I don’t have a bike rack on my car, nor do I like riding on the road. Putting my e-bike on a trailer hitch would be a pain. A Onewheel can just go in the boot or behind the seat in my car.
- I think a ‘last mile’ transport solution would be handy from time to time. Parking really far from something and having to walk a long way sucks.
- There’s now an open source community that has opened the door for DIY servicing and building boards.
The third reason is what really got me hooked again. Onewheel is not a brand but a trademarked product name. The company is Futuremotion, who are based in the USA.
They don’t have a good track record for making their product user-servicable, so if something went wrong with it, I’d have to pay hundreds of dollars to ship it from Australia to America for repair.
In addition, I’ve seen many reports of peoples boards just kicking them off, and the Onewheel app gives almost no diagnostic information to explain why.
Lastly, being a for-profit company, they’re incentivized to make their product with the minimum quality components to maximise profits.
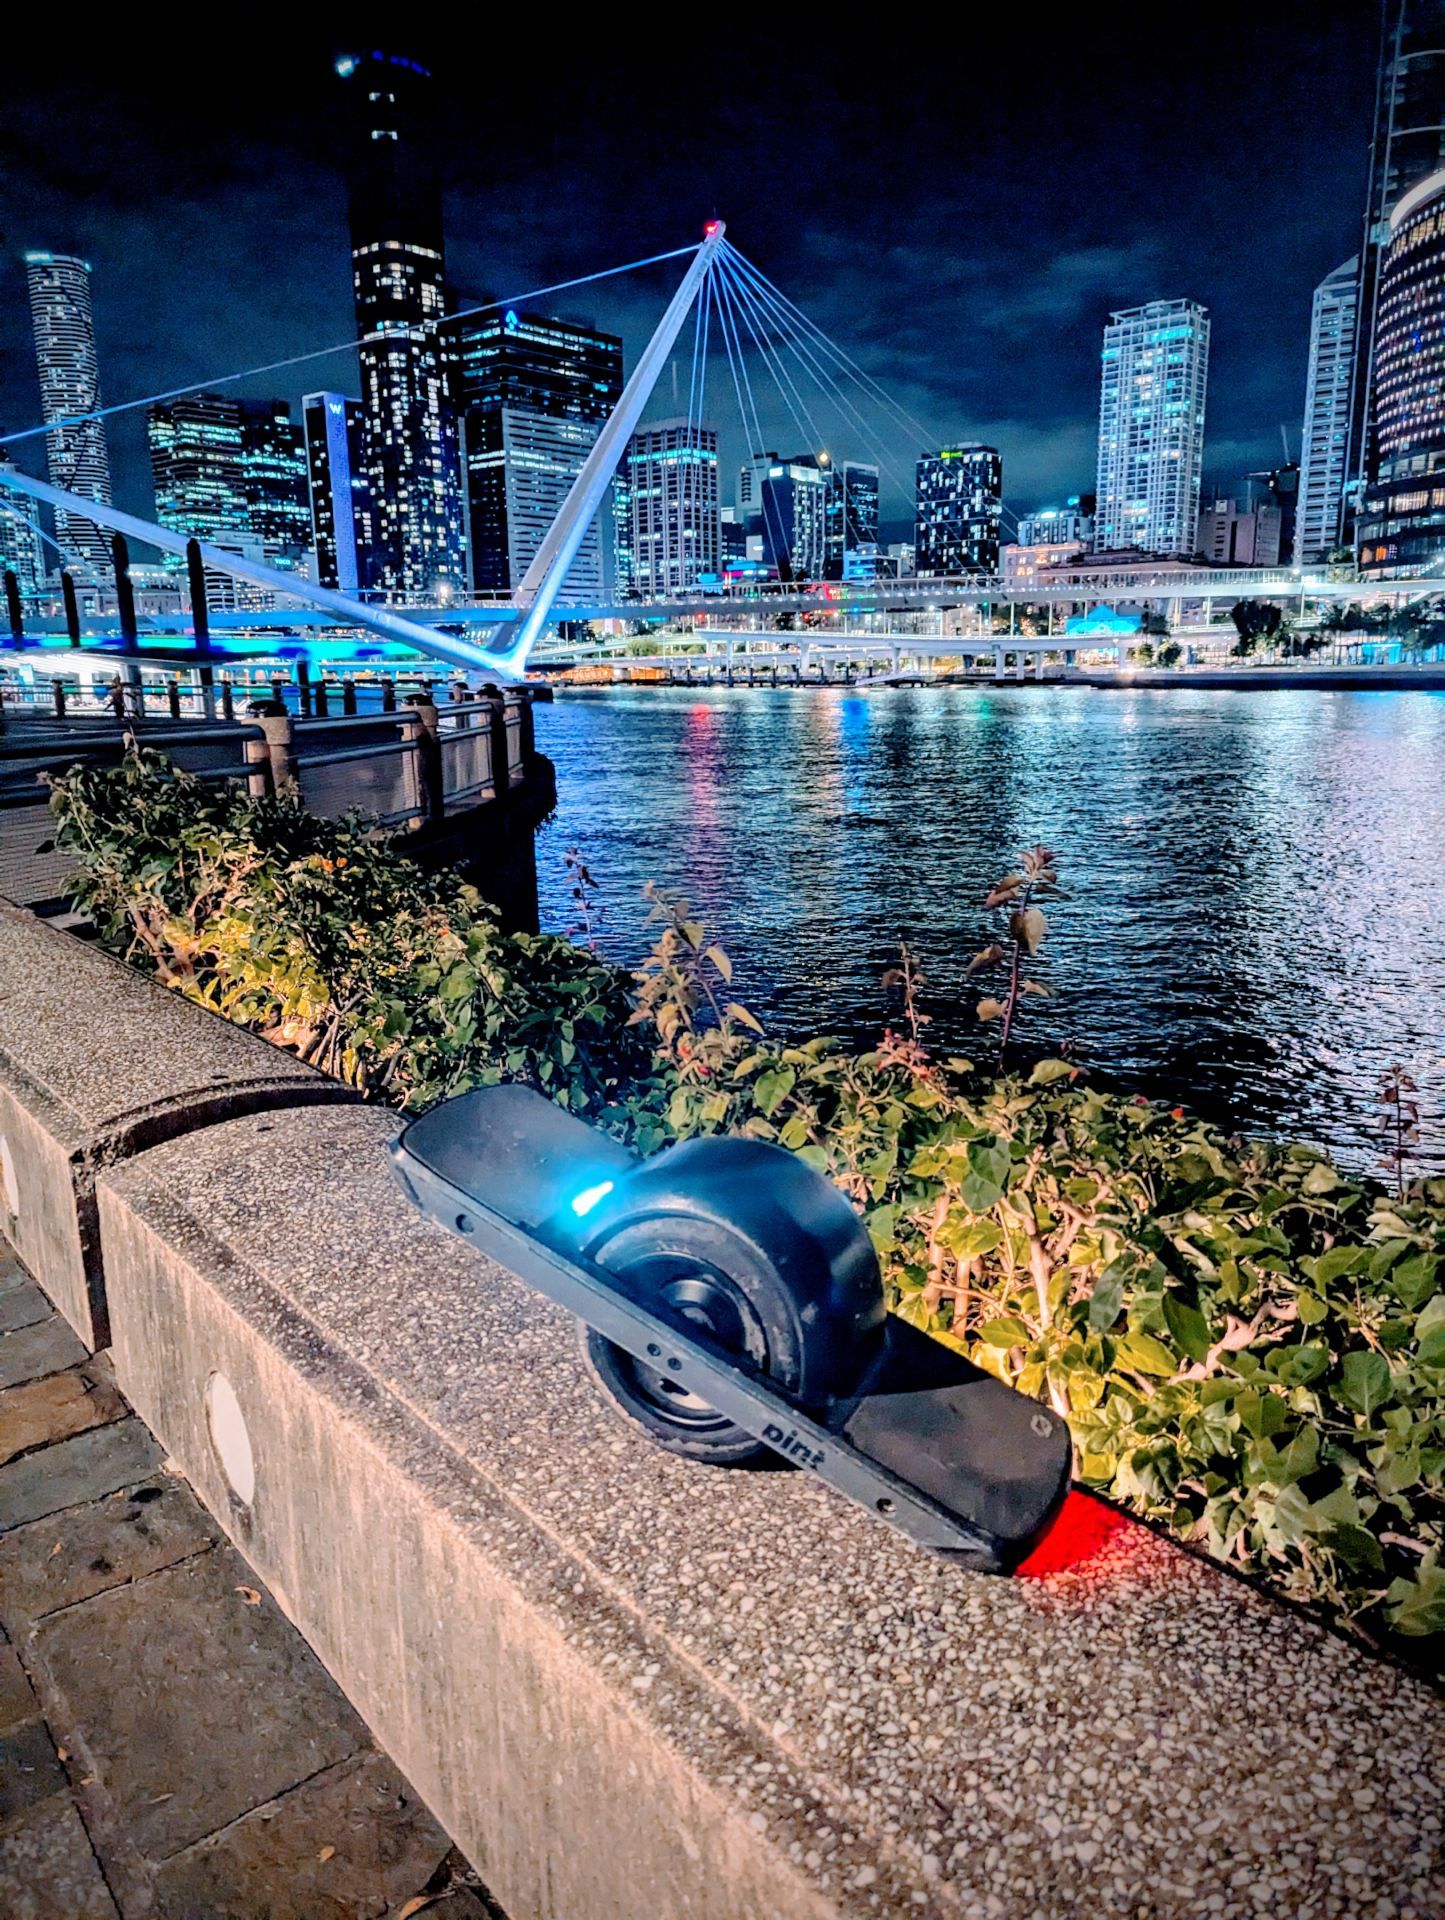 The used pint I bought on Facebook marketplace.
With my history building drones, I know that manufacturers cheap out on batteries and controllers, instead relying on software to prevent the system from exceeding it’s operating limits.
When I’m flying a drone, there’s almost no injury risk to me personally, but on a skateboard going 20kph, I could actually die.
So, I don’t want the bare minimum components, I want it to be over-engineered.
The name of the controller that is effectively the board’s brain is called the VESC, which stands for Vedders Electronic Speed Controller, and was designed by Benjamin Vedder.
I suspect it’s very similar to other ESCs from the drone world, just adapted to the specific needs of personal electric vehicles (PEV).
It’s open source, so with the help of an enthusiastic community it has grown from a pretty rough hobbyist experiment into a product that outstrips FutureMotion’s own Onewheel in every respect.

In the VESC space you can make your own, or buy from a builder - they take all the components from various makers (and some of their own) and assemble boards for customers.
Some make a single board, like the Floatwheel. Others do custom builds and design various accessories, like Fungineers and VOW Systems.
I’m pretty lucky to be in the same city as VOW Systems, so I reached out to Stanley early on in my learnings. He was very helpful and welcoming. I checked out two boards he had for sale, and was really impressed with all the development he’s doing.
Stanley is designing better footpads, integrating motors and controllers, improving boxes for batteries and electronics, and a lot more - all from his garage. It’s amazing what can be done now with a computer, a 3D printer, and a smart, dedicated enthusiast.
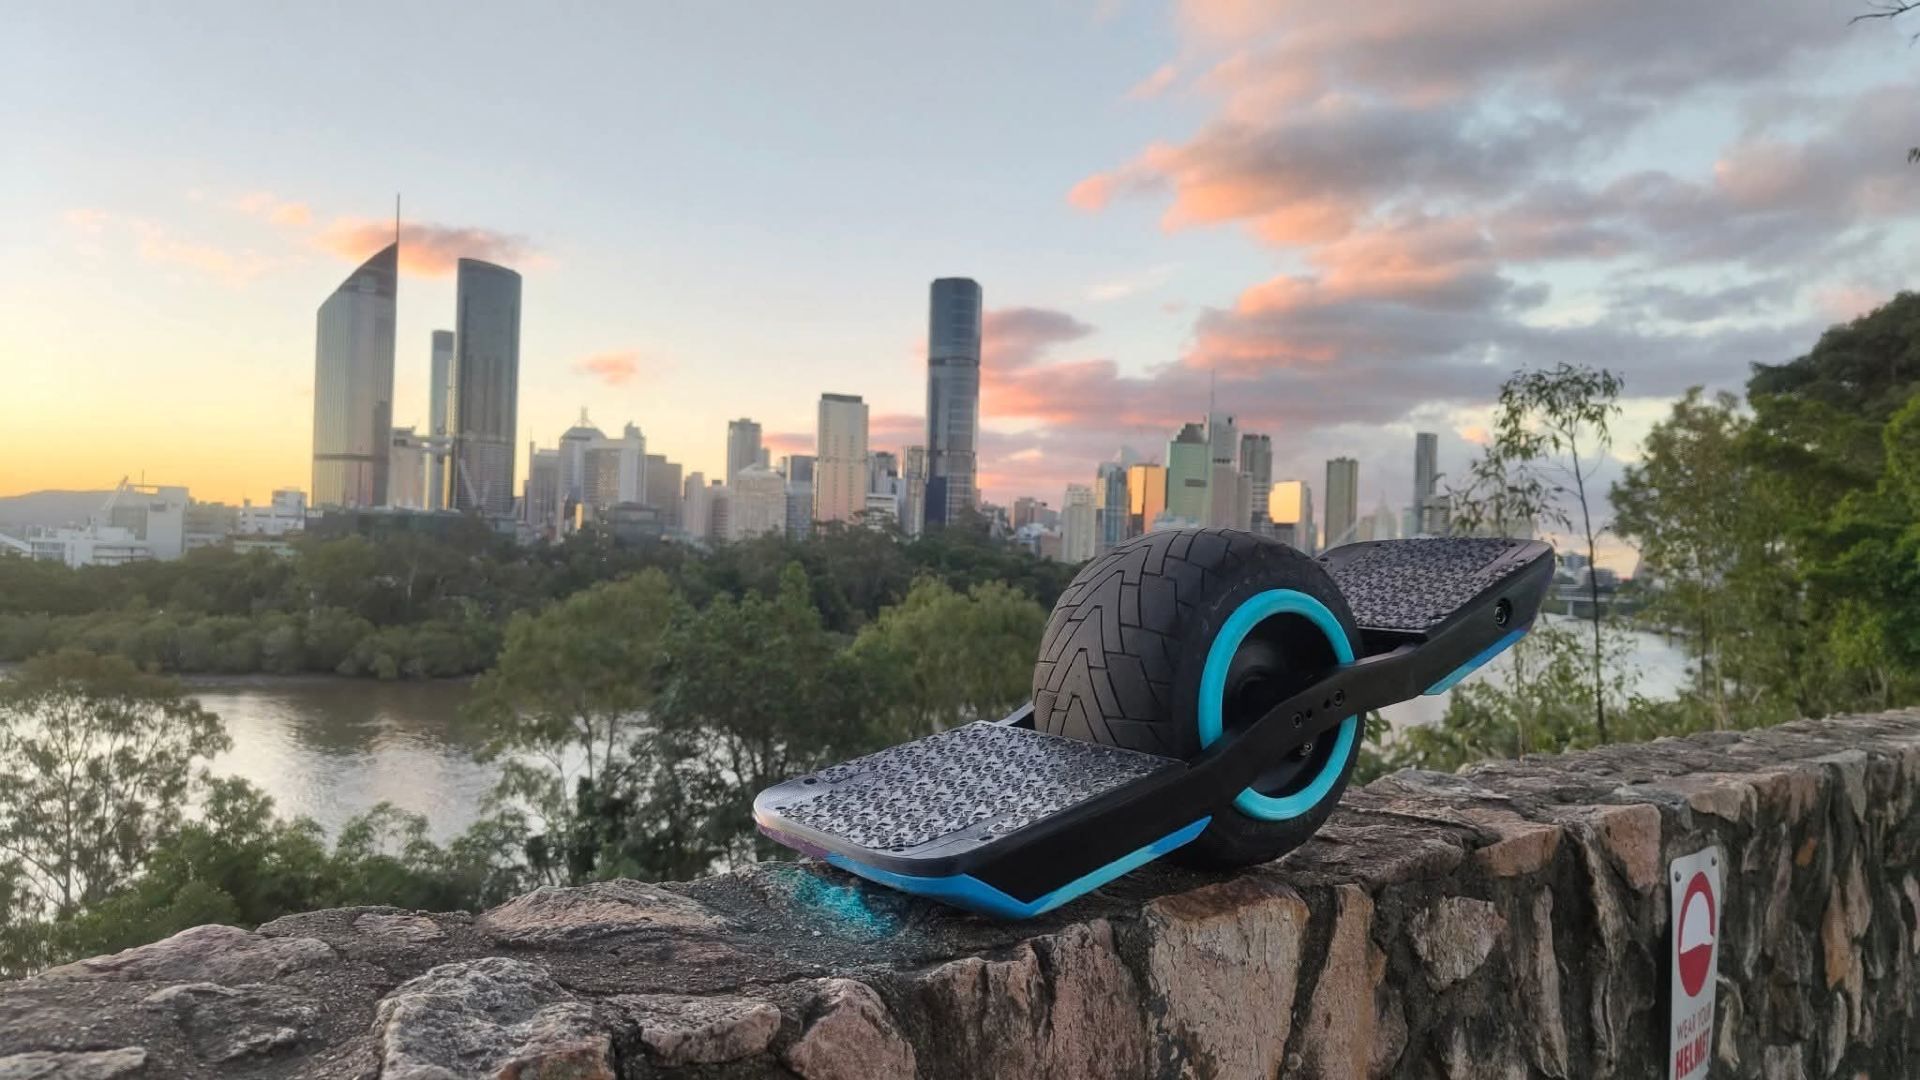 One of Stanley’s custom boards.
I suspect he could create and assemble nearly the entire physical board with components built in-house, with only the electronics (VESC), motor, and rails being bought in.
It’s really exciting, I think there’s a great opportunity for VOW to become the vendor for VESC boards in Australia. I reached out to him about helping with his journey, because I think the product is awesome, and I think I could offer my knowledge to turbocharge his growth. It would be a fun project for me.
After I met Stanley I was deciding whether to buy one of his boards. The investment was significant, at least $3500, which considering I’d never ridden a board before, was daunting.
Instead I scoured Facebook marketplace for a deal and found a Onewheel Pint for just $700. The board had done 1200km, which is about half of what the battery is rated for before it degrades significantly.
I am the third or fourth owner of this Pint. I think they’re popular with beginners because of the lower price. However, they’re actually a bit harder to ride than larger boards like the XR.
This is due to the rounded tyre. The board balances forwards and backwards automatically, but keeping it from rolling toe or heel is challenging and requires similar muscles to snowboarding.
Fortunately, I made a mistake which helped a lot with my learning. I was so excited to try the board that I didn’t check the tyre pressure - which was at only 4psi. As a result, my first ride was much easier, as the tyre was wider. (flat)
If you’re starting out, I suggest dropping the tyre pressure to 5psi and slowly increasing it by a few psi each ride. Your range will be much lower, but it’ll help with confidence.
Once I had some confidence balancing, I went on my first ride around my local walking track.
I immediately felt comfortable riding at speed, in fact it’s easier once moving. I did about 7km with a few stops to rest my feet and came home for a rest.
Over the next few weeks, I’d make time to ride two or three times a week. Recently I stepped up from ‘Redwood’ the beginner mode, to ‘Pacific’ and then to ‘Skyline’.
This increased the top speed which meant I was riding less in pushback, which feels unnatural.
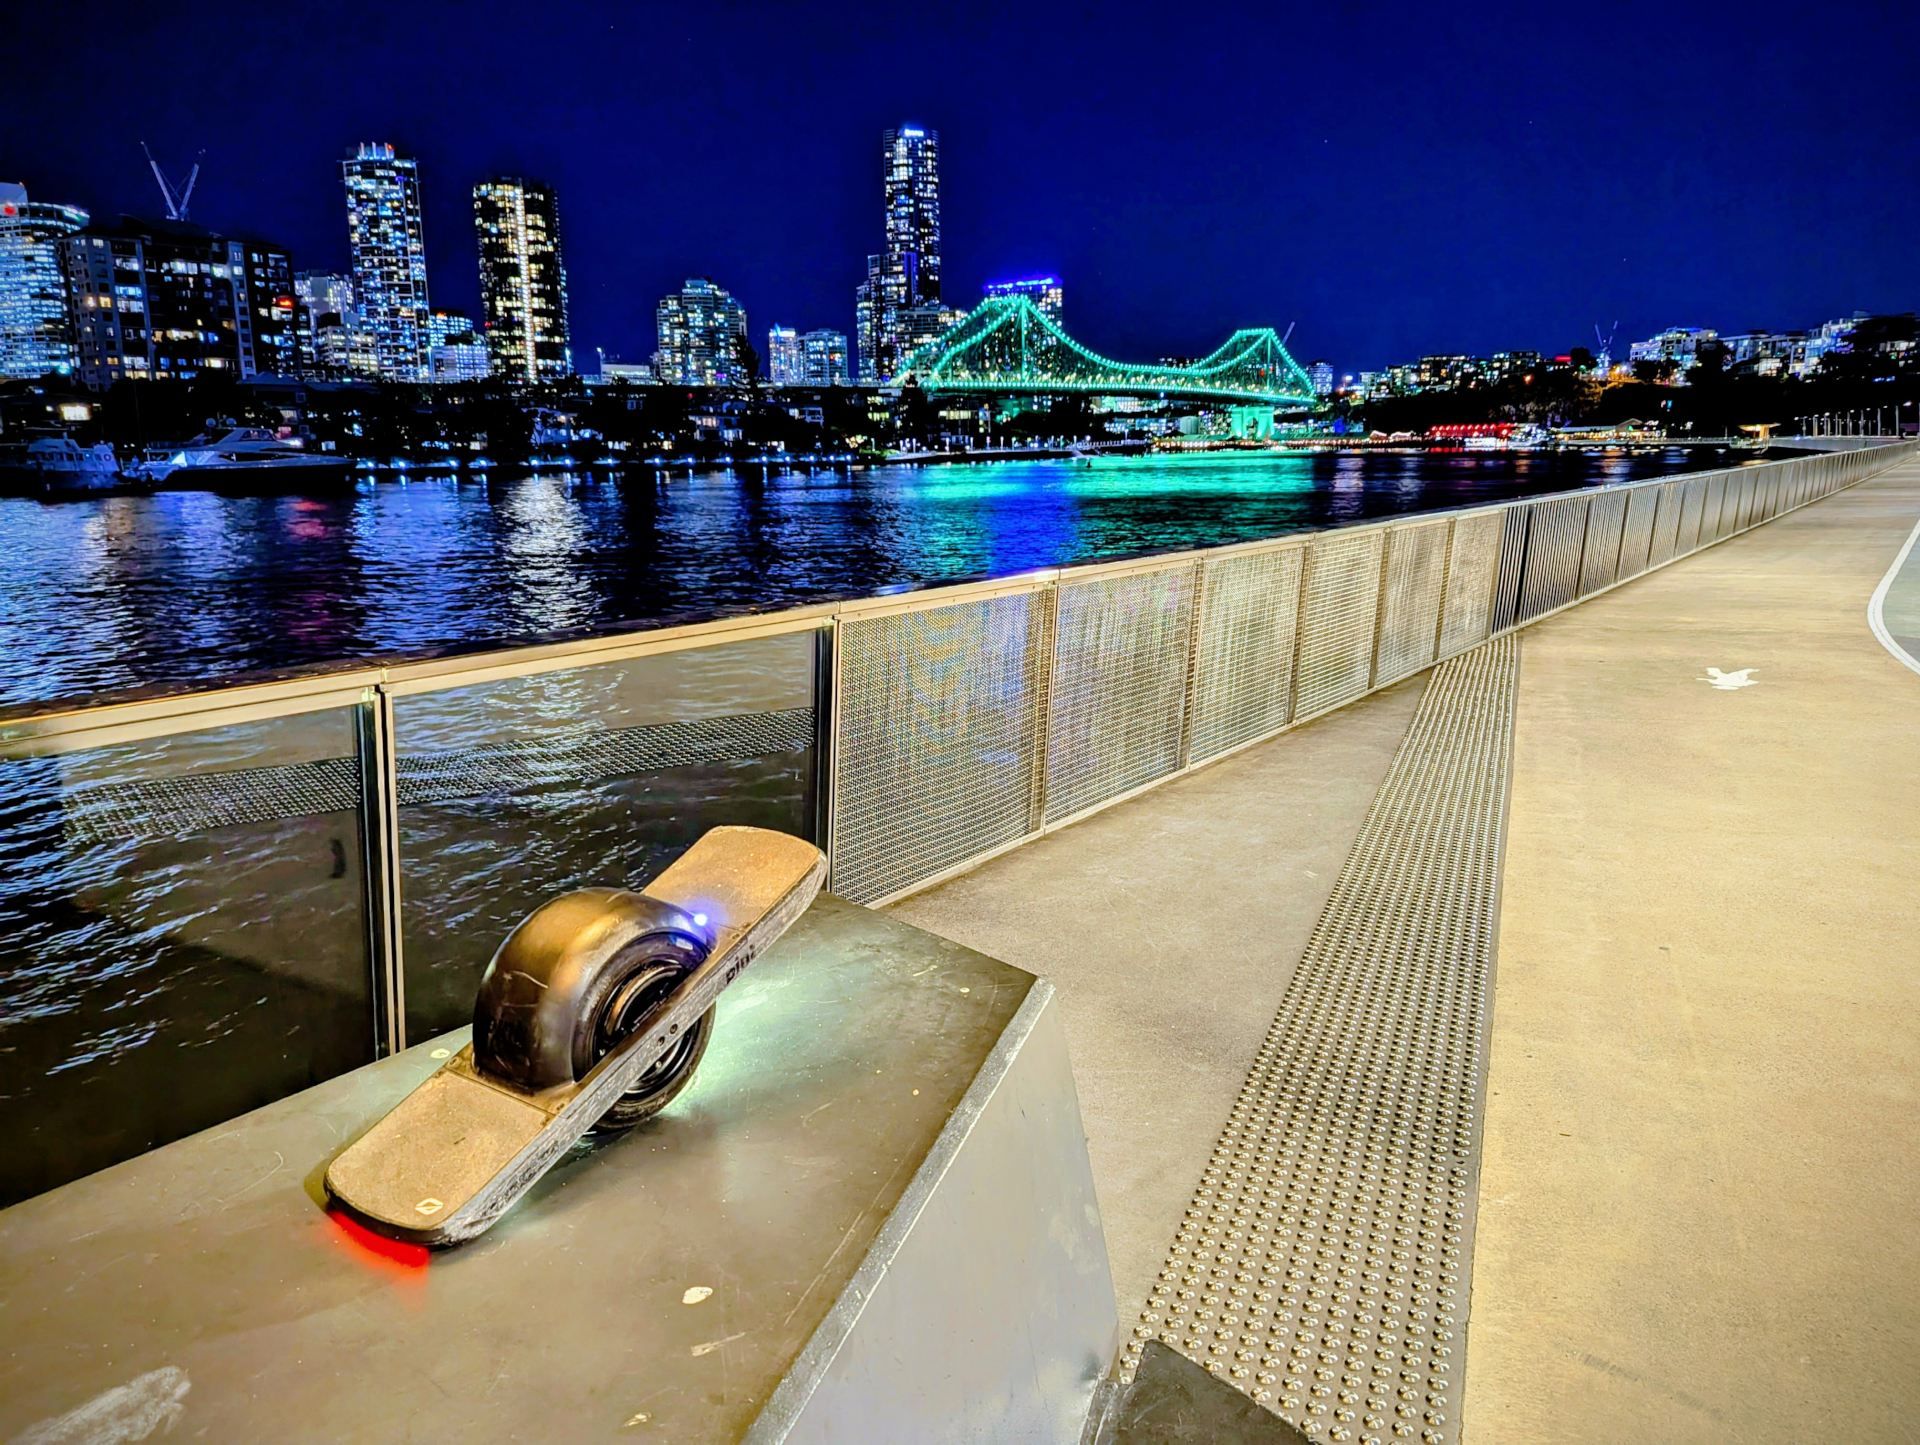
Most recently I upped my tire pressure to 22psi and the board felt amazing. I went to Southbank and had a great time. The sensation of snowboarding is fully present when gliding between obstacles and carving left and right.
It’s a pretty magic flow state experience, especially when coupled with some headphones to add some groove.
I tried Sony Linkbuds Open, but found them uncomfortable, hard to position, and difficult to hear over the wind noise. I tried some Soundpeat Pearls instead, and they’re much better.
The wind noise is gone, and they’re very comfortable. Sound quality is also just as good as the Sony. They just look a little weird, kind of like … earrings. Hence pearls I guess. They were only $50! I’m very happy with them.
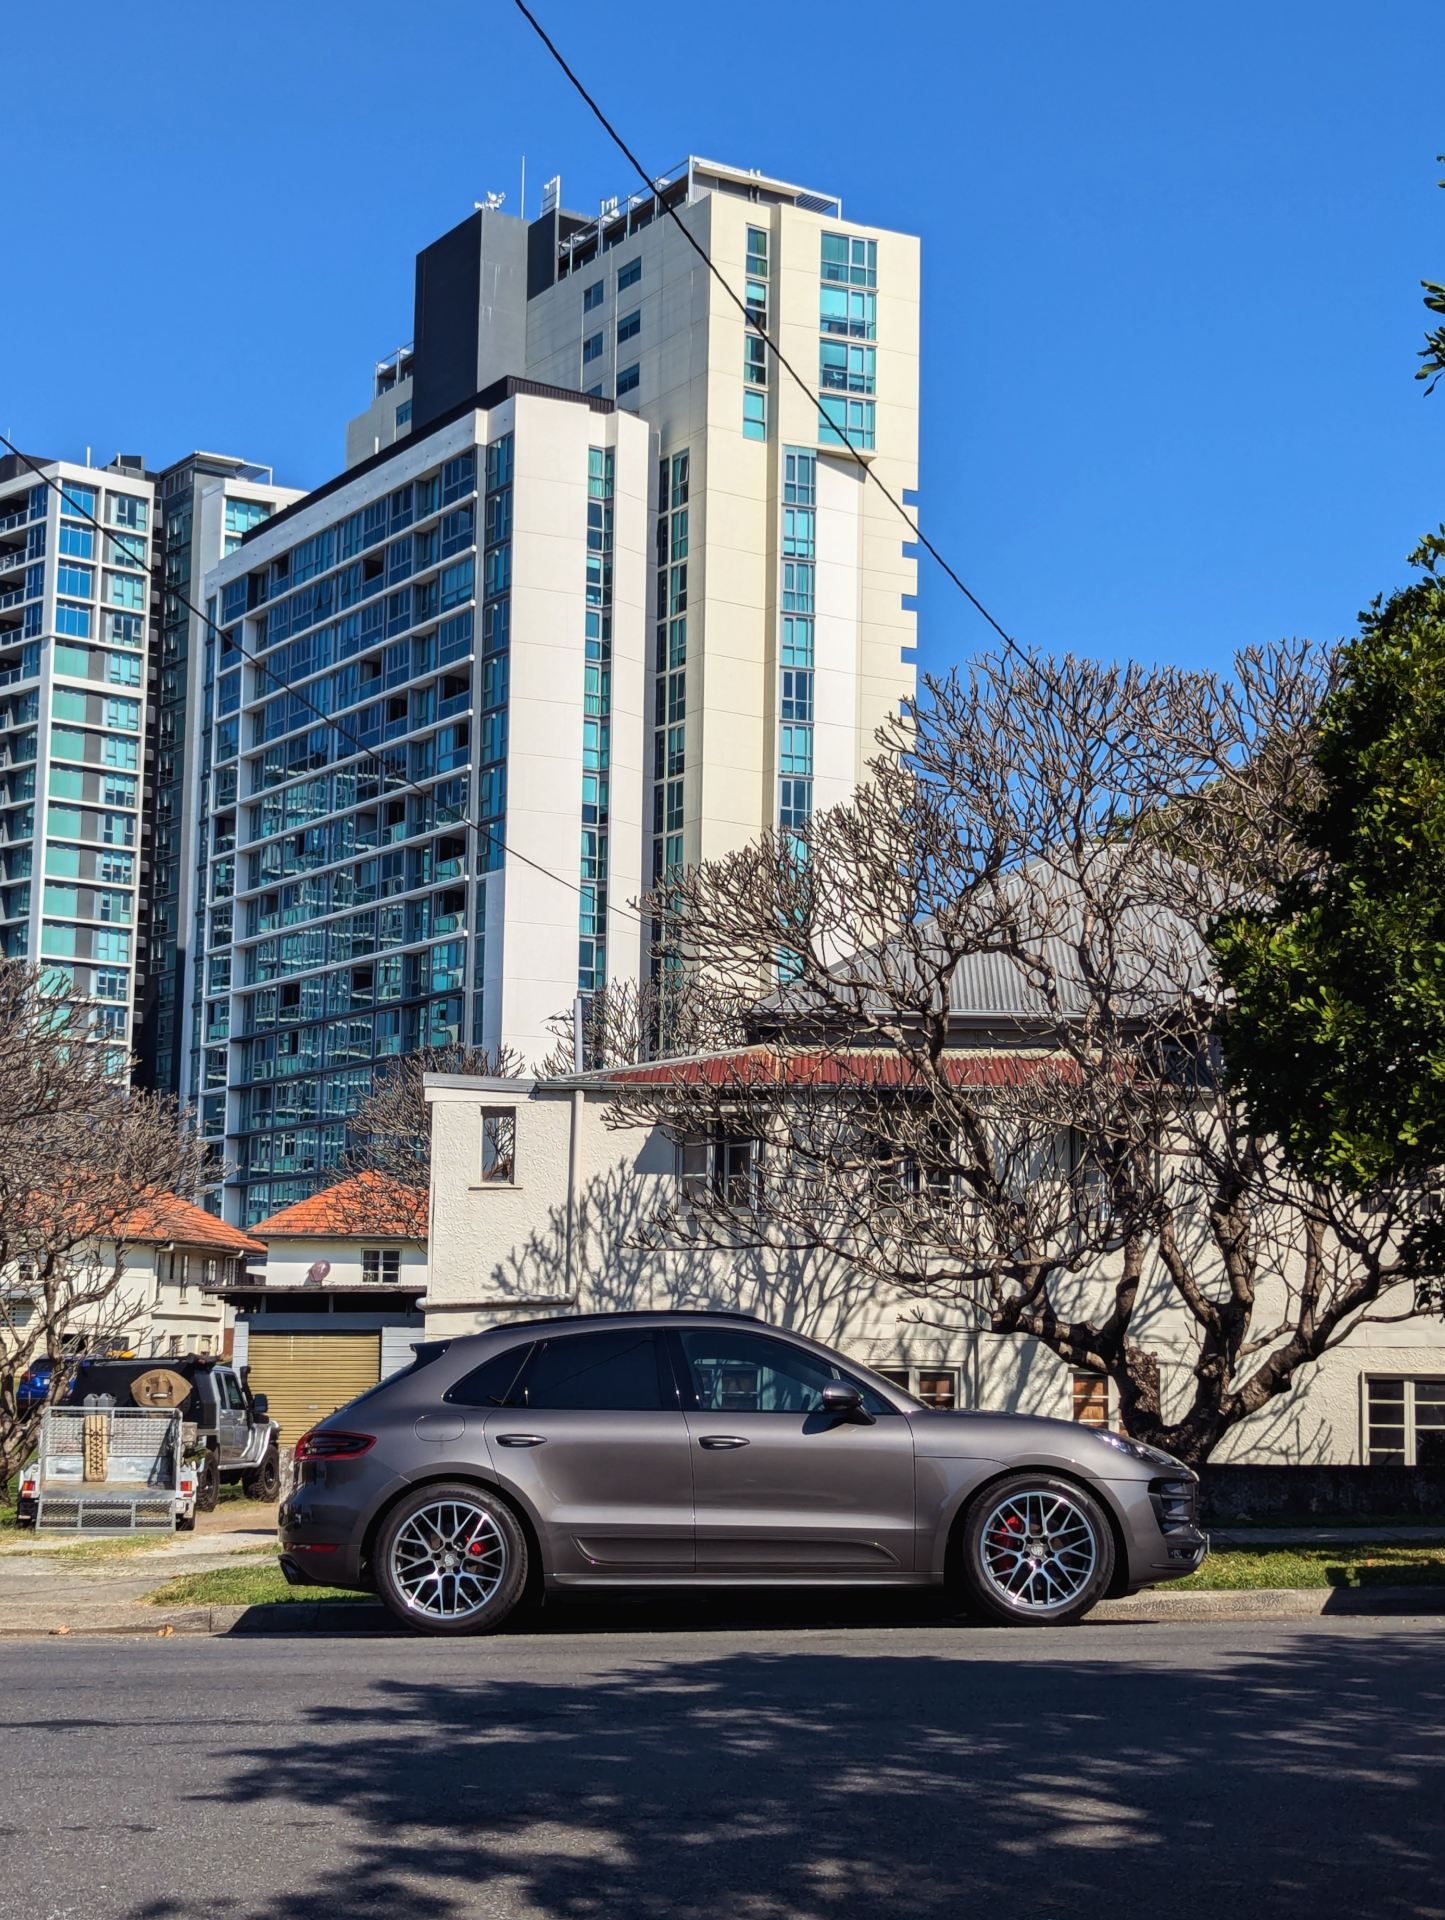
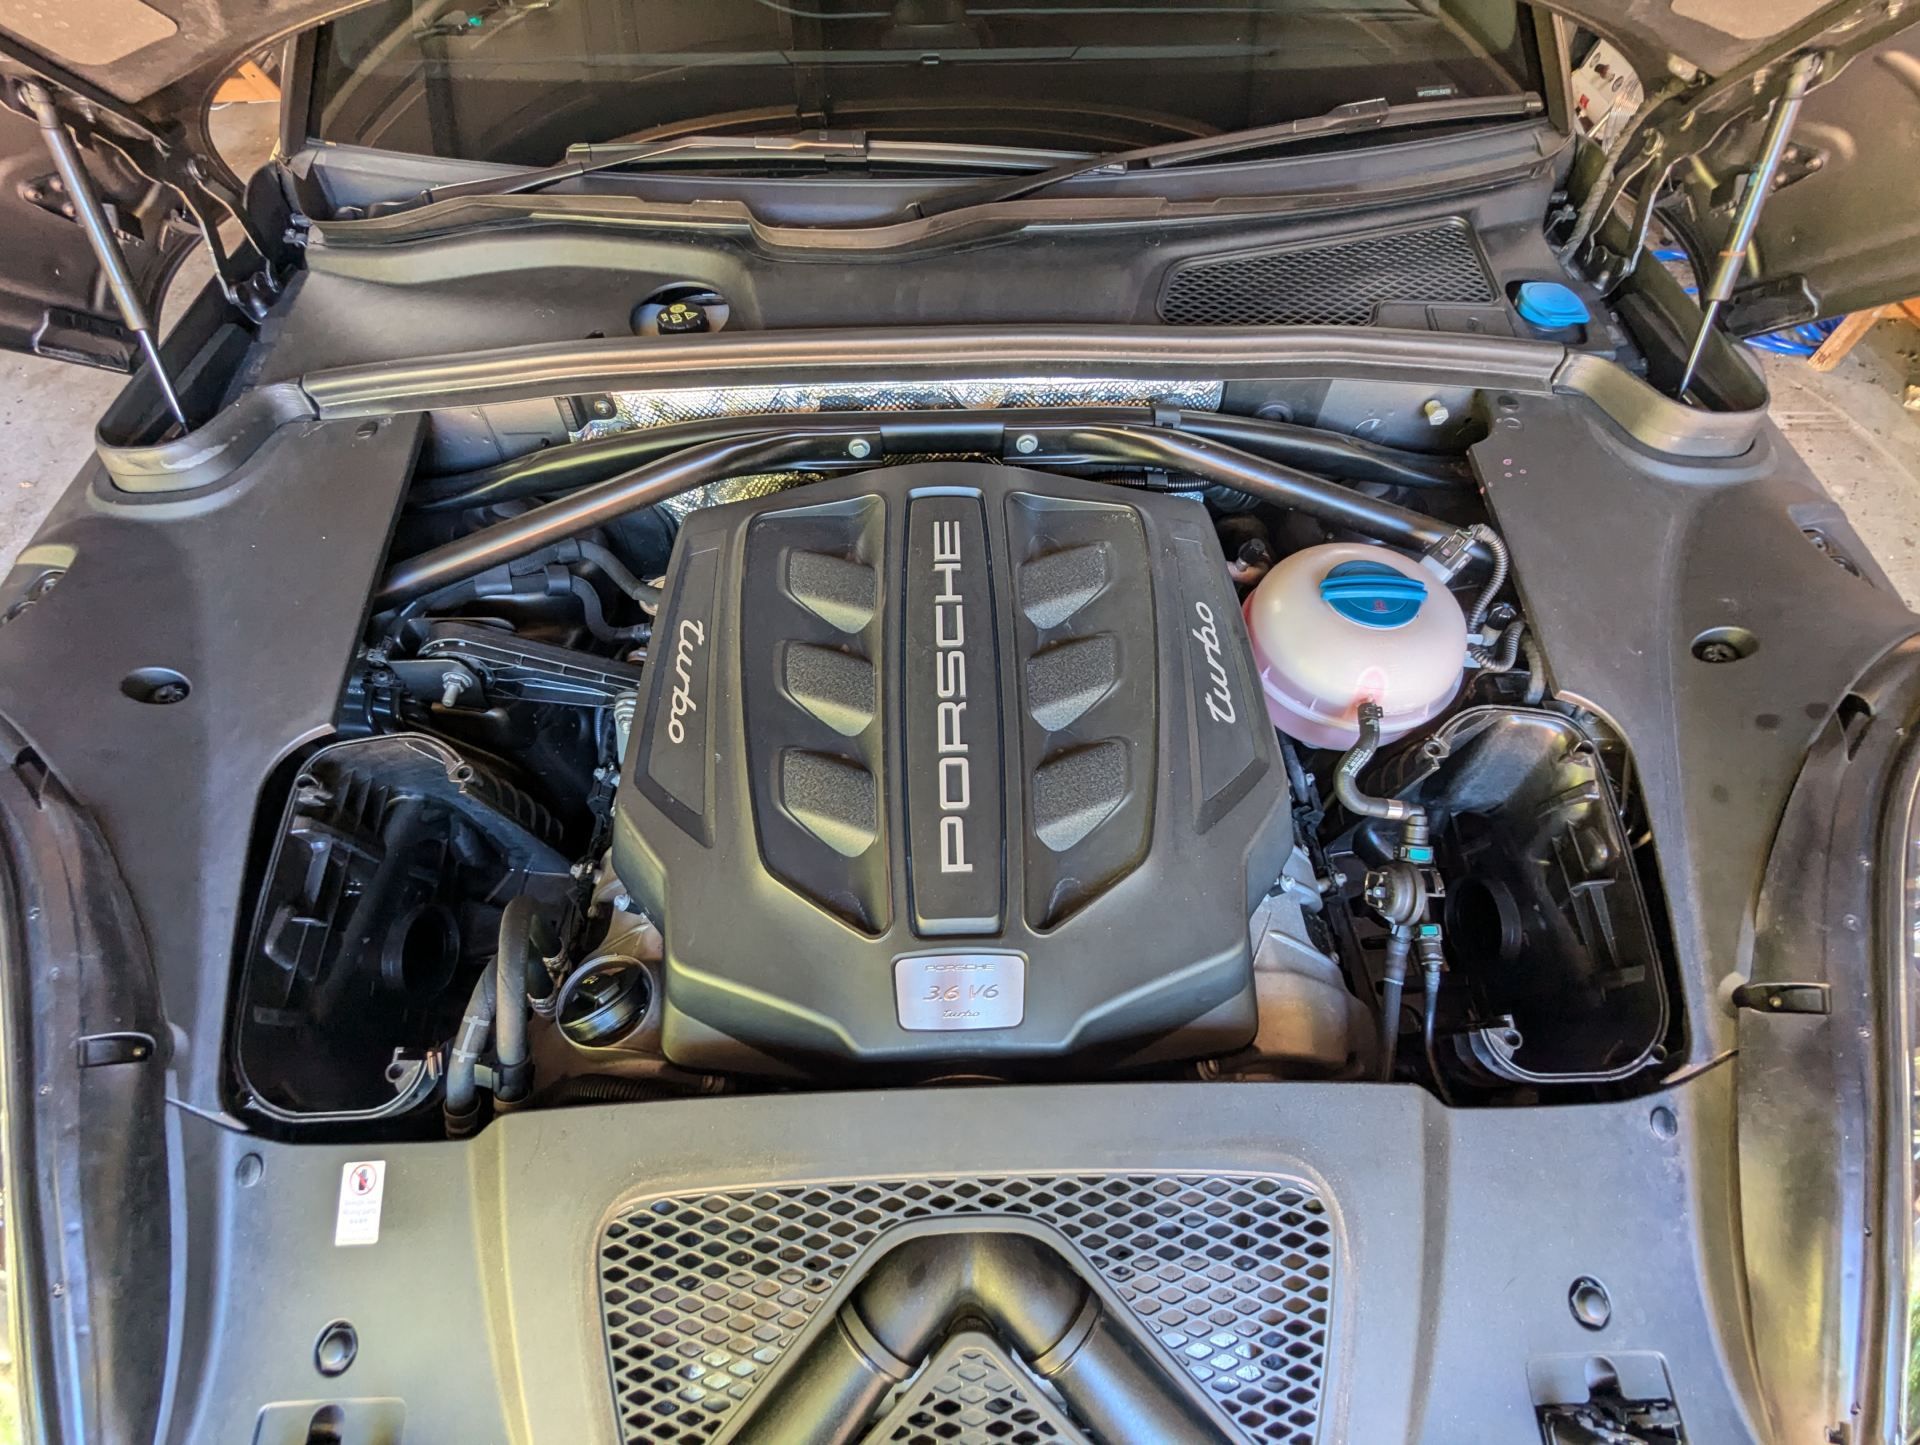
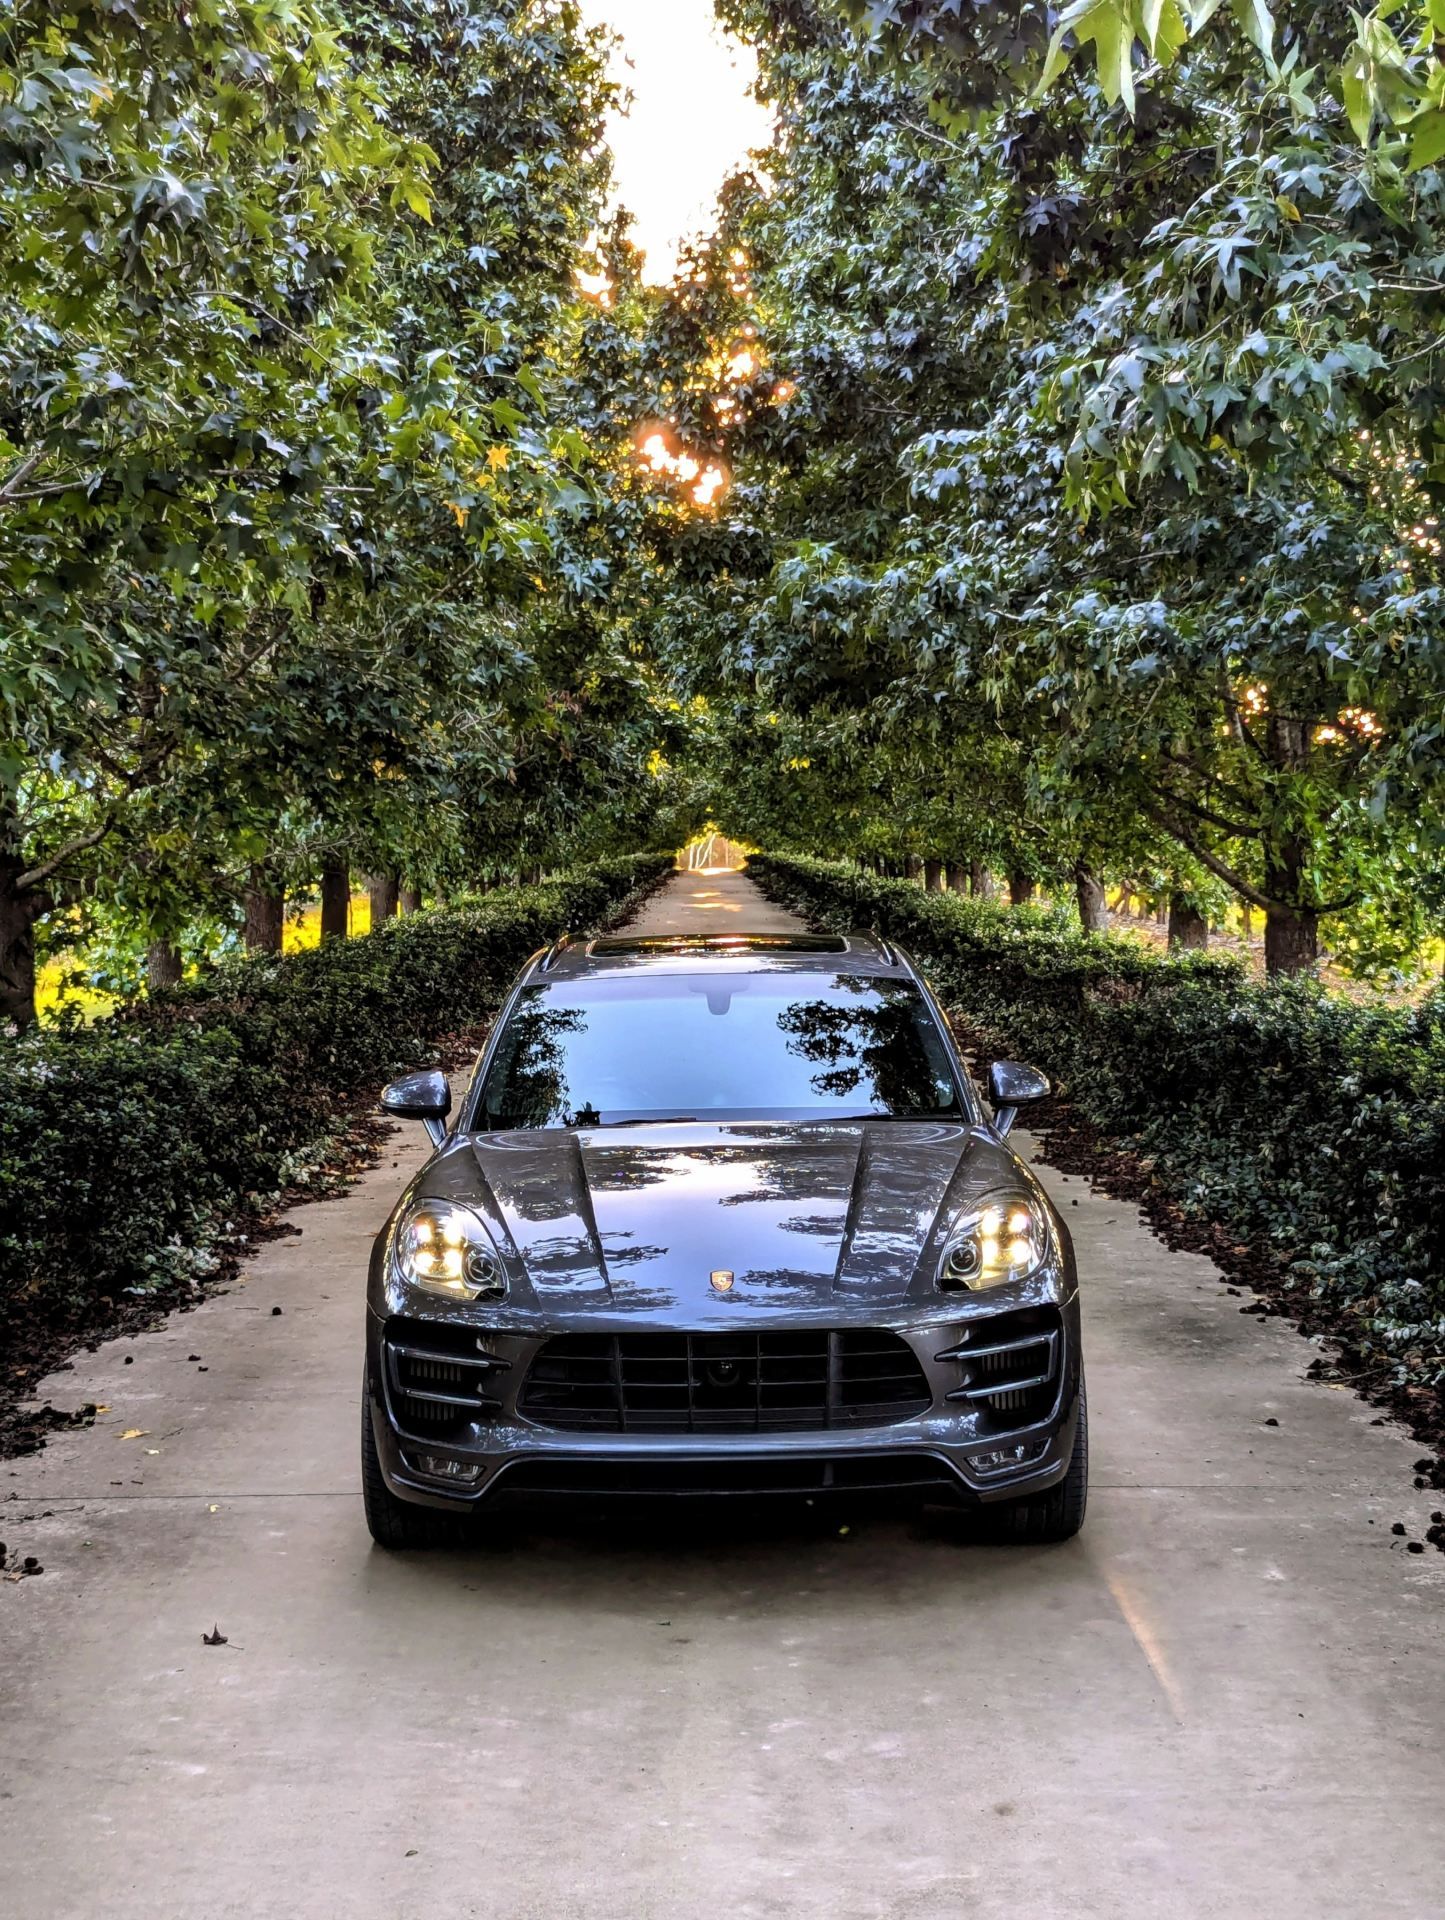
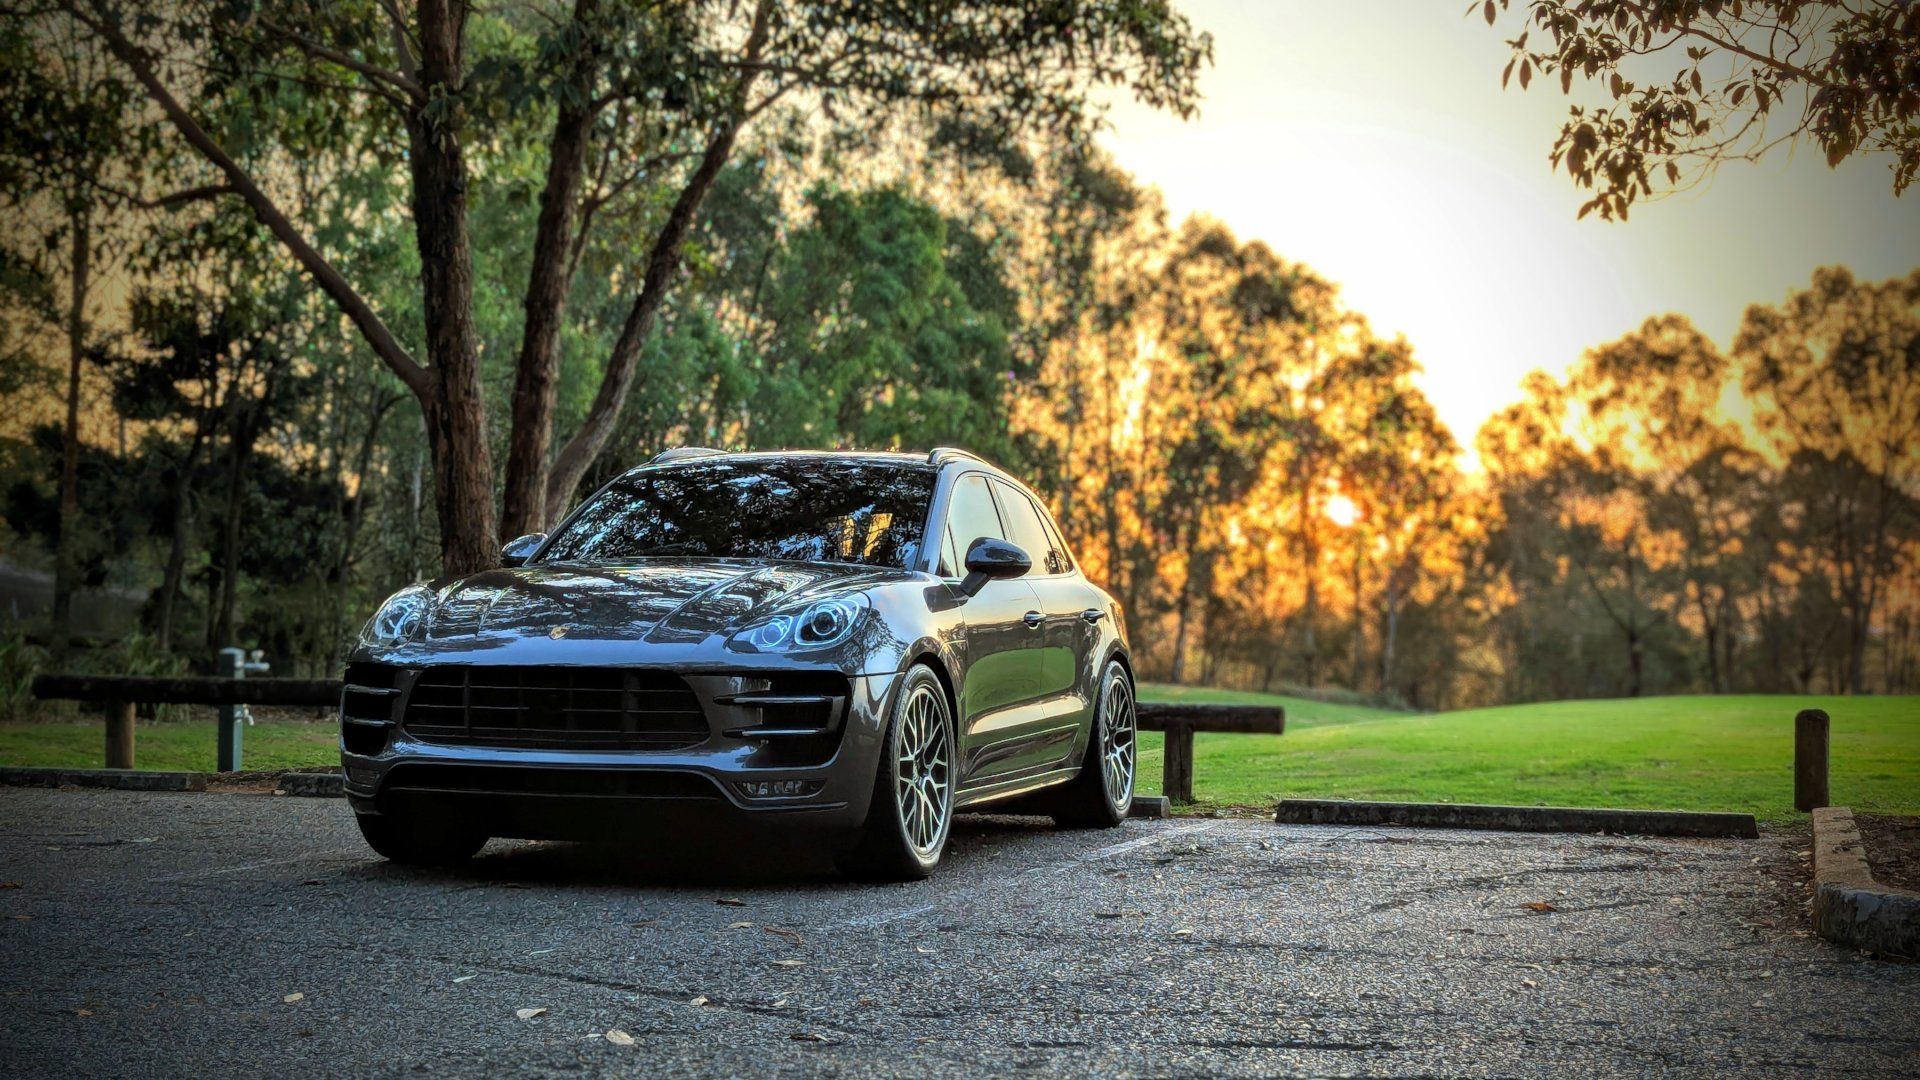
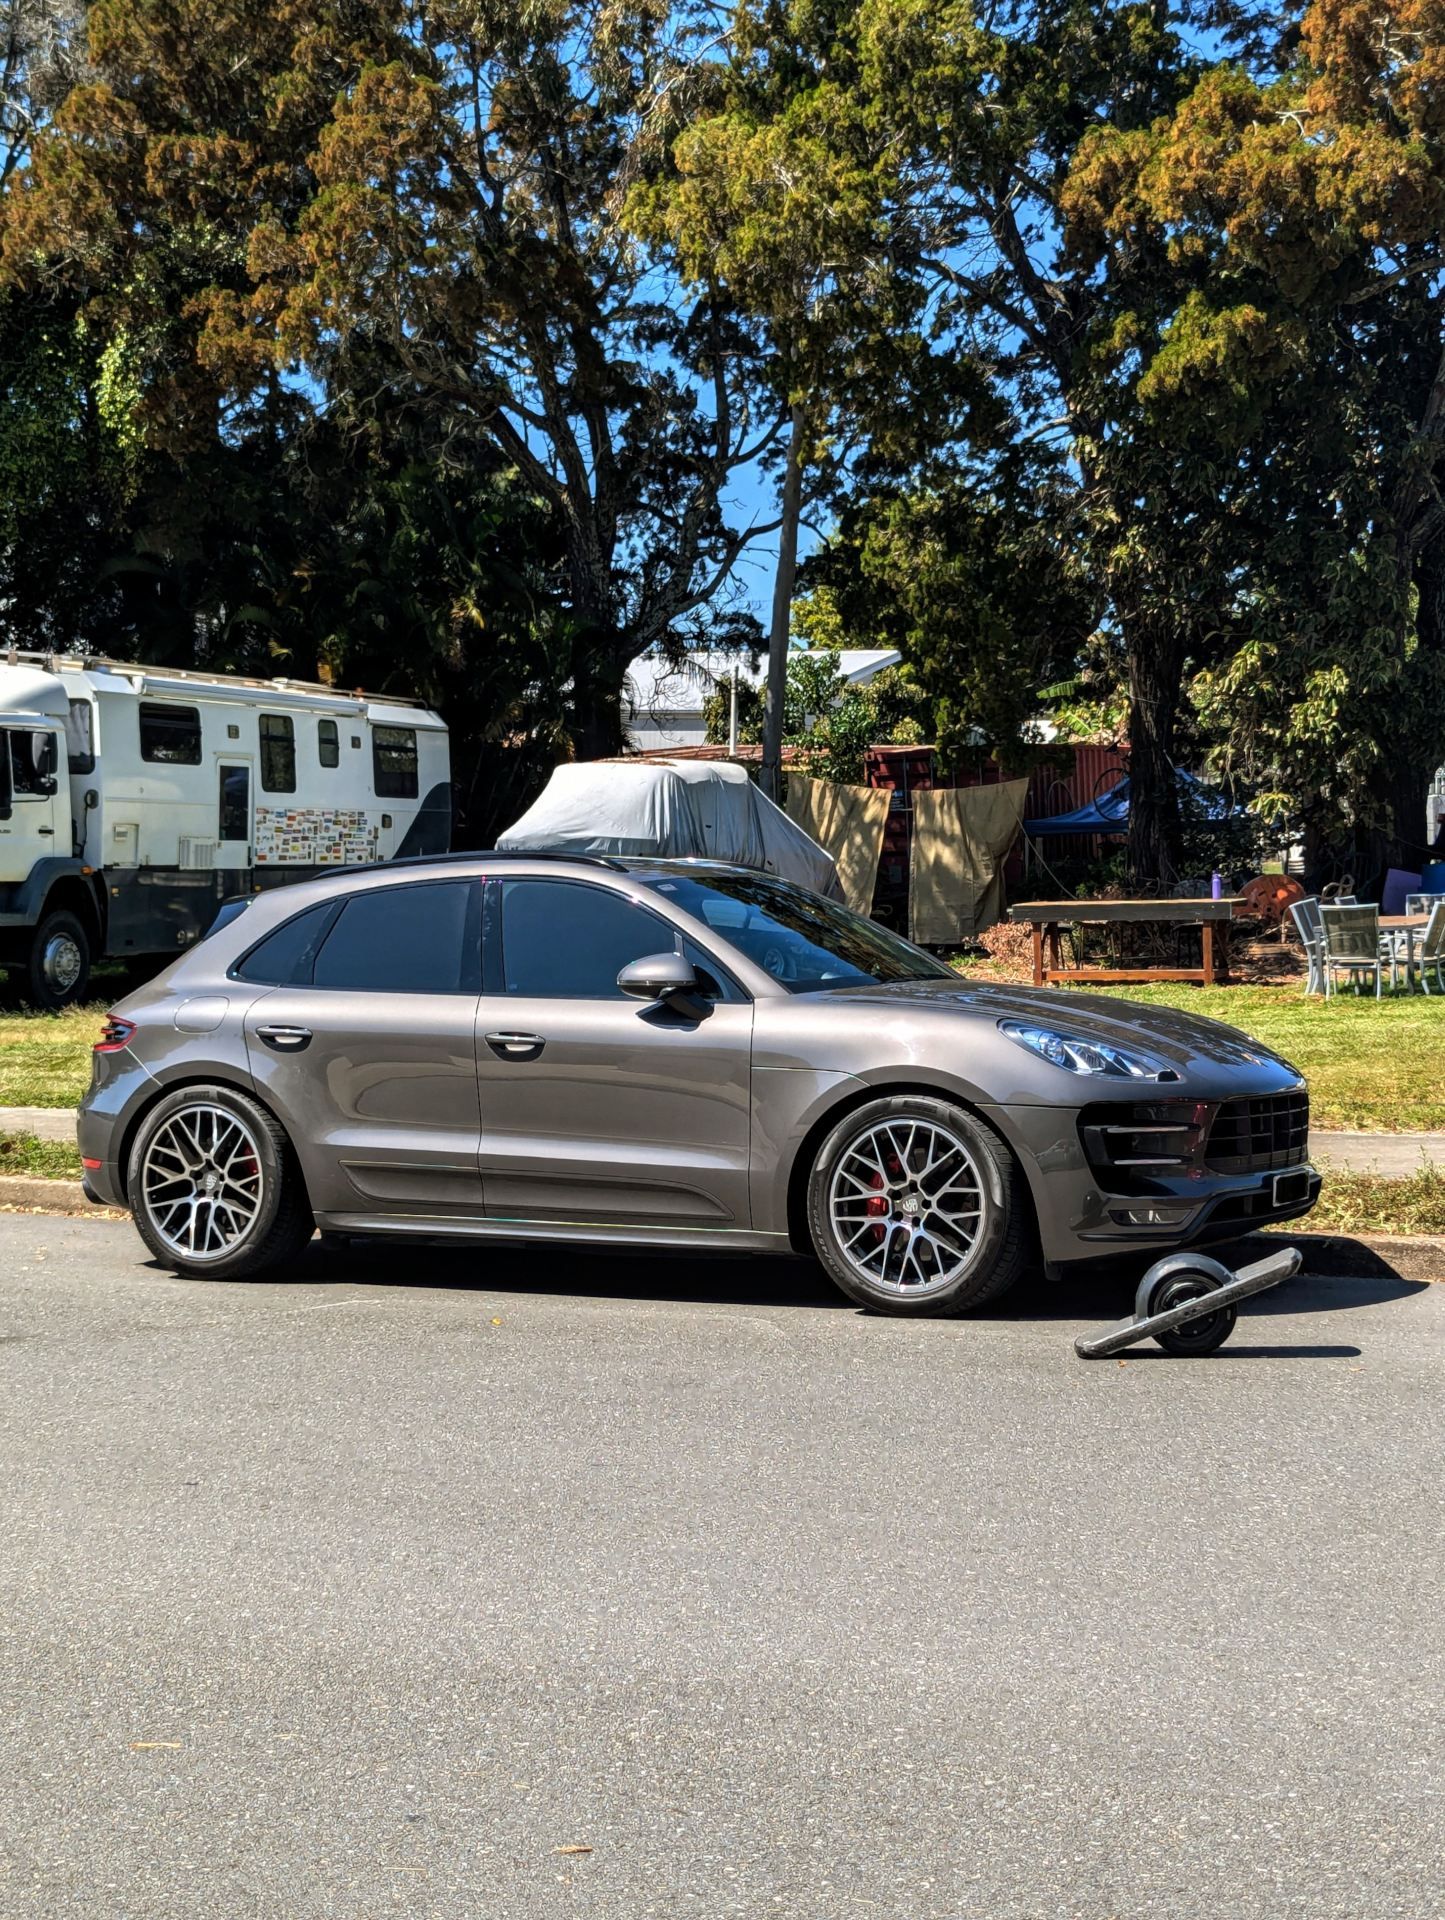 The perfect ICE and EV combo!
The pint now lives in the boot of my Porsche, and I often use it for last-mile transport. It’s super convenient, and means I can park wherever I want and ride the rest of the way in minutes, and carry it around with me too.
Despite everything I said at the start of the article about Onewheels being lower quality than VESC, my Pint has never let me down and I’ve now ridden 400km on it.
I’m still planning to upgrade to a VESC board built by VOW systems, but for now the pint is great fun for very little money.
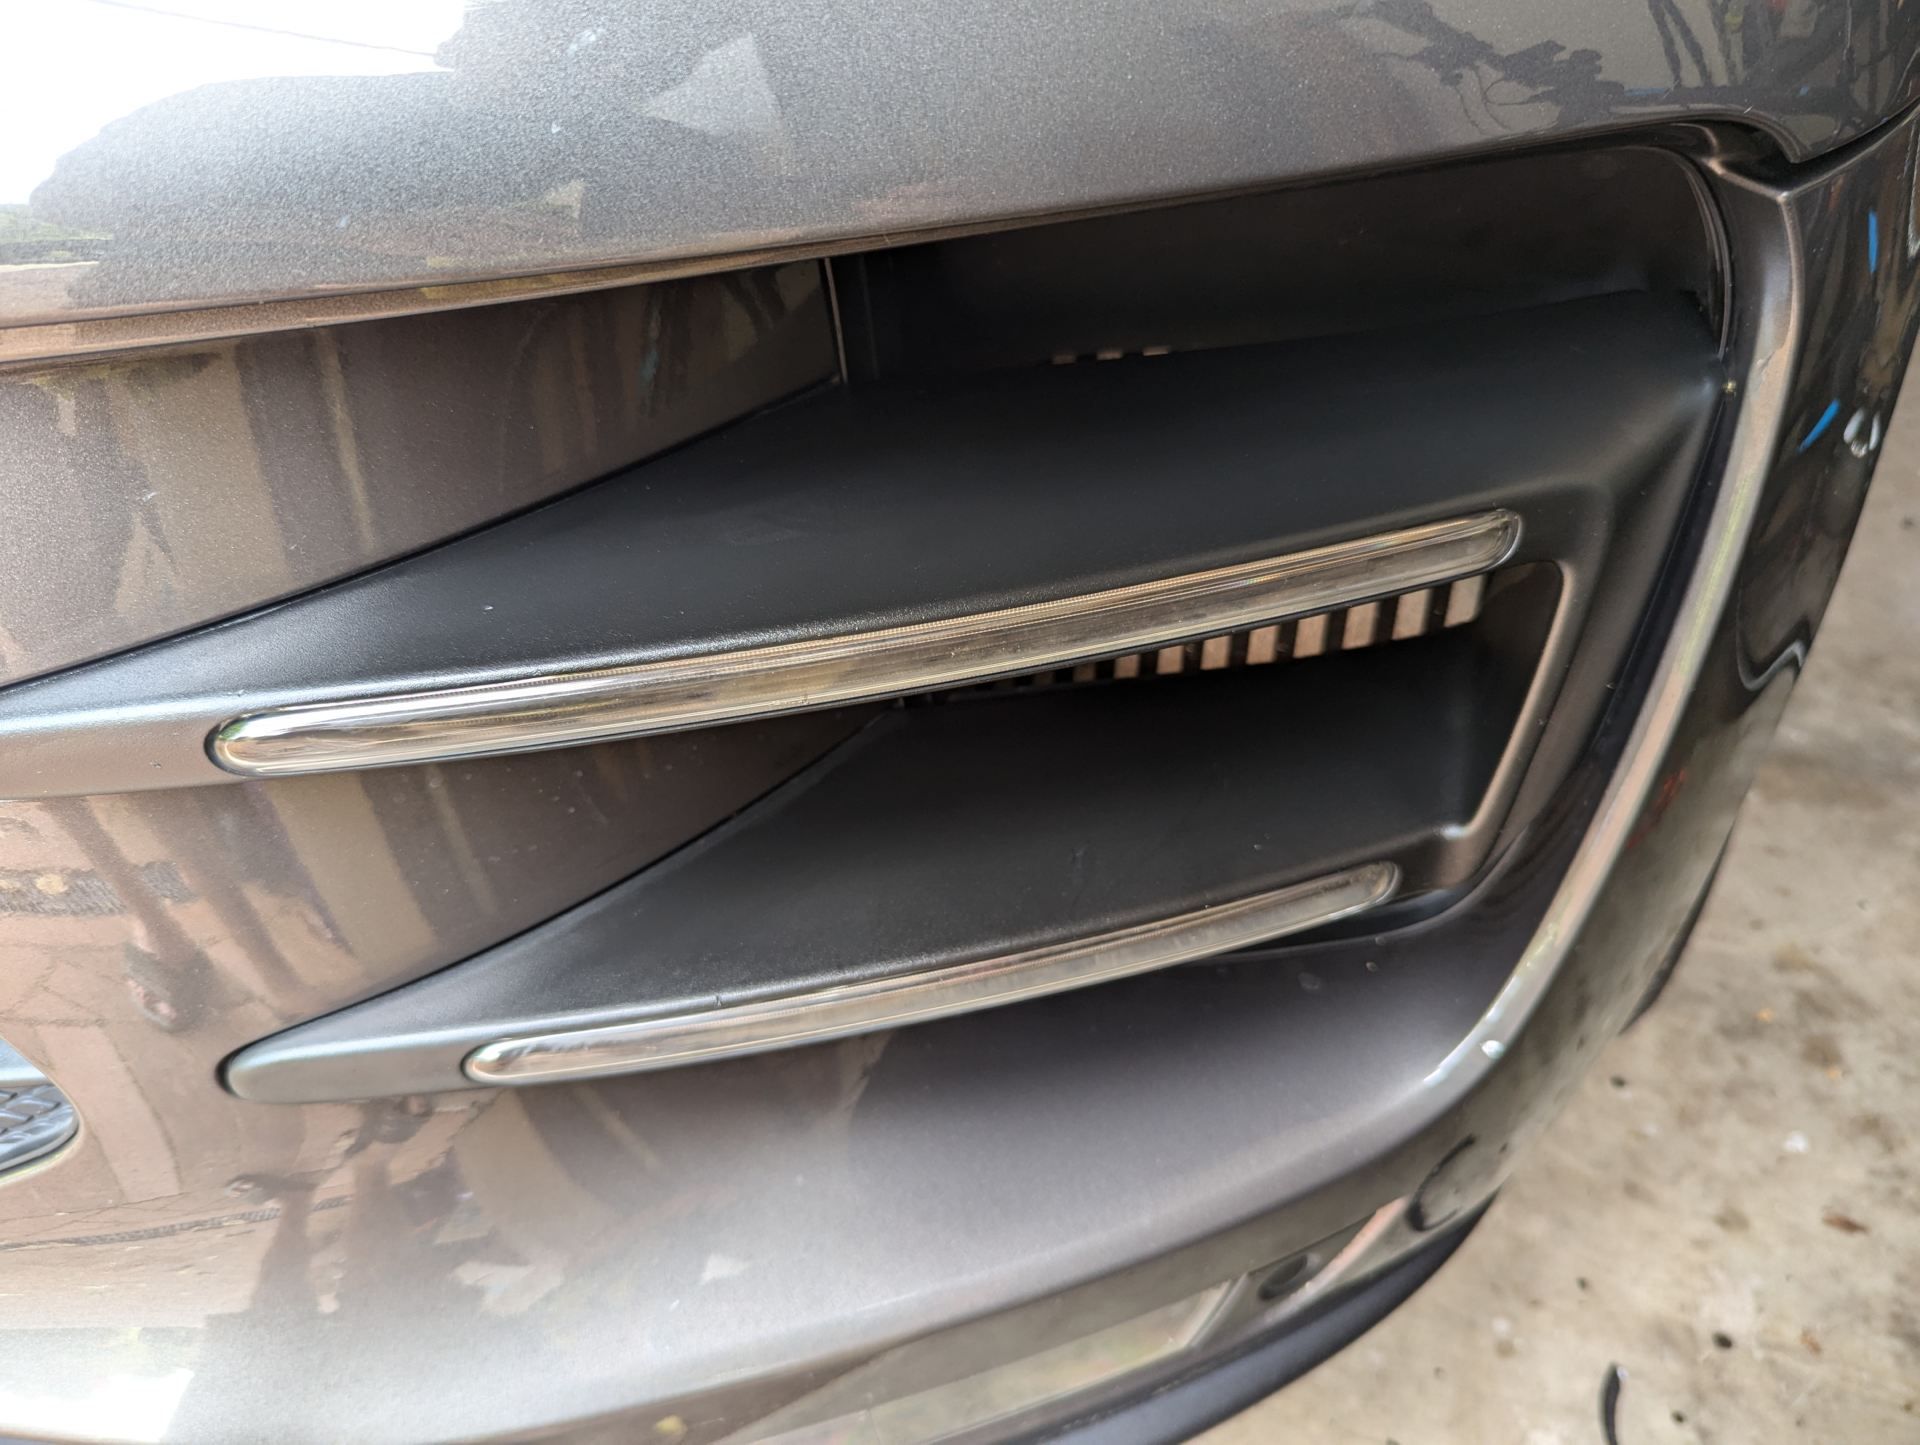
Fixing discolouration of black plastics on Porsche Macan bumper
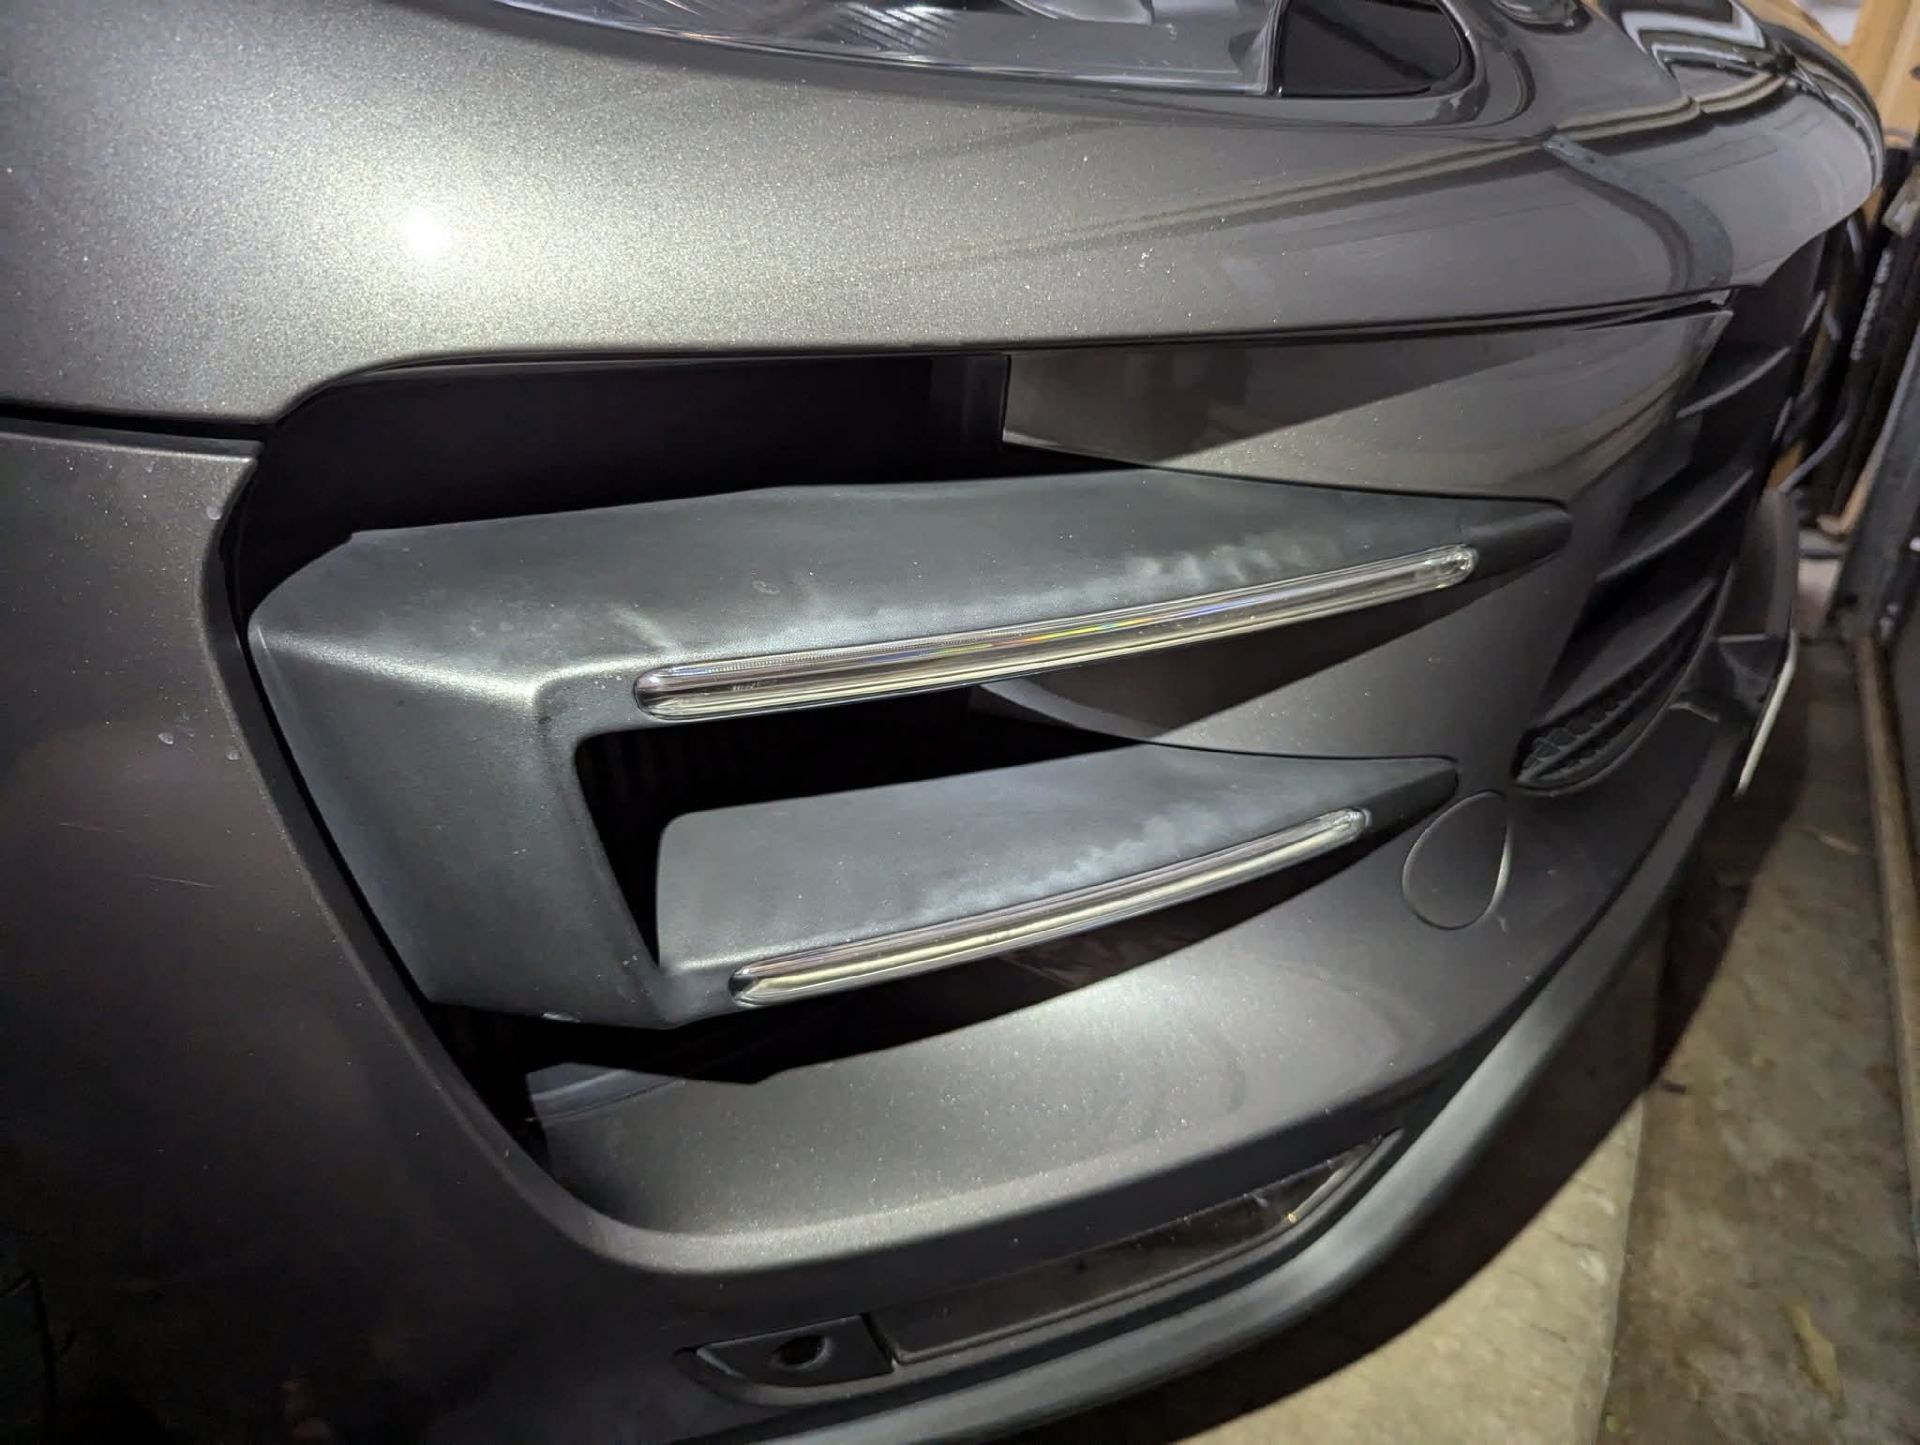
My Macan’s front air intakes had some discolouration of the plastics. I presume due to UV exposure or car wash chemicals used by the previous owner.
In the past I have used Gyeon Trim on my BMW Z4 to great effect to restore the black plastics around the windows. It really freshens up the car and makes it look much newer.
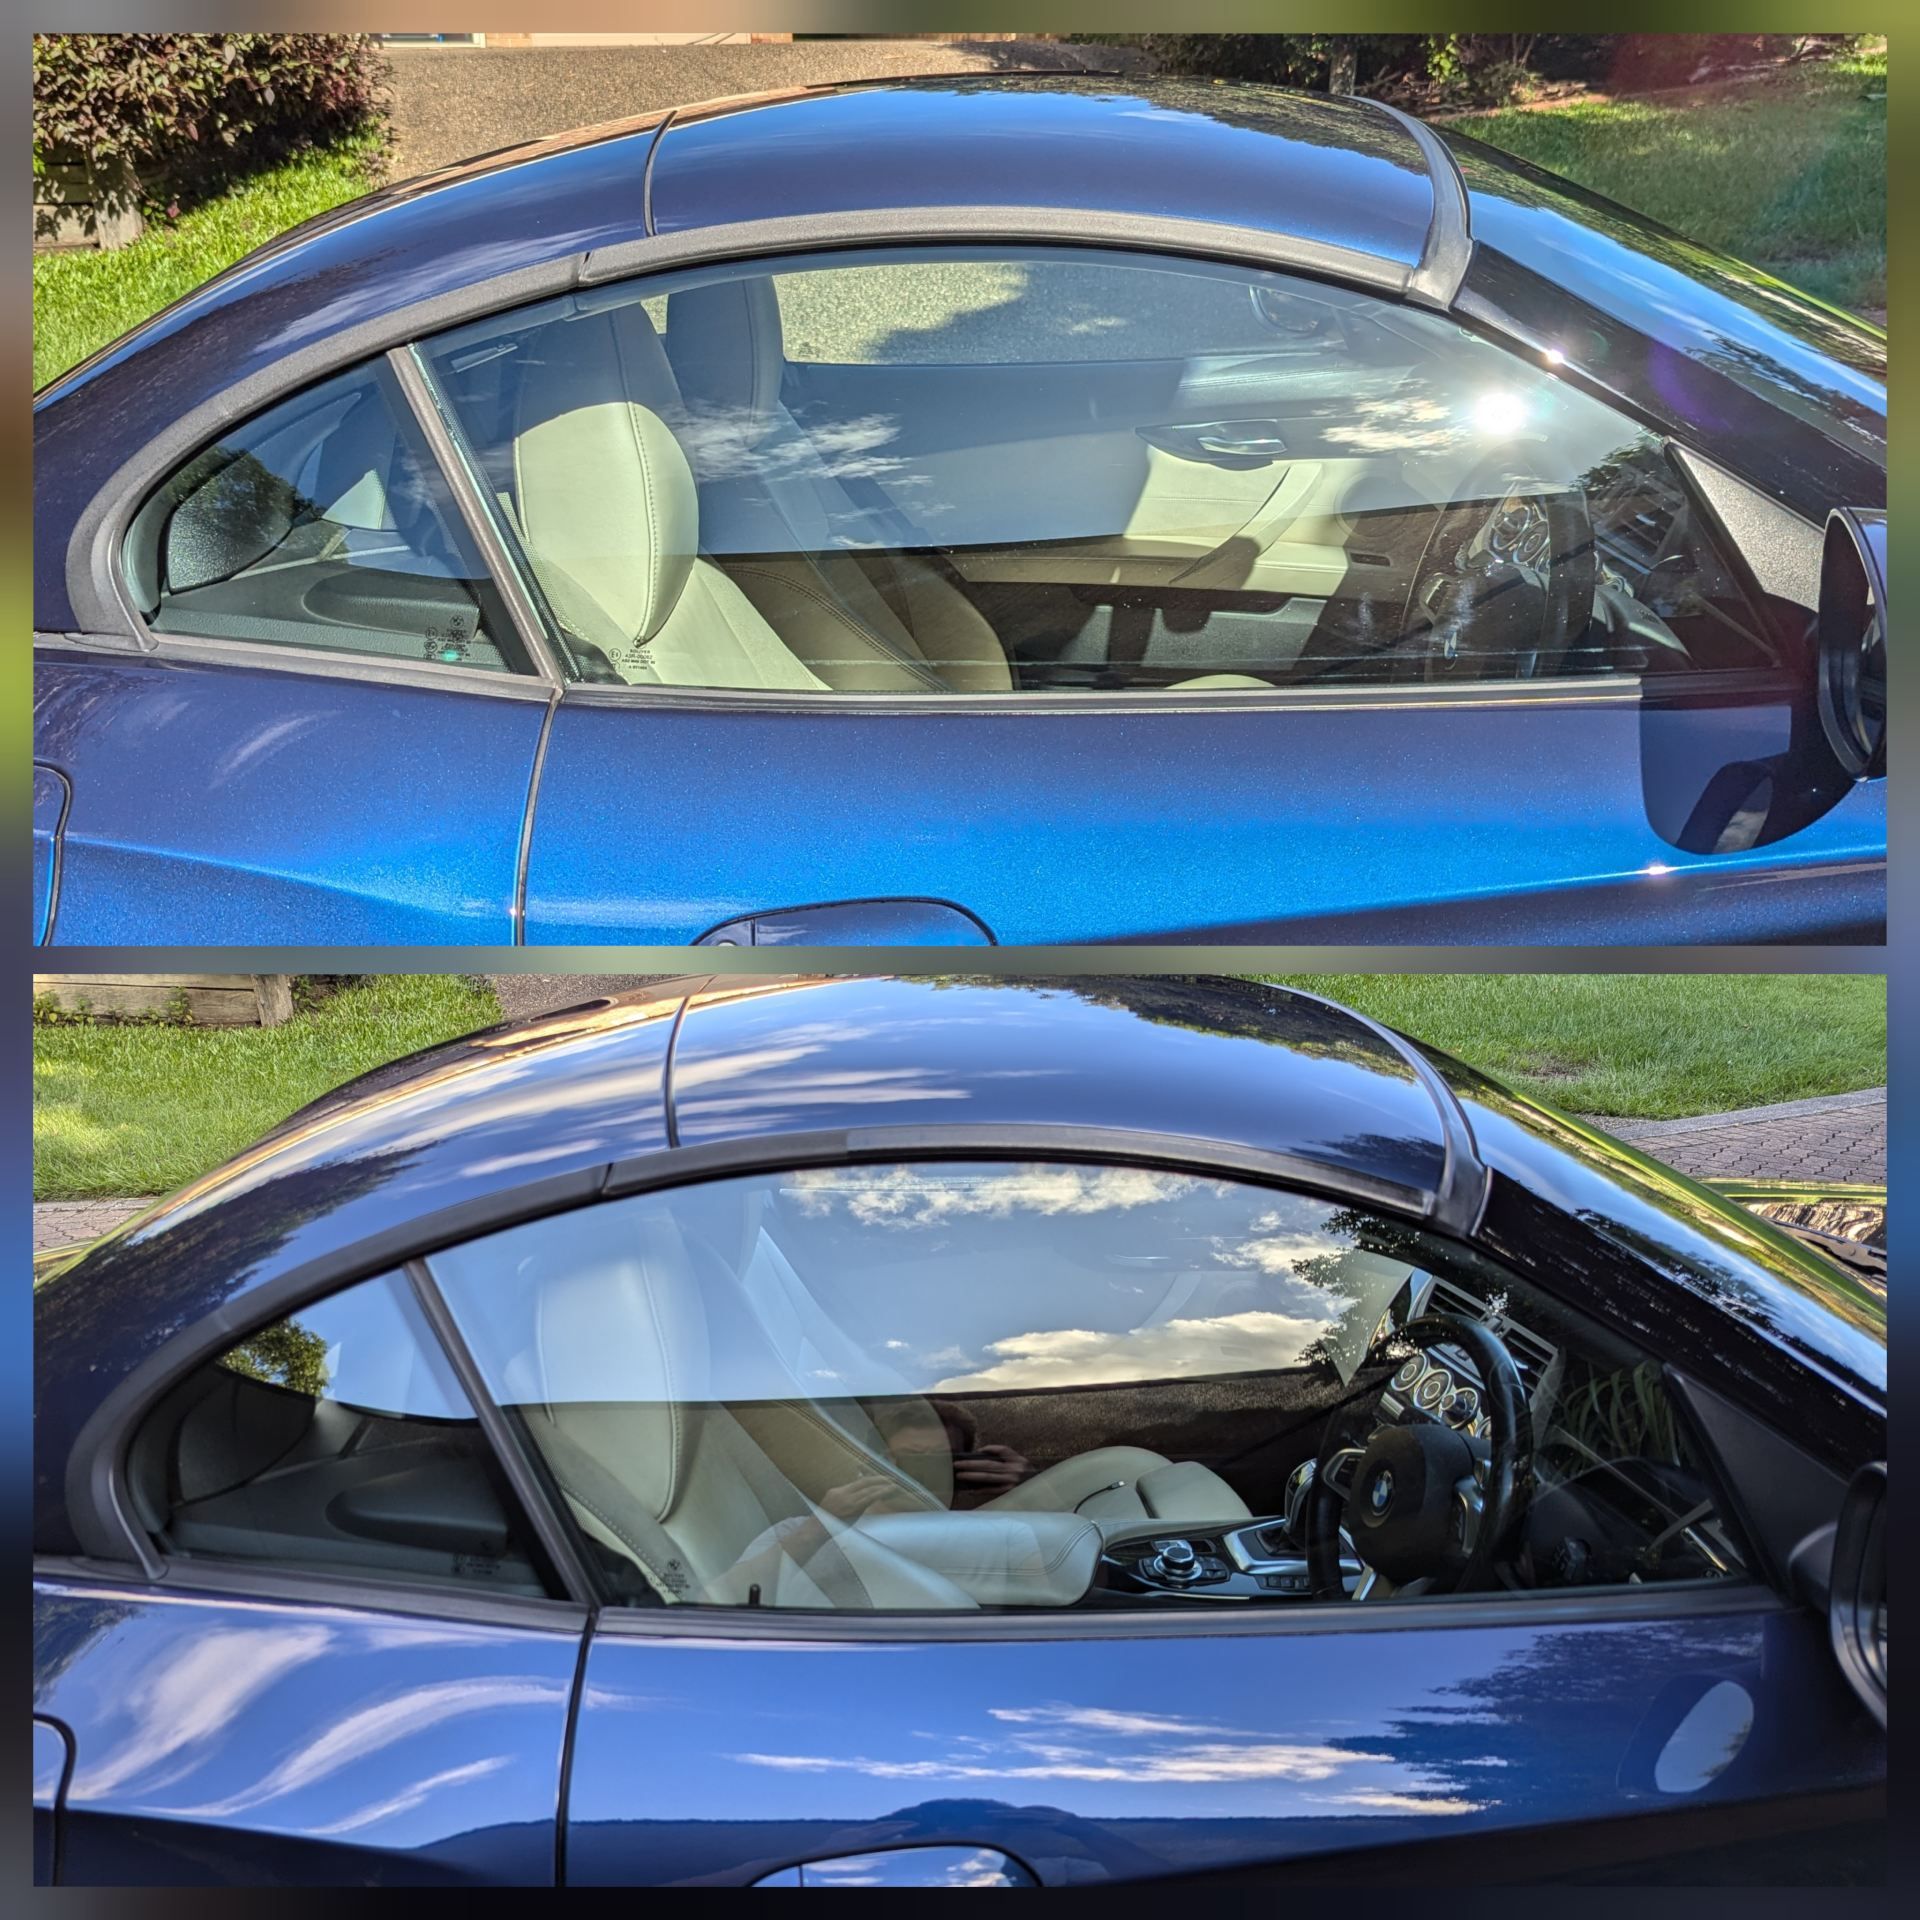 Before and after.
I tried the same on my Macan but it didn’t make any difference.
 After some internet research, I found many people suggesting that a heat gun would restore the colour by bringing the oils in the plastic back to the surface.
I tried this, and at first it seemed to be working, but as the plastic cooled … oh dear, it made it much worse.

I did some more research and found Solution Finish trim restorer. I bought some from America via Amazon.
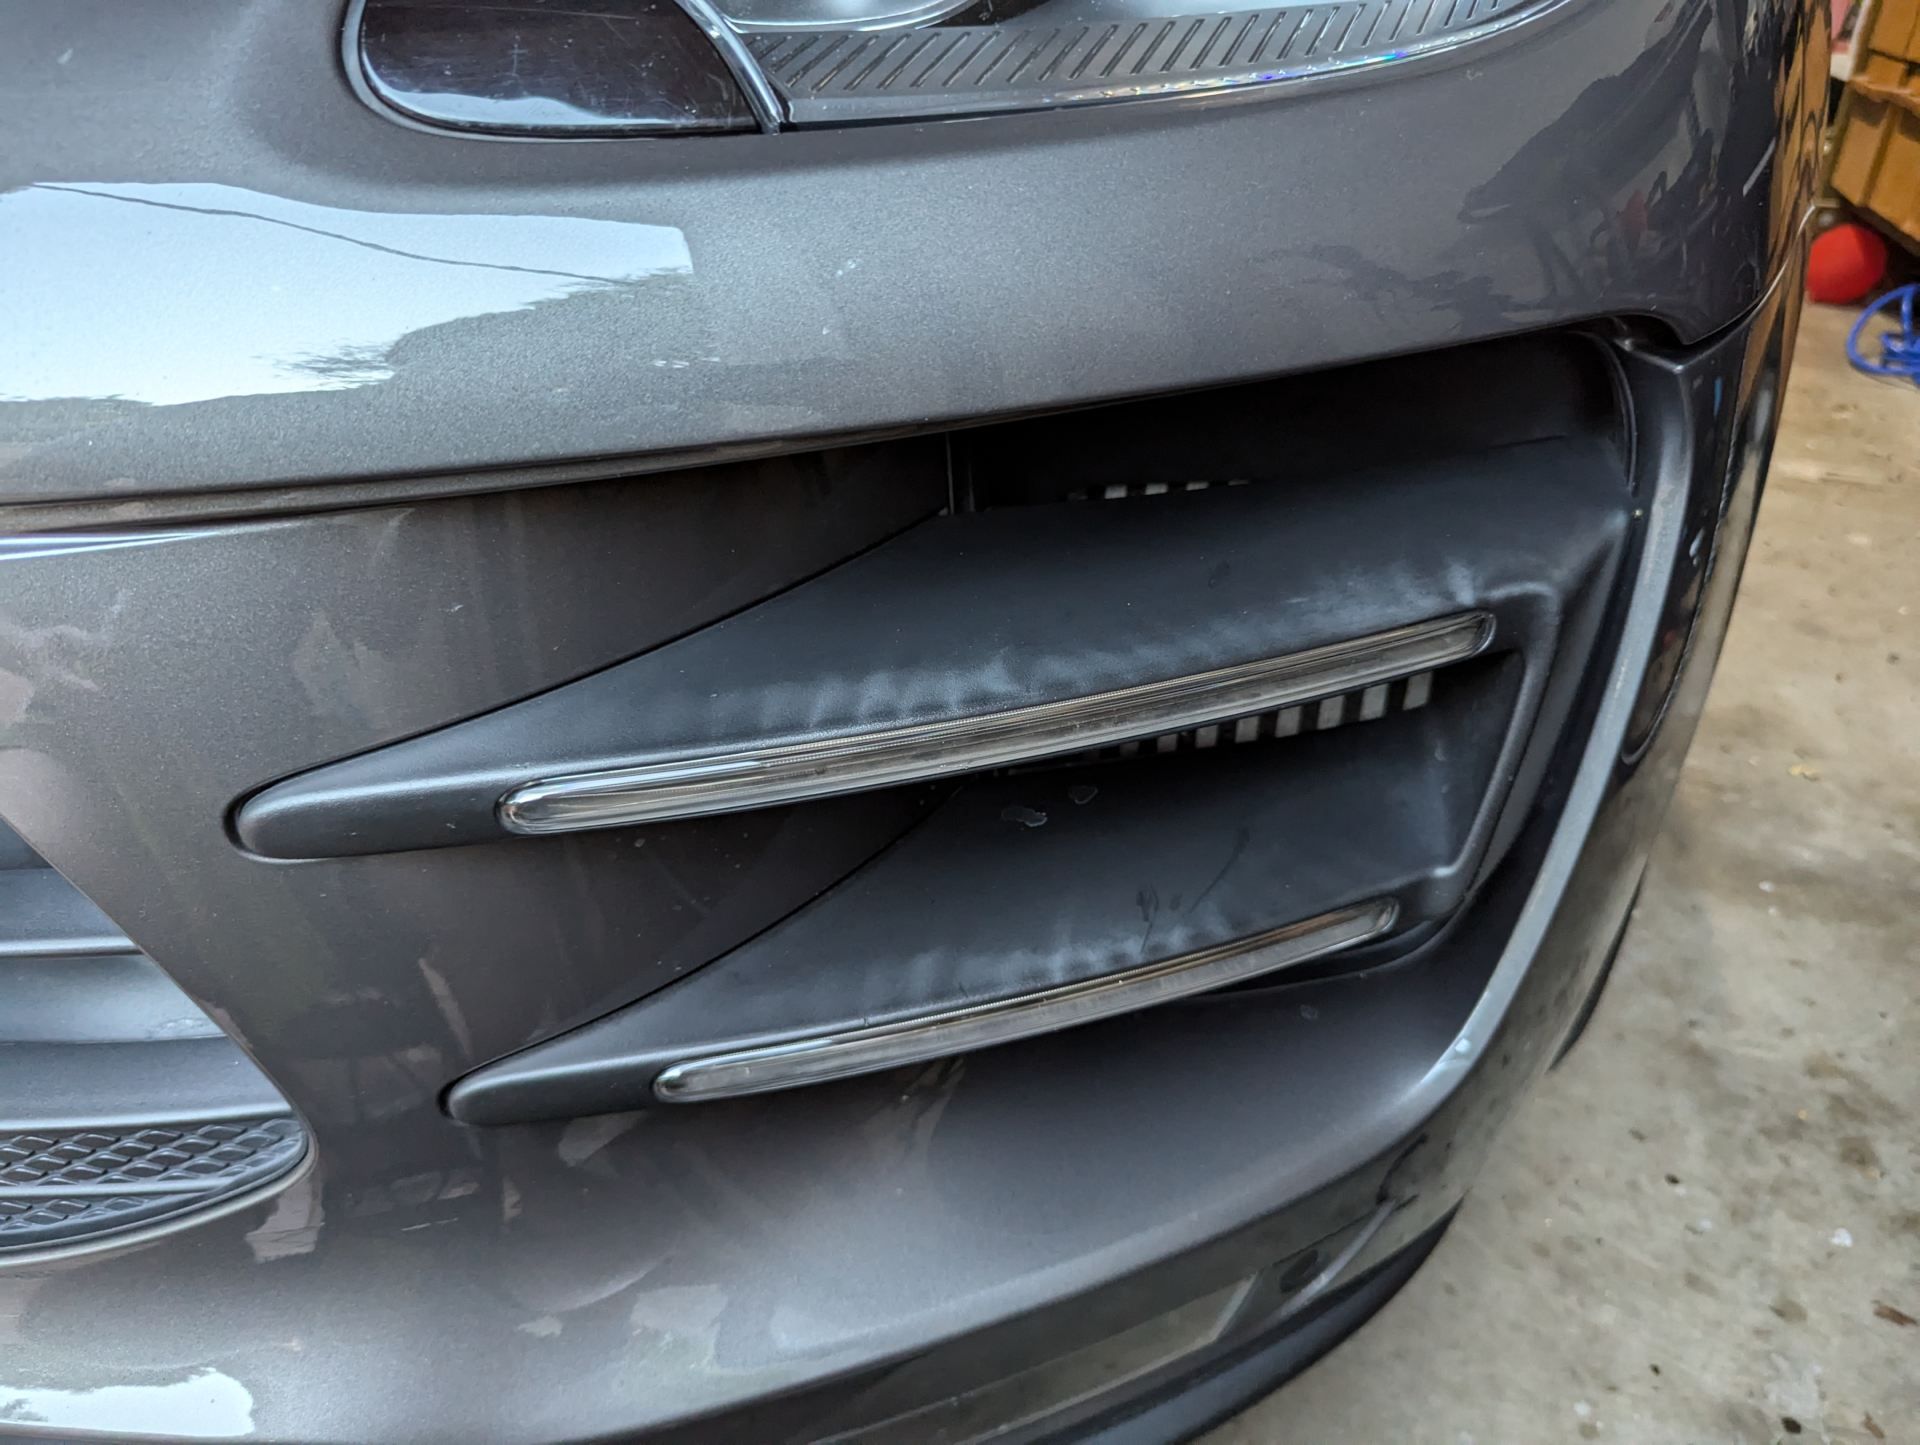
I applied it but it had little effect. Like Gyeon Trim, it made the surrounding area darker but not the grey itself.
The difference with Solution Finish is that the product itself is black, and is very thick and sticky to apply.
I didn’t have anything to lose so I went against the instructions that say to wipe it off after a few minutes, and instead applied it liberally with an applicator and left it on for 48 hours.
I actually forgot I had applied it and drove the car for a few hours one day. There was a little dust caught in the wet liquid but it stayed in place - it’s quite viscous.
I wiped it off after 48 hours and was amazed to see the discolouration completely gone.
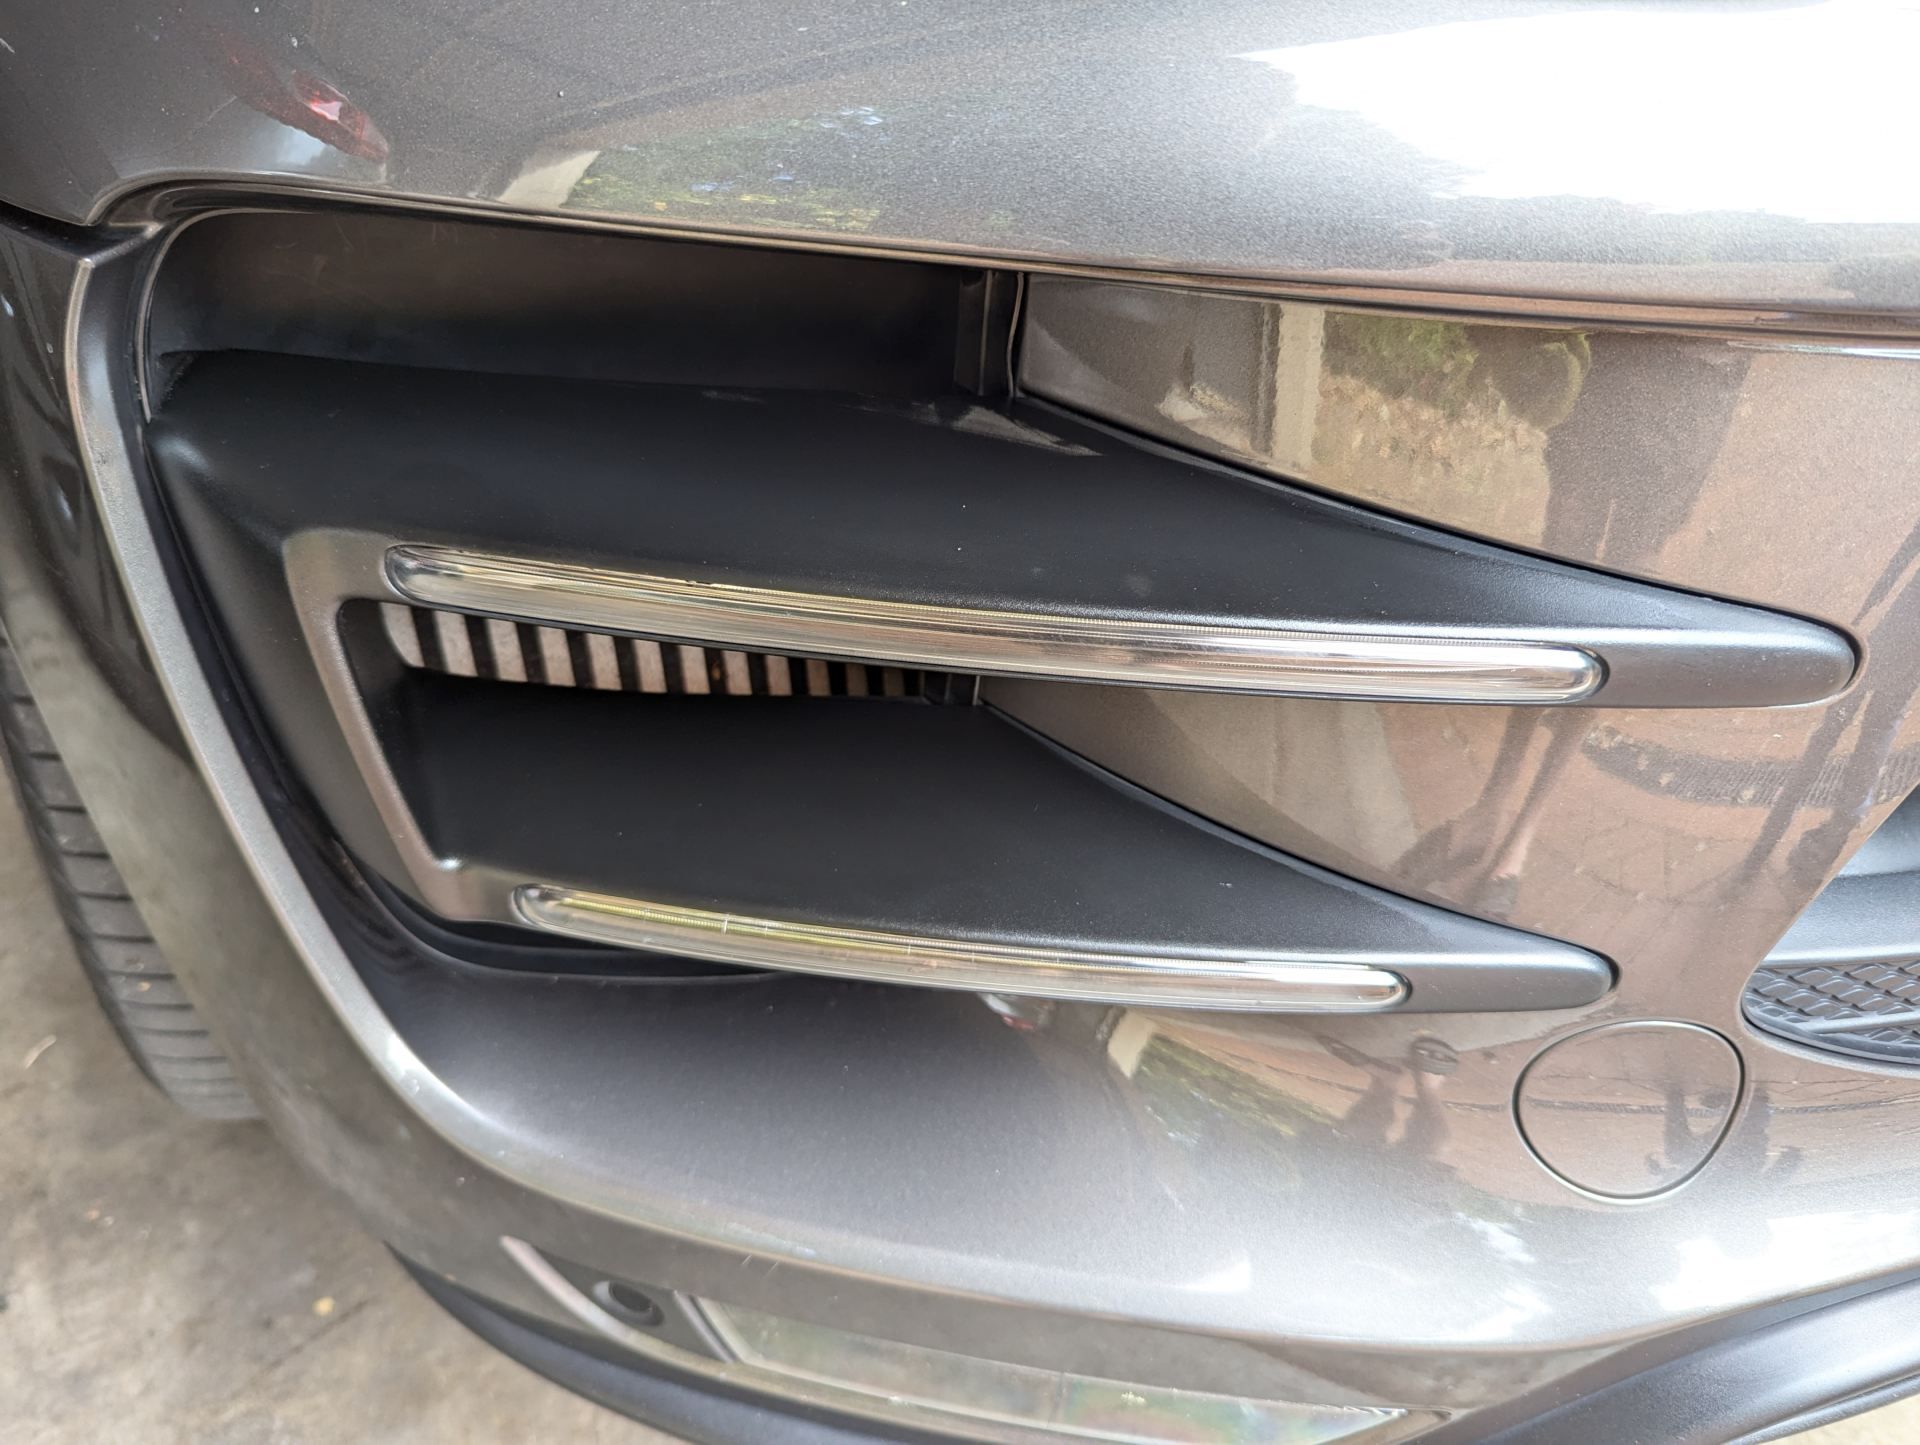 I missed a spot at the back, but will re apply to cover that too.
The plastics feel completely dry to the touch and wiping with a cloth there’s no colour transfer - it seems like it’s been absorbed by the plastic.
I’m very pleased and highly recommend Solution Finish trim restorer.
Branch office

Porsche Macan Turbo spark plugs and bore scoring
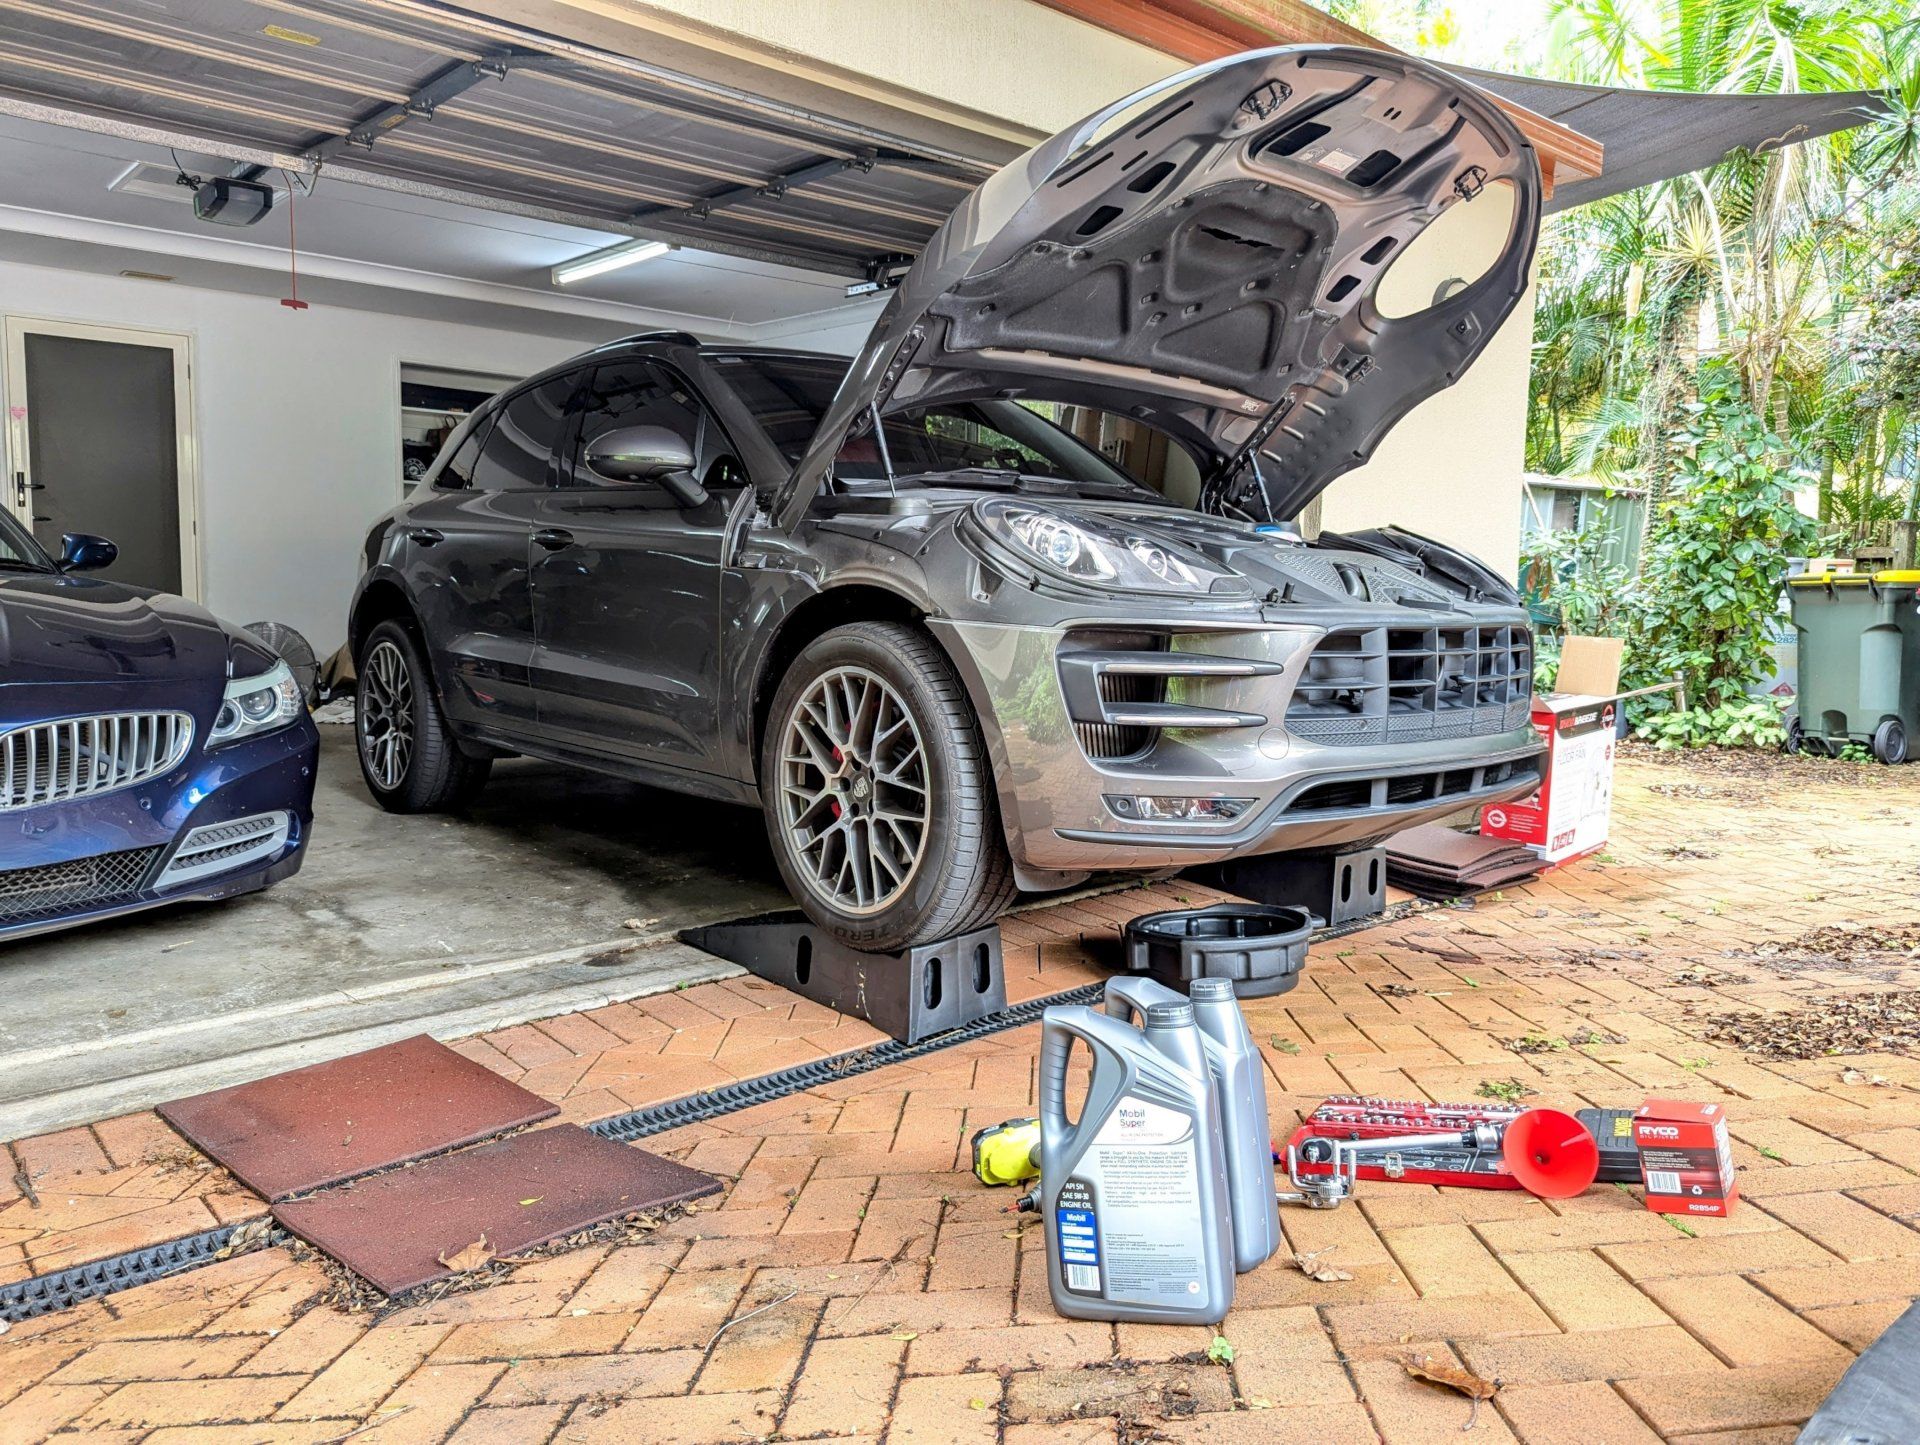
When I bought my 2015 Macan Turbo, it had 87,000km. It’s now hit 122,000km, and since I’m doing oil changes every 7500km it was time for another.
This time I decided not to use Liqui Moly engine flush. It’s advised to flush the engine with clean oil after using it, to ensure you remove all of the detergents, so they don’t continue breaking down the new oil.
I didn’t want to do this, and since it’s been running well, I just did an oil change, as well as using some Liqui-Moly additives which you can read more about here.
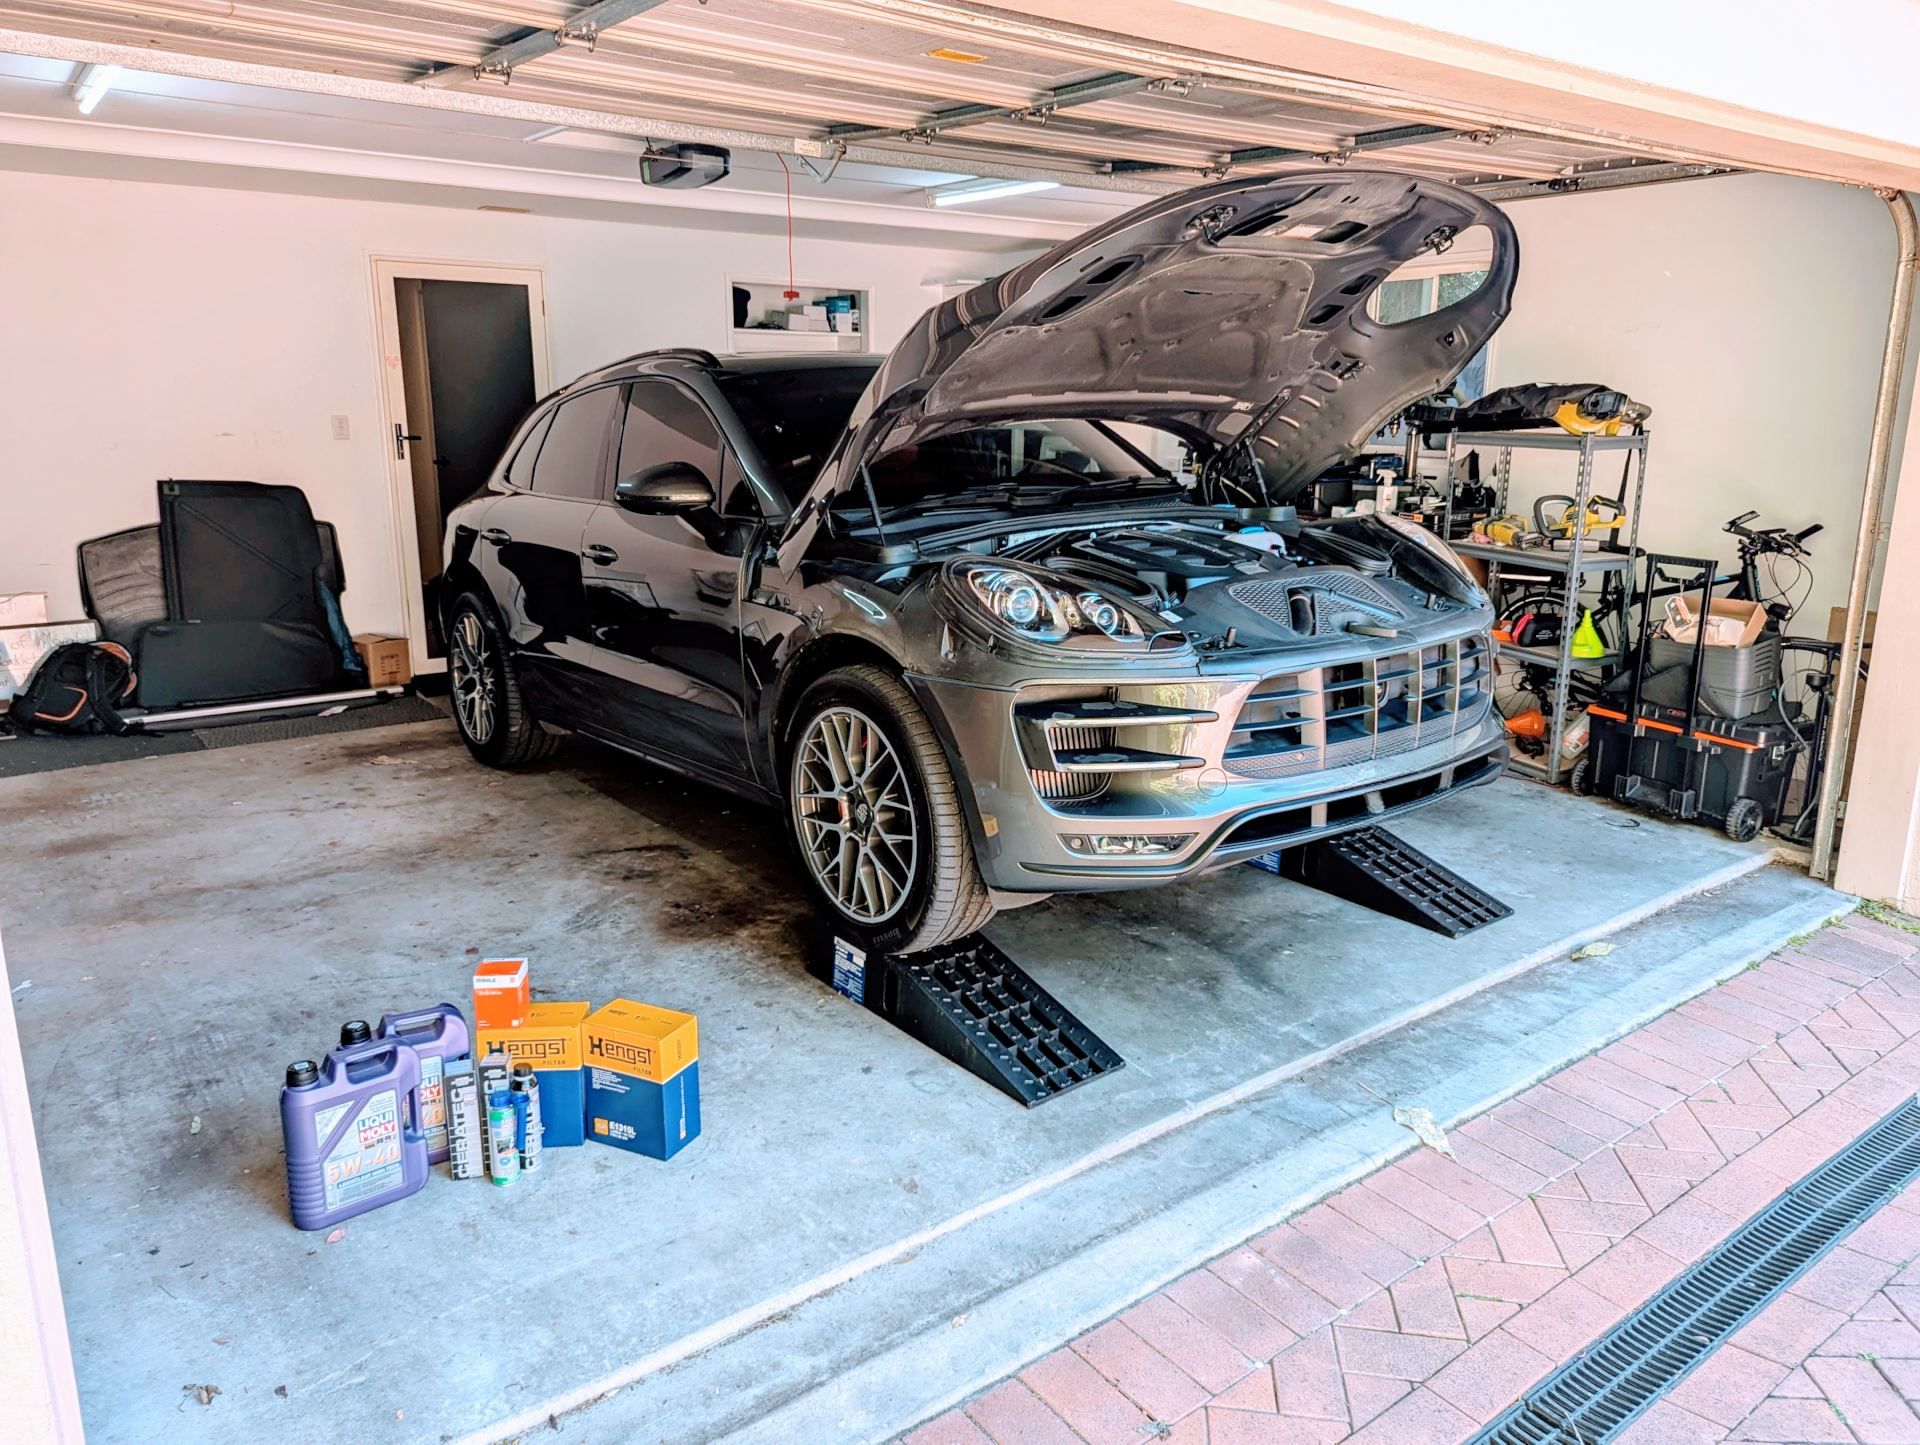
I’m getting pretty good at this now, and had the job done in about an hour and a half.
I also installed new air filters, as I didn’t know how old they were. This took only a few minutes.
I checked the service book and it recommends changing the spark plugs every 45,000km. They were last done at 82,000km, so it was time to do them too.
I’ve not changed spark plugs before, but thought I’d give it a go. I ordered a spark plug socket kit from Amazon for $30, and a set of six Bosch Double Platinum spark plugs from run auto for $125.
I find Pelican parts do great guides for jobs like this.
Here are torques for my 2015 Turbo, likely will be the same for all V6s:
spark plug, new - 25 Nm (tolerance +1.5 Nm), don’t use lubricant
spark plug, re-used - 31.5 Nm (tolerance +1.5 Nm), don’t use lubricant
fastening screw for ignition coil - 10Nm
fastening screw for coolant reservoir - 5 Nm
Plug electrode gap - 0.8mm +/-0.05mm
I got started the following weekend. The job went well, and took me about 3 hours. I was very careful removing and reinstalling the plugs to avoid damaging the aluminium threads.
The front four plugs are very easy to do. The rear two are harder as they’re obstructed. A universal joint and some extensions helps a lot.
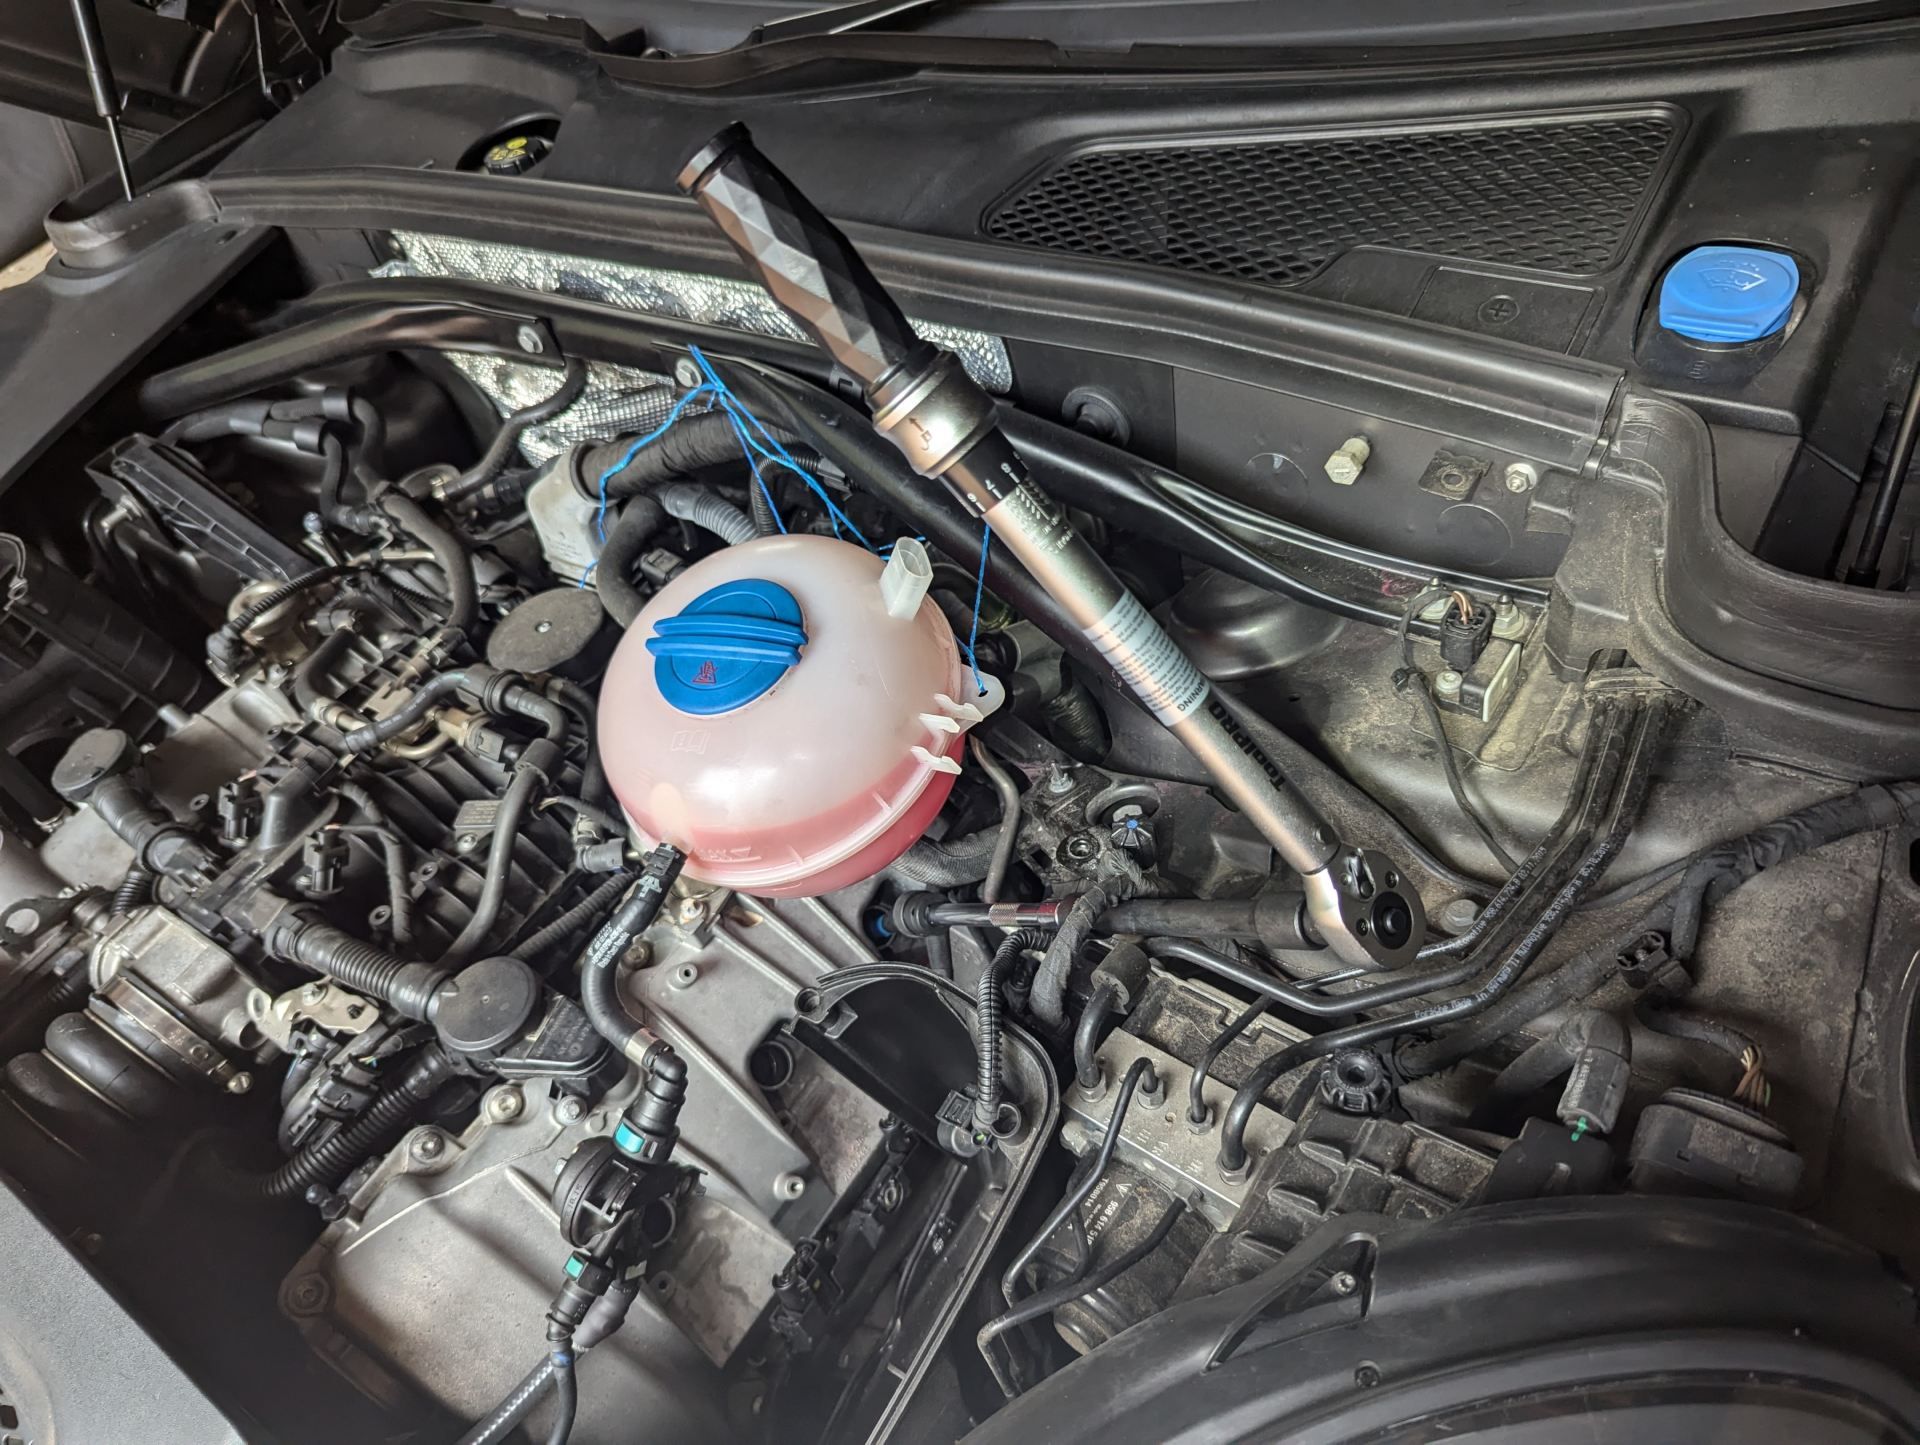
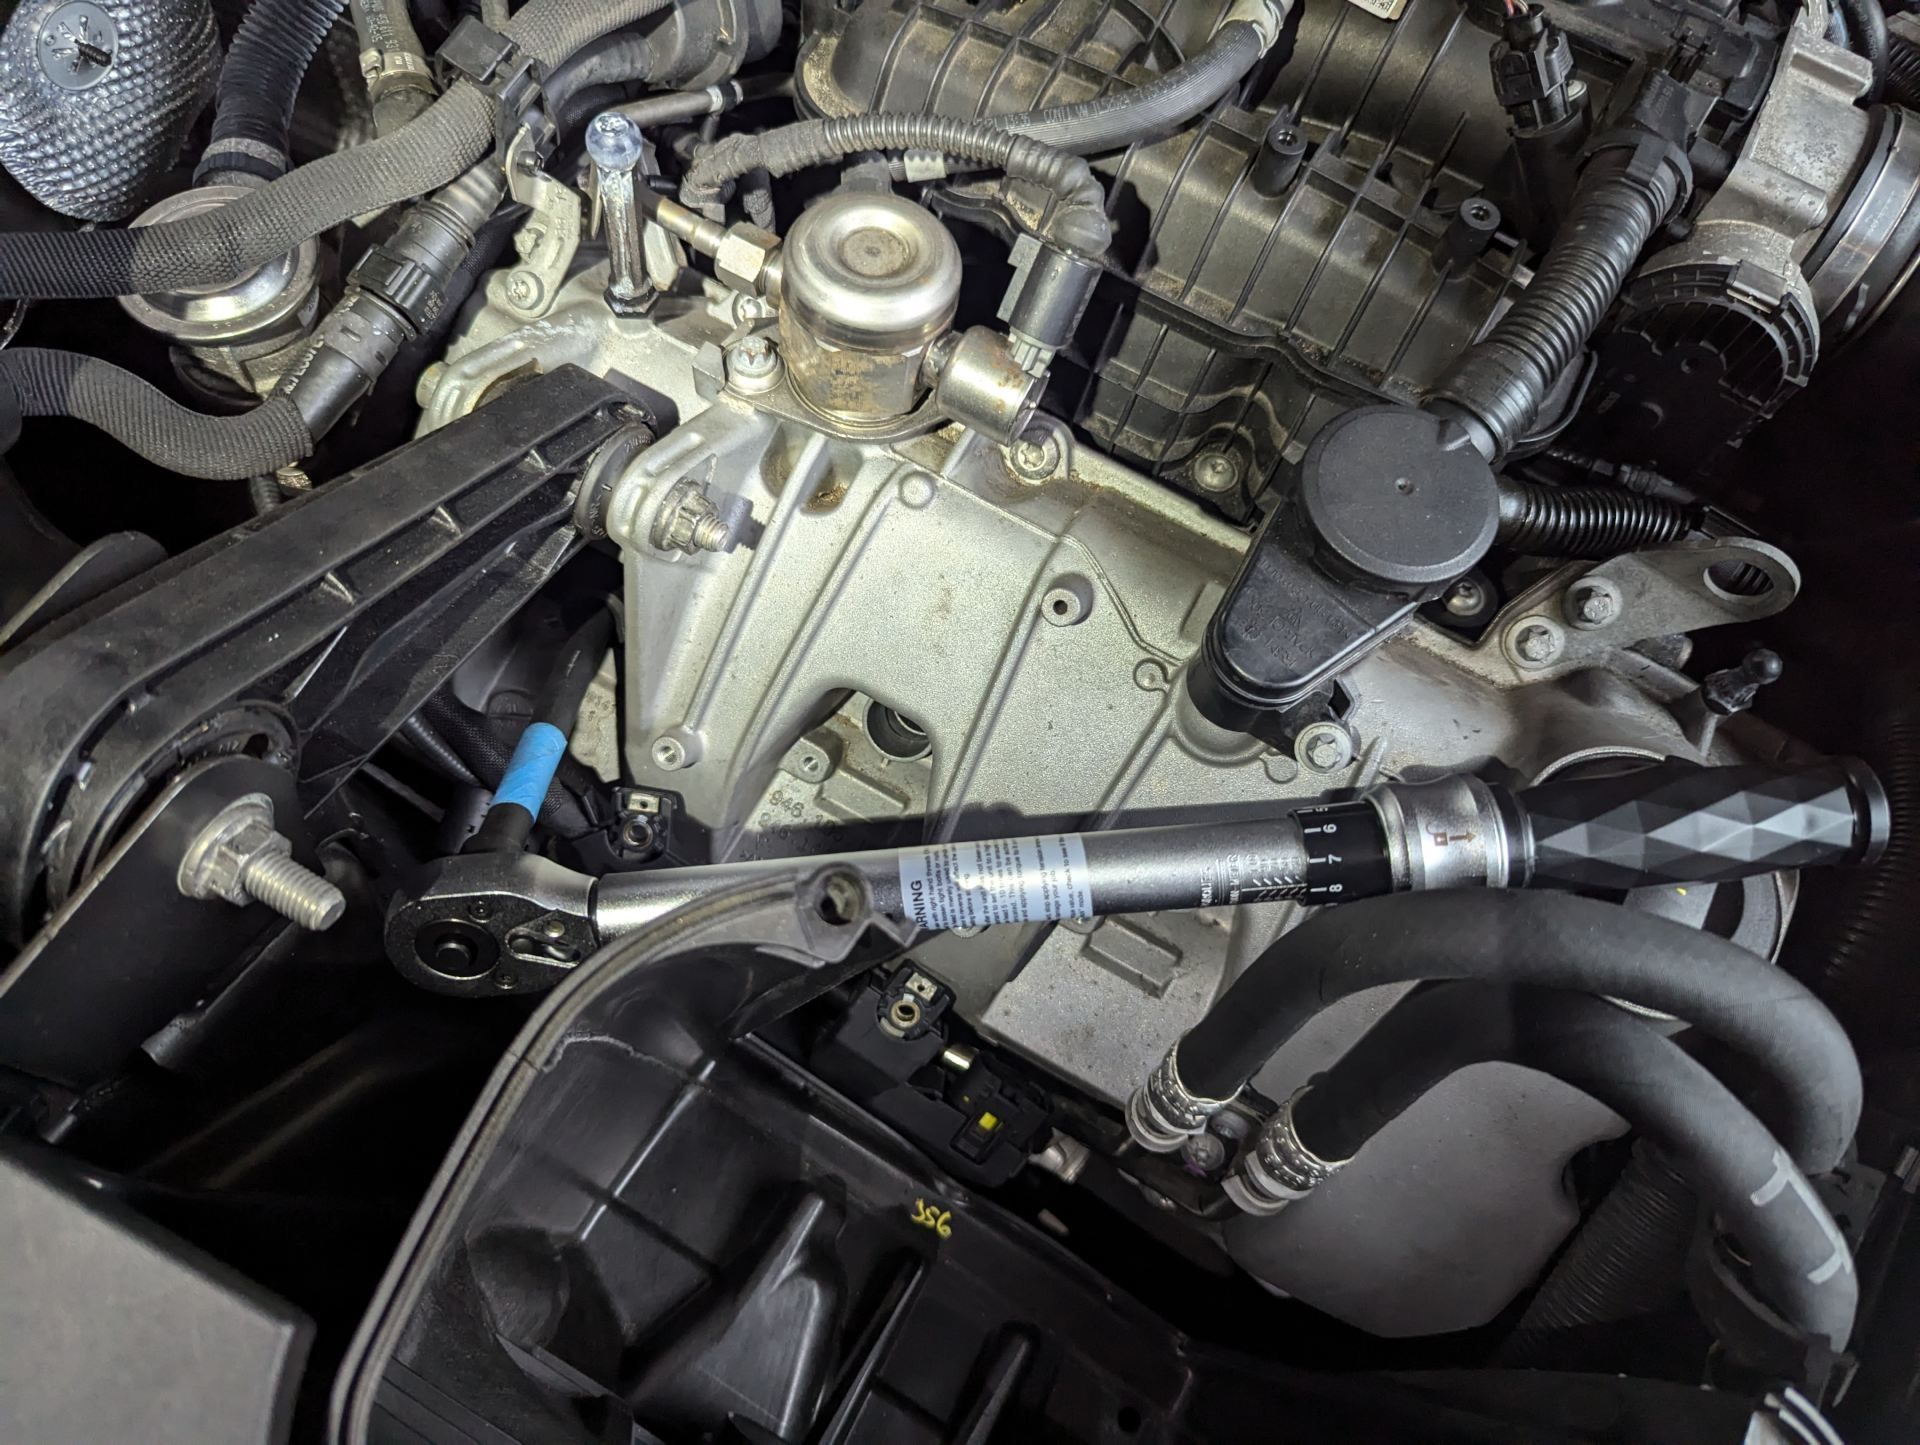
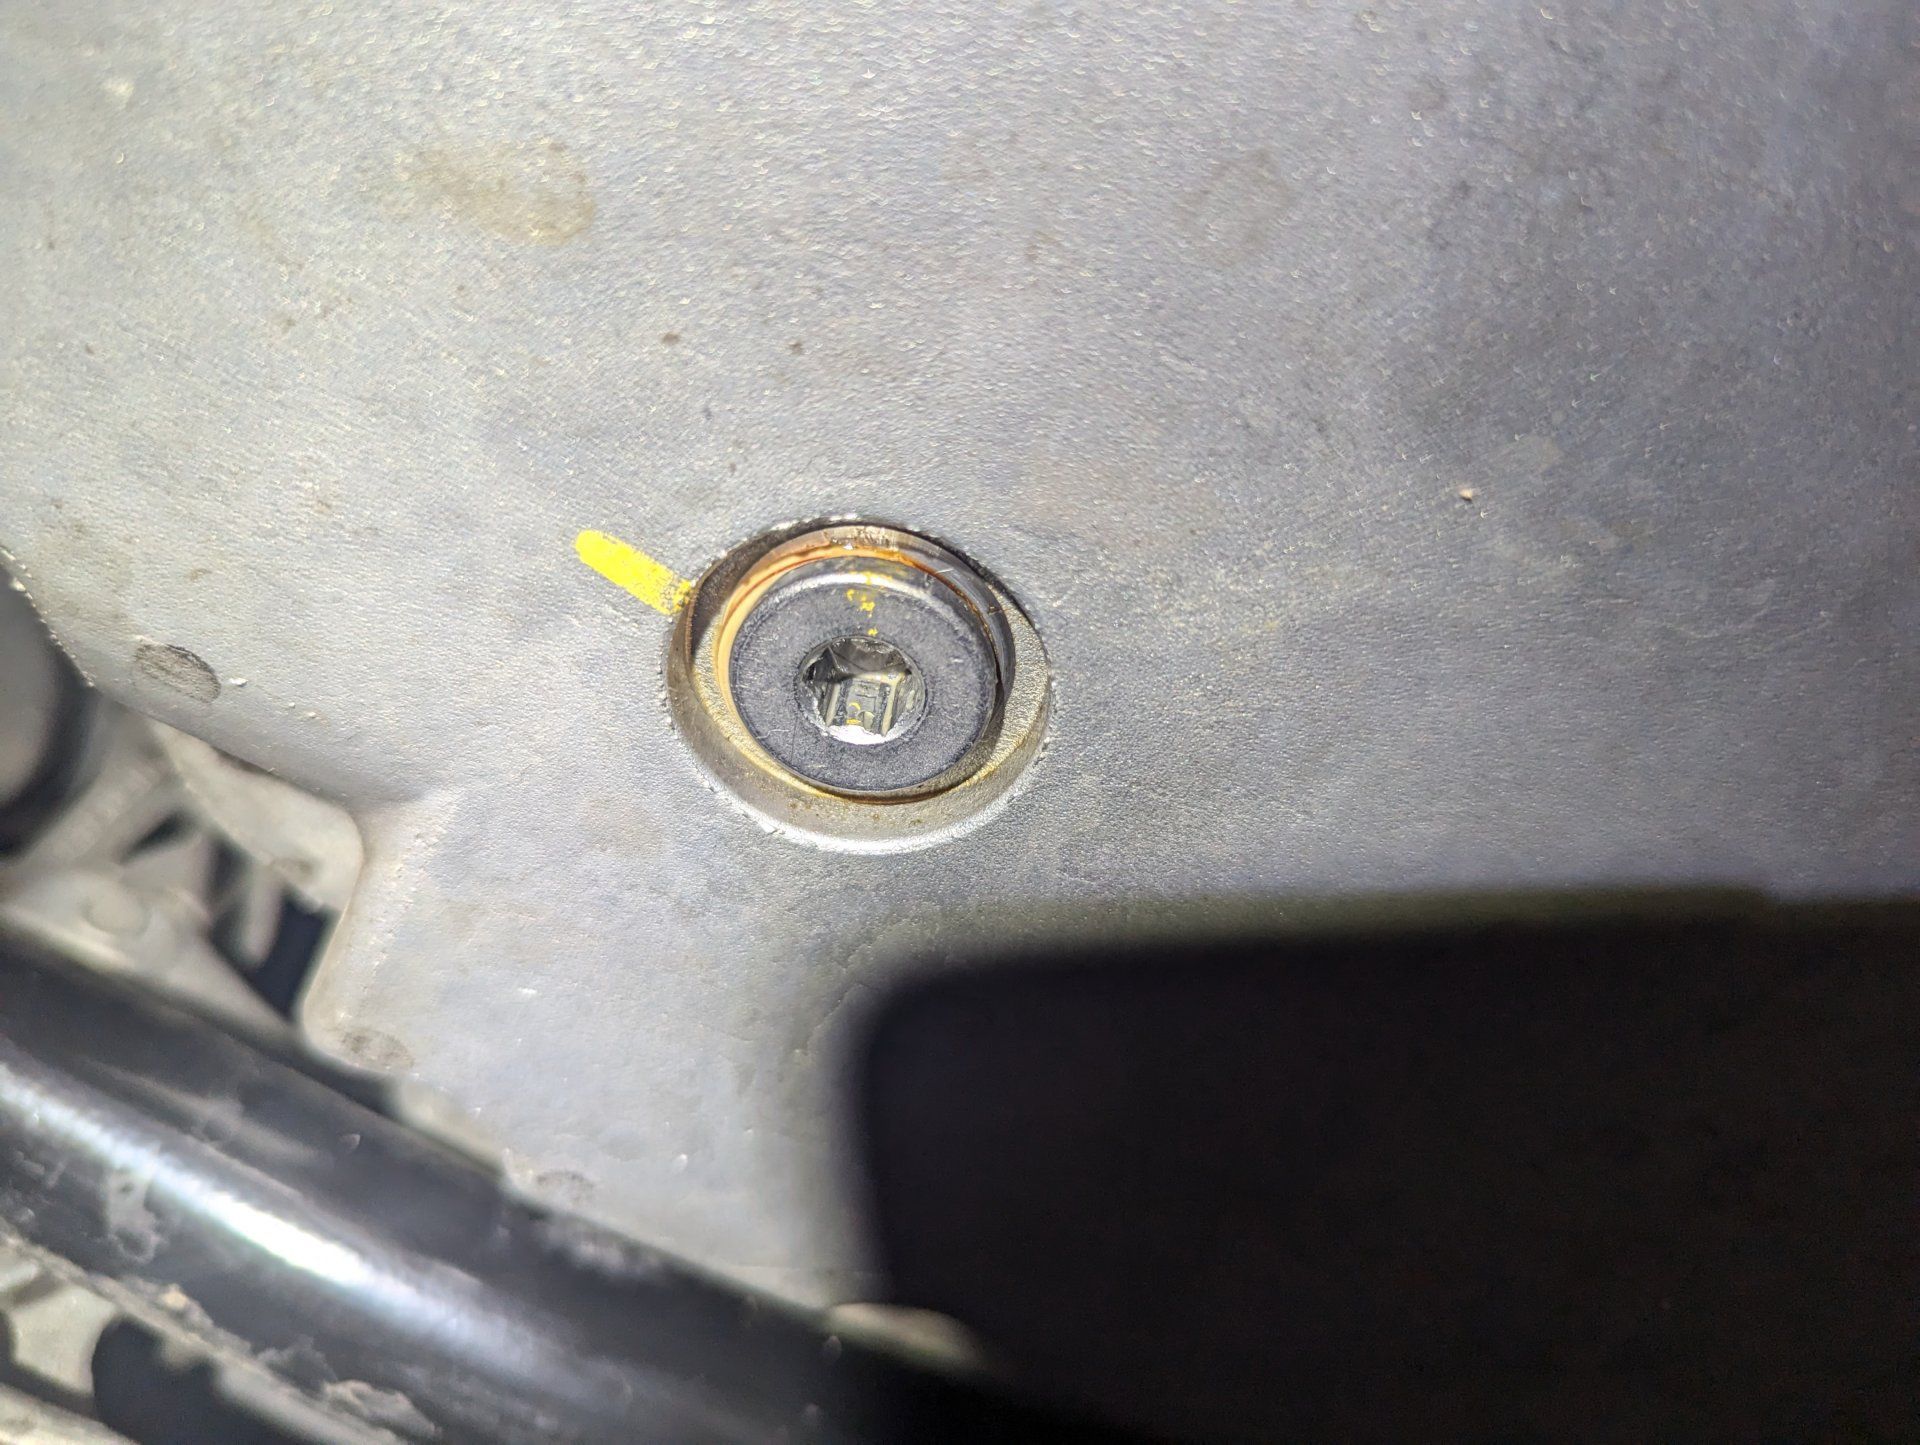
A trick I read about on a forum is to put some tape around the extension bar to show where the ‘fully in’ position is.
This is helpful because the plug sometimes gets stuck when inserting, and it’s hard to know whether it’s bottomed out, or you just need to back out a few turns and try again to get past the rough spot.
If the plug gets jammed and you torque it down, it could strip the thread, which could be catastrophic. The blue tape gave me confidence, but I would always back out and rethread anytime it stopped, even when bottoming out, just to be sure.
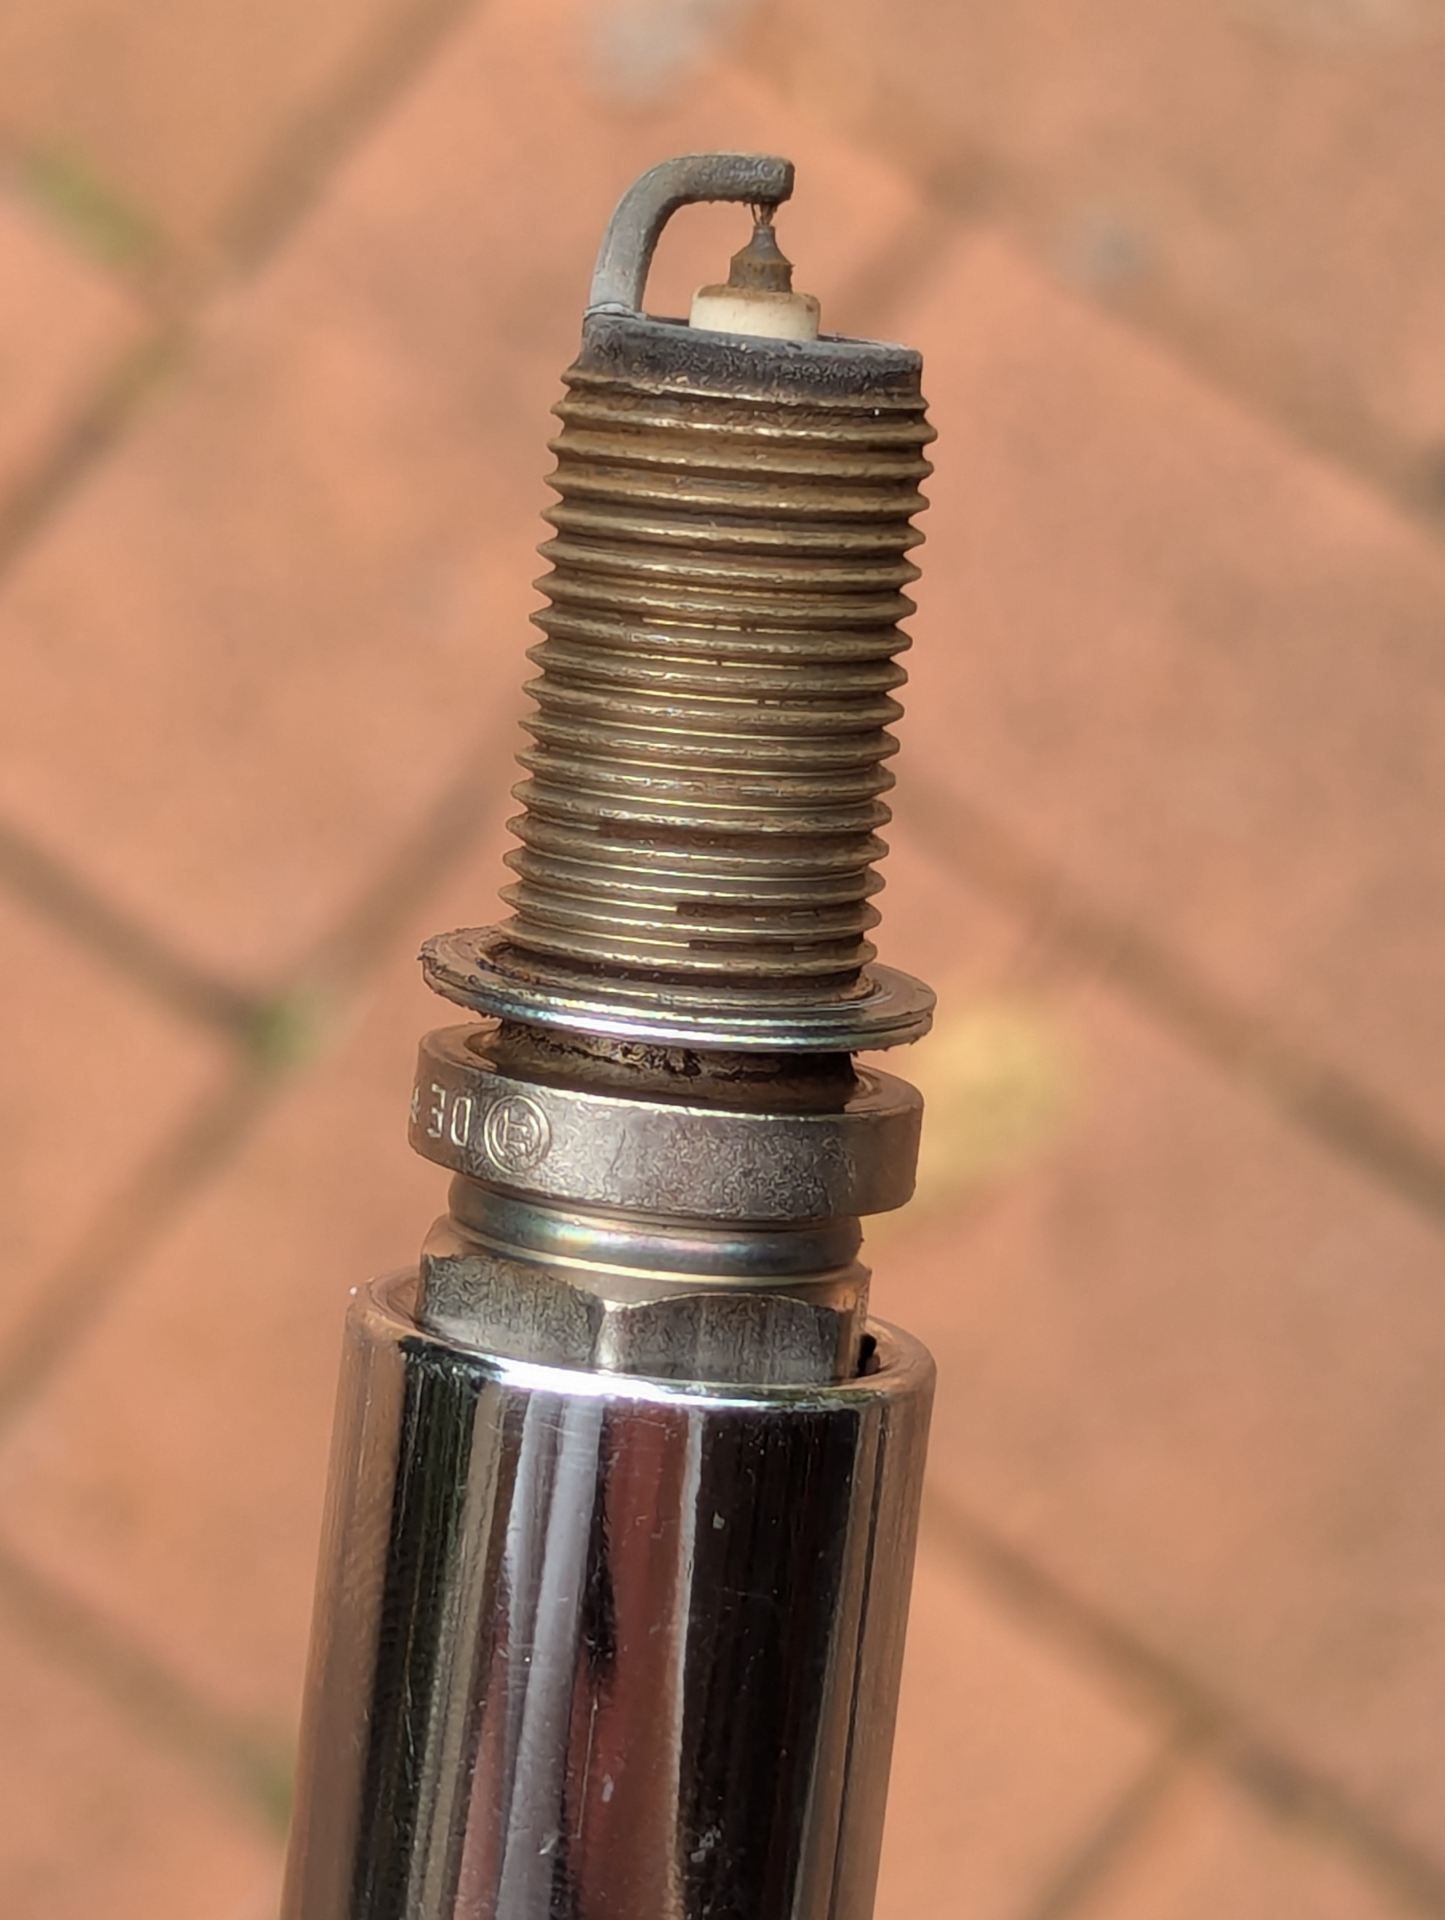
I inspected each spark plug but didn’t see any signs of damage. The worst was this one that seemed to have some crud bridging the terminals. It came off with a brush of my finger.
While I had each plug out, I took the opportunity to boroscope the cylinders.
I have heard some horror stories of engines being destroyed due to bore scoring, where the piston scrapes away the protective lining in the cylinder. This leads to noise, excessive oil use, and eventually complete engine failure.
From what I’ve read, this is usually caused by poor maintenance. Long oil change intervals are the main culprit, which is why I always change my oil every 7500km instead of the Porsche recommended 15,000.
There’s been some instances of manufacturing fault, but I think it’s rare.
If I were buying a used Macan again today, I’d take the time to check for signs of this damage, at least in the front four cylinders which are easy to access.
I bought my boroscope off Amazon for $100. It’s a handy tool for all sorts of uses. Be sure you get one with at least two cameras so you can look ‘forward’ as well as ‘sideways’. Mine has 3 cameras, so it can look left and right. Very helpful.
Thankfully, I didn’t see any evidence of bore scoring in my engine. There’s the typical cross hatching which is normal.
I did see quite a lot of carbon deposits, but my mechanic said it’s below average for an engine like mine. It’d be nice to get that cleaned off one day.
After I put everything back together, I was pleasantly surprised to find the car running smoother. That seems obvious but it’s quite noticeable, the engine revs more smoothly.
In addition, the hesitation that was present at 2100rpm since I bought the car is now fixed! Another win.
New spark plugs have been the biggest improvement since the initial engine flush I did.
I’m proud to have done another maintenance job on the Porsche. It feels great to tick the box in the service book myself.
The car is due for drivetrain oil change next, so I’ll write more about that once I’ve done it.
Review - RADHAUS 95B.1 Coolant Vent Line Bypass Kit for Porsche Macan
I recently had the misfortune of experiencing the failure of the coolant vent line on my 2015 Macan Turbo, at around 120,000km.
Sometimes also called the coolant T-pipe or Y-pipe, it runs from the reservoir tank back towards the firewall, then makes a U turn and comes forward through the centre of the engine V, past the intake and into two inlets below the throttle body.
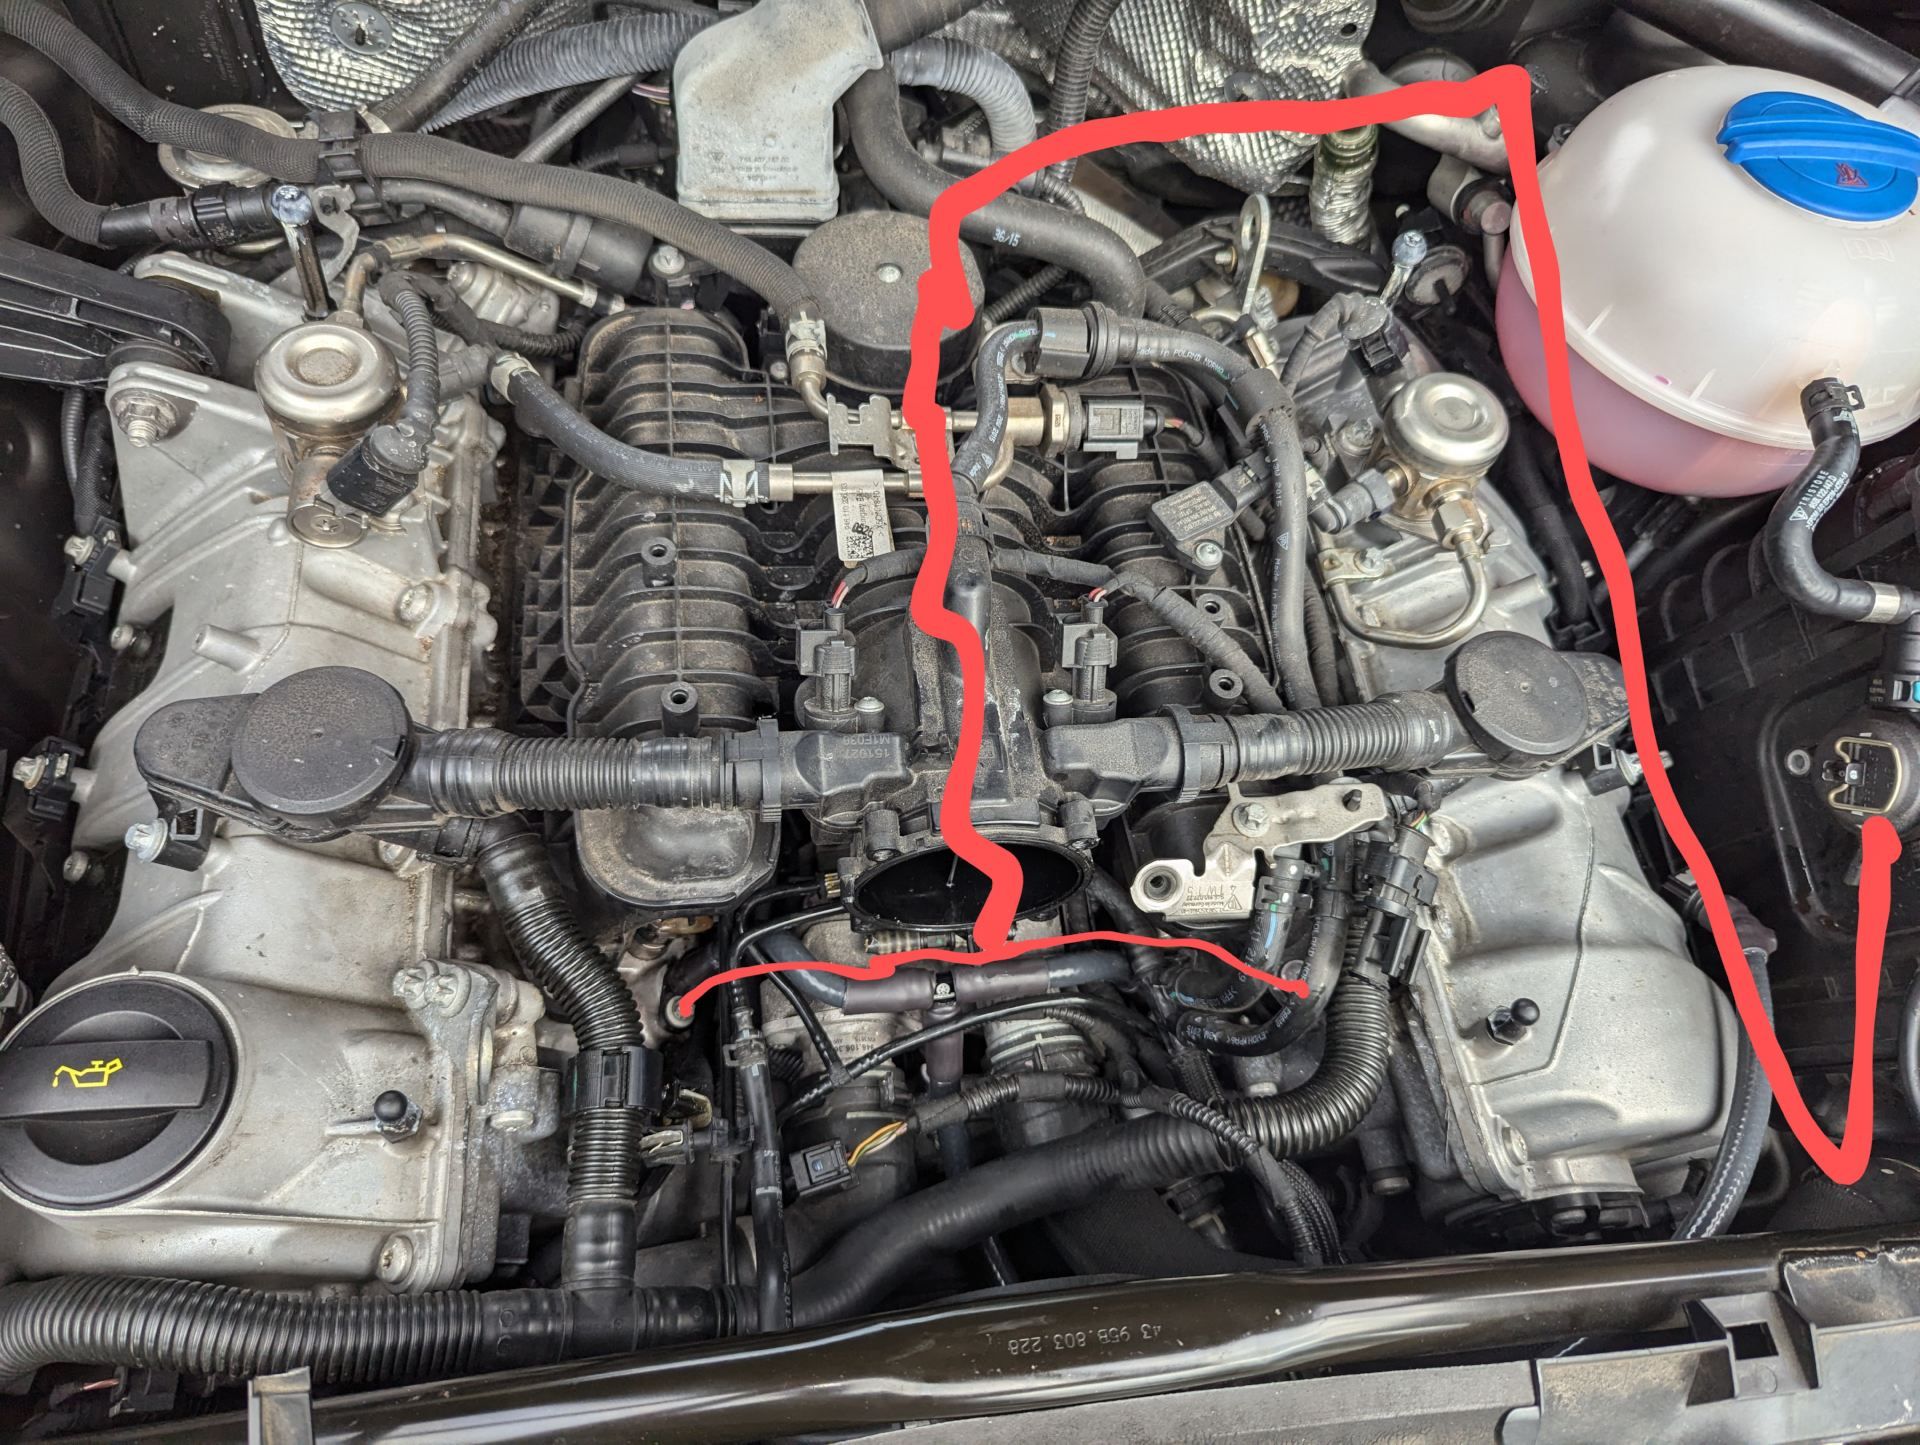 A crude drawing to show how the pipe is routed.
This design would be acceptable if the pipe was at least silicone, but it’s a hard plastic which fatigues with repeated heat cycles.
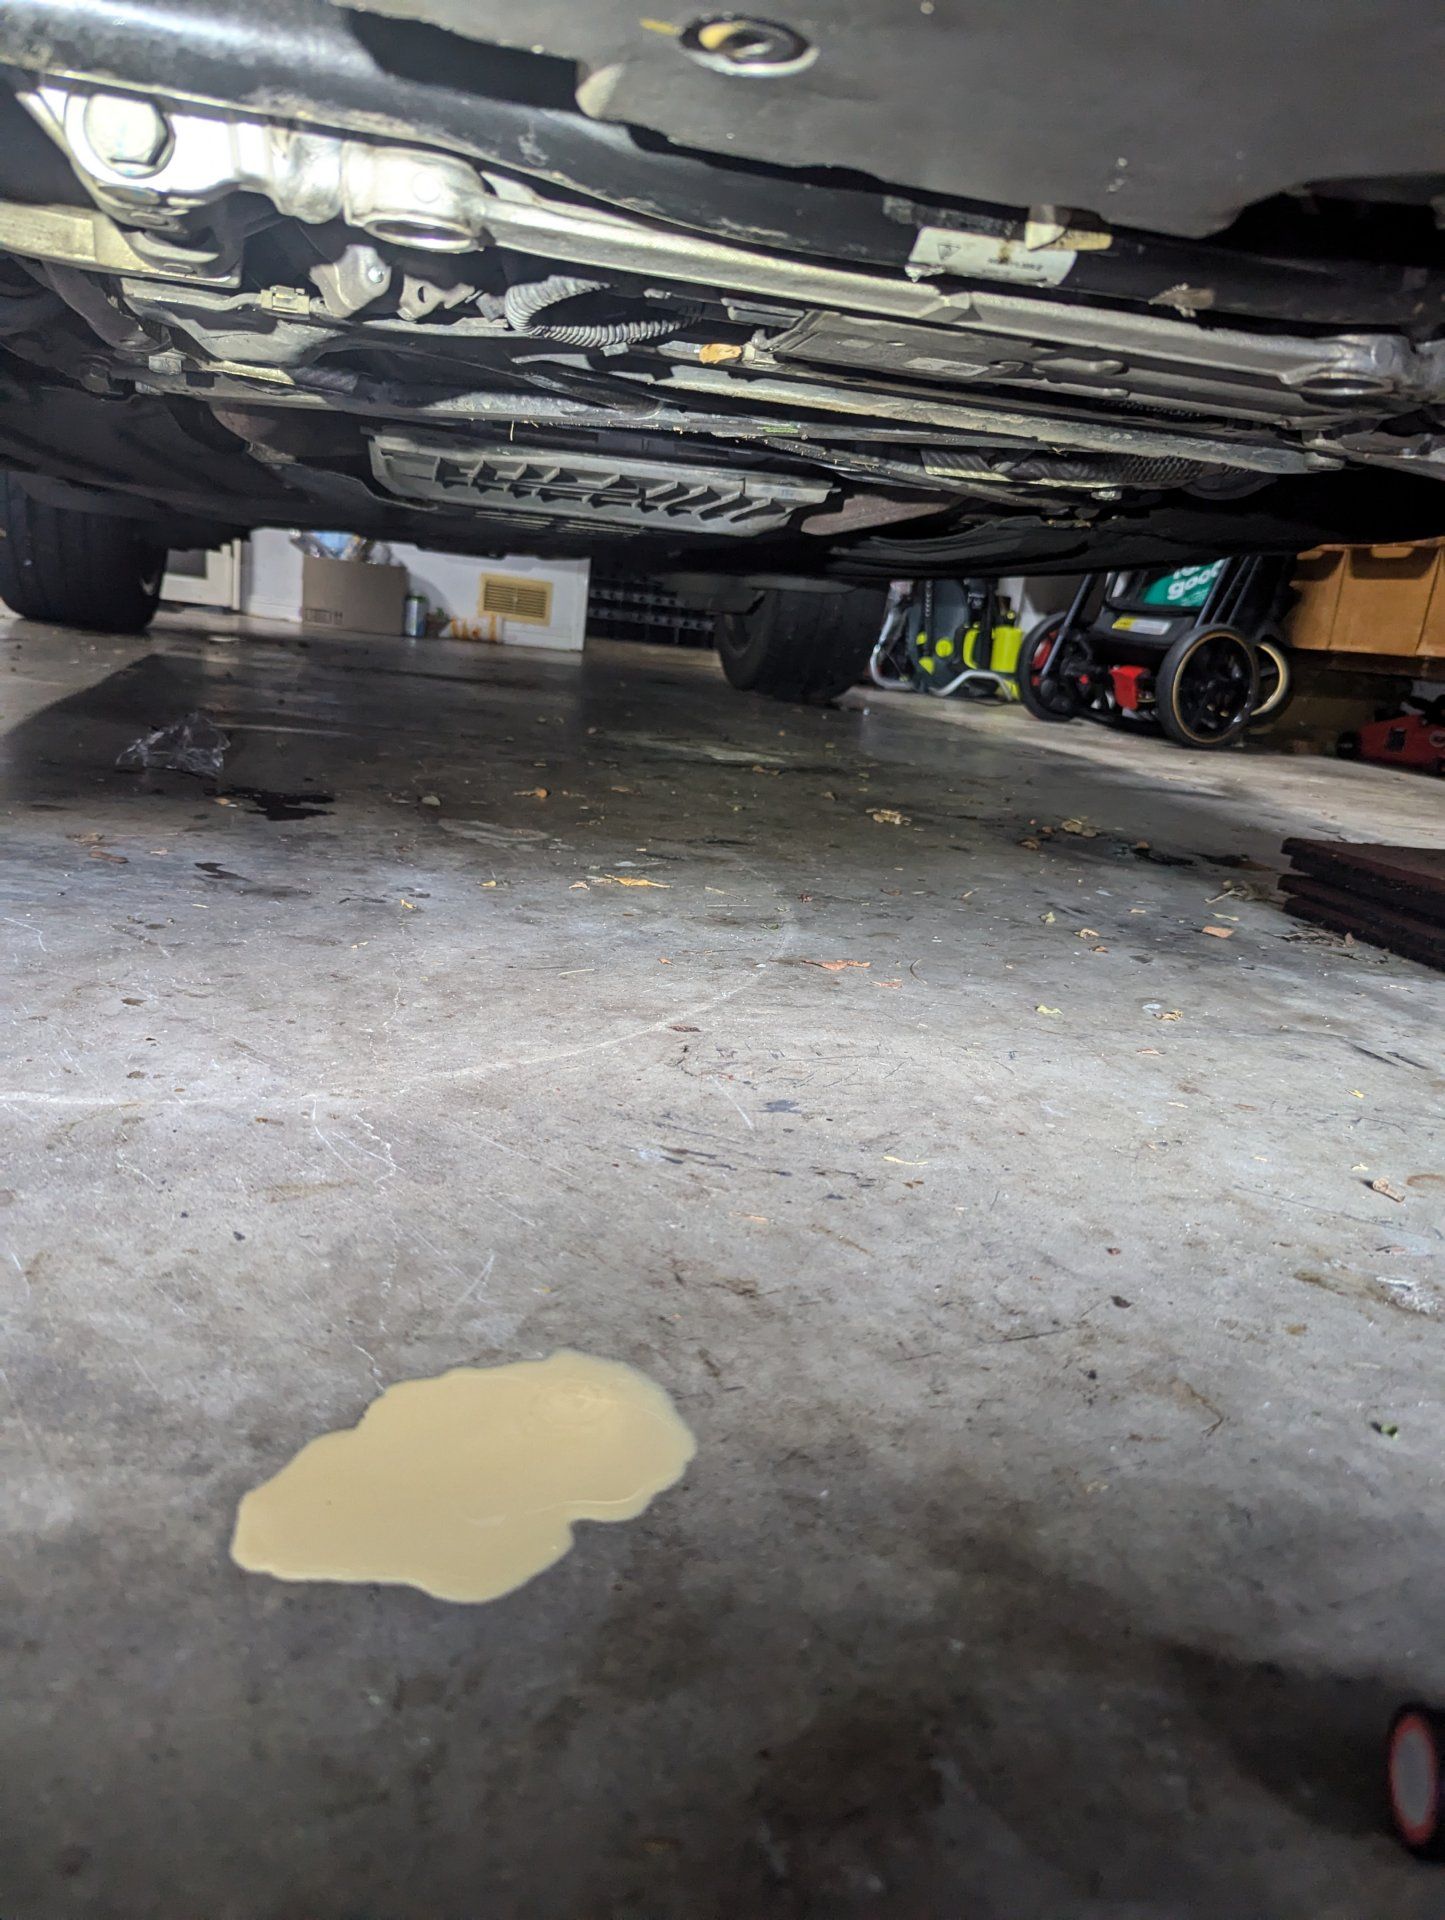
Mine broke as I was pulling into my in-laws driveway. I noticed the engine fans were running which was unusual on a cool day, and I checked the coolant temperature which showed 105C. Normally it sits steady at 90C.
I hadn’t got a warning yet, but I immediately switched the car off and looked underneath to see a big puddle of coolant and more leaking.
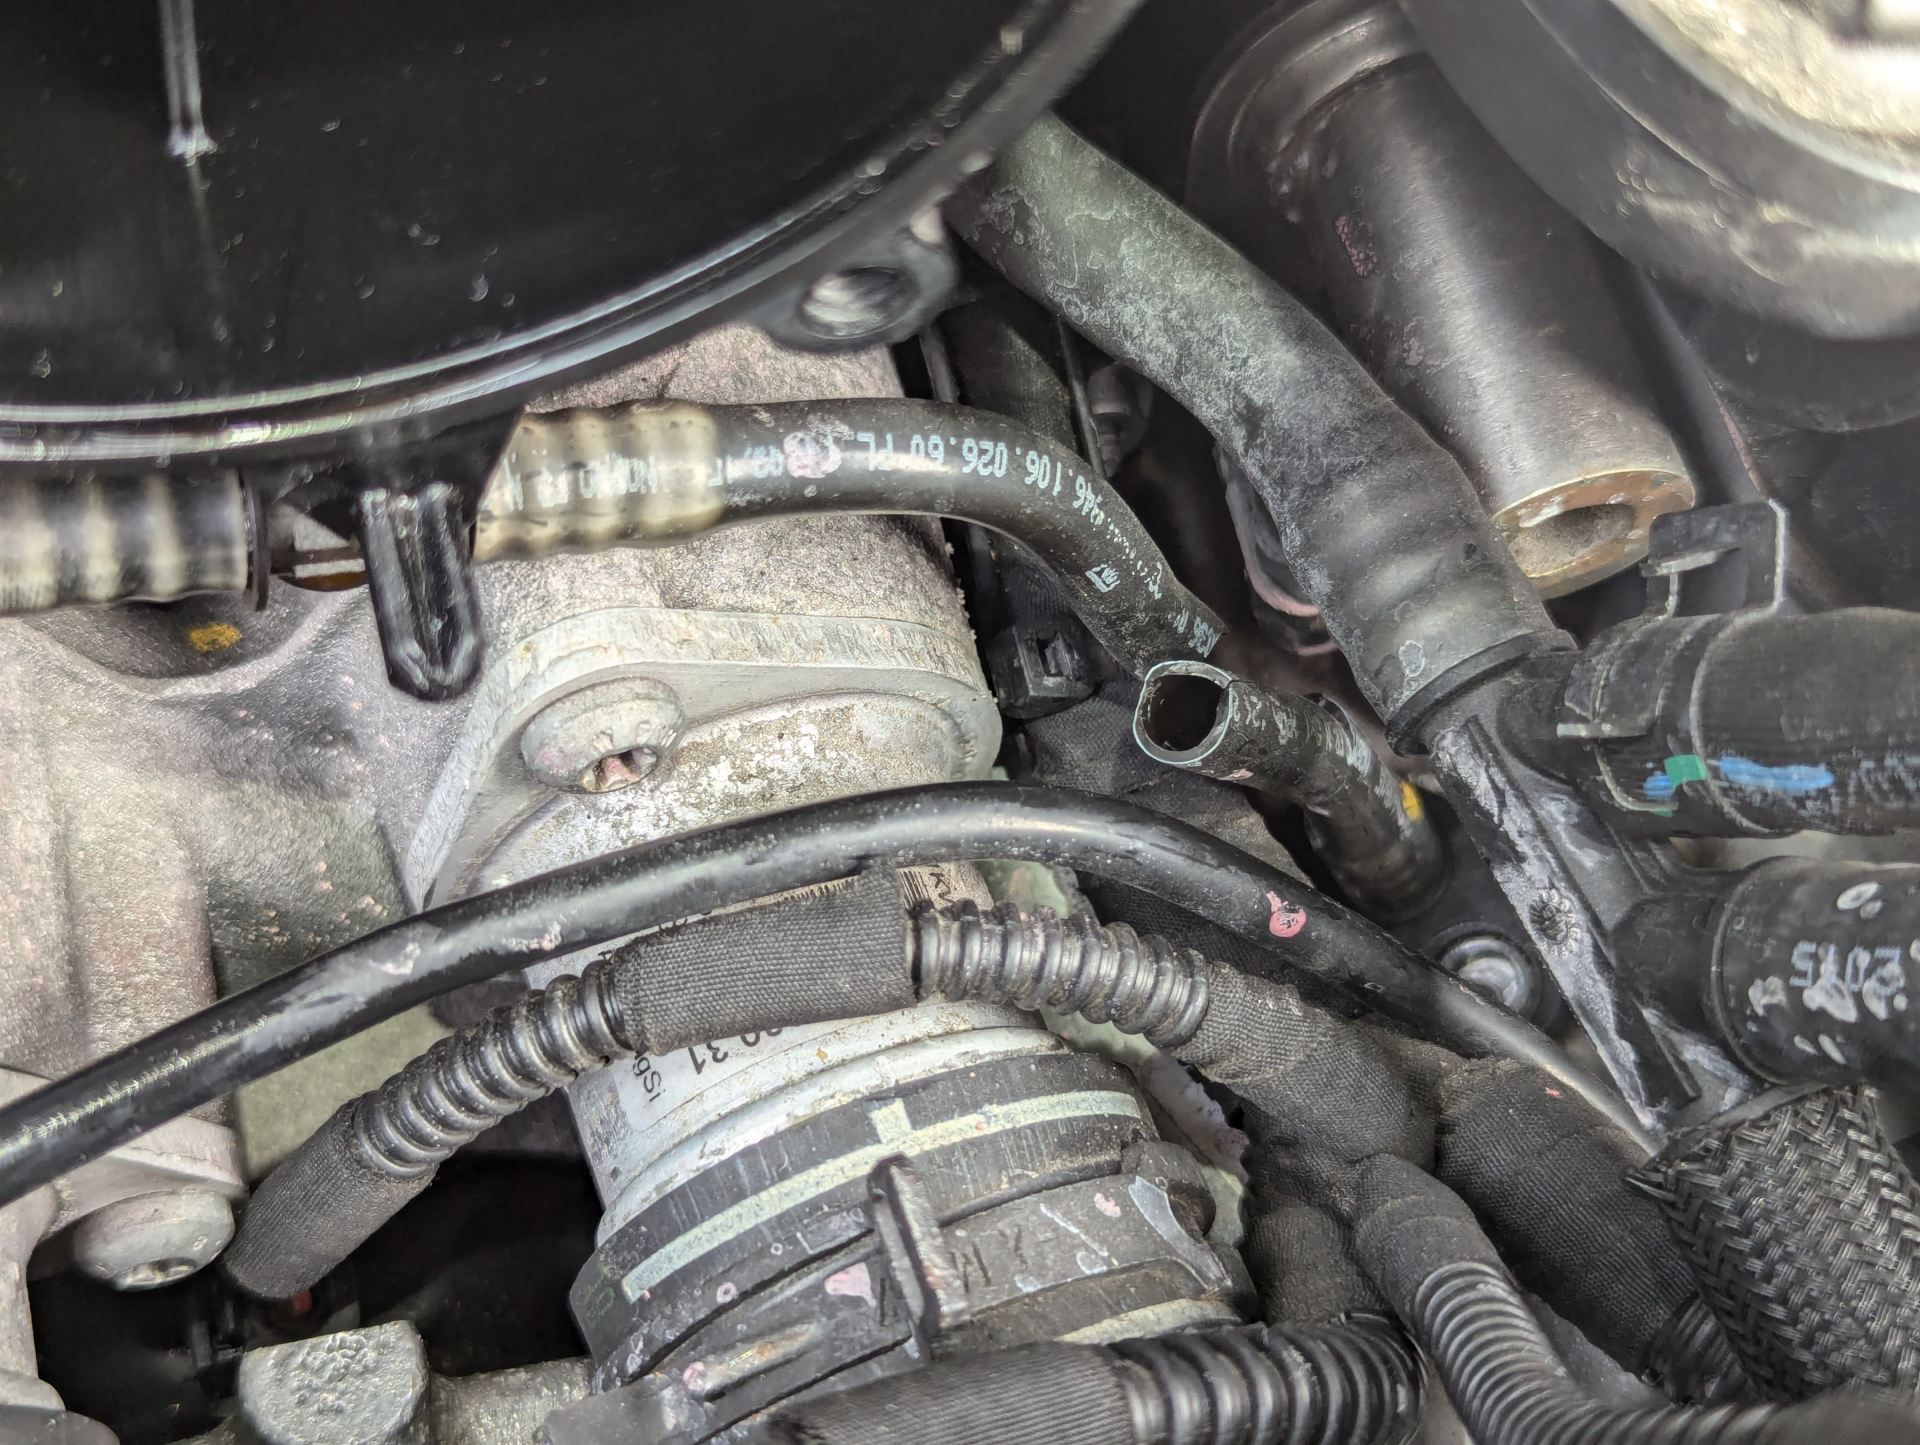
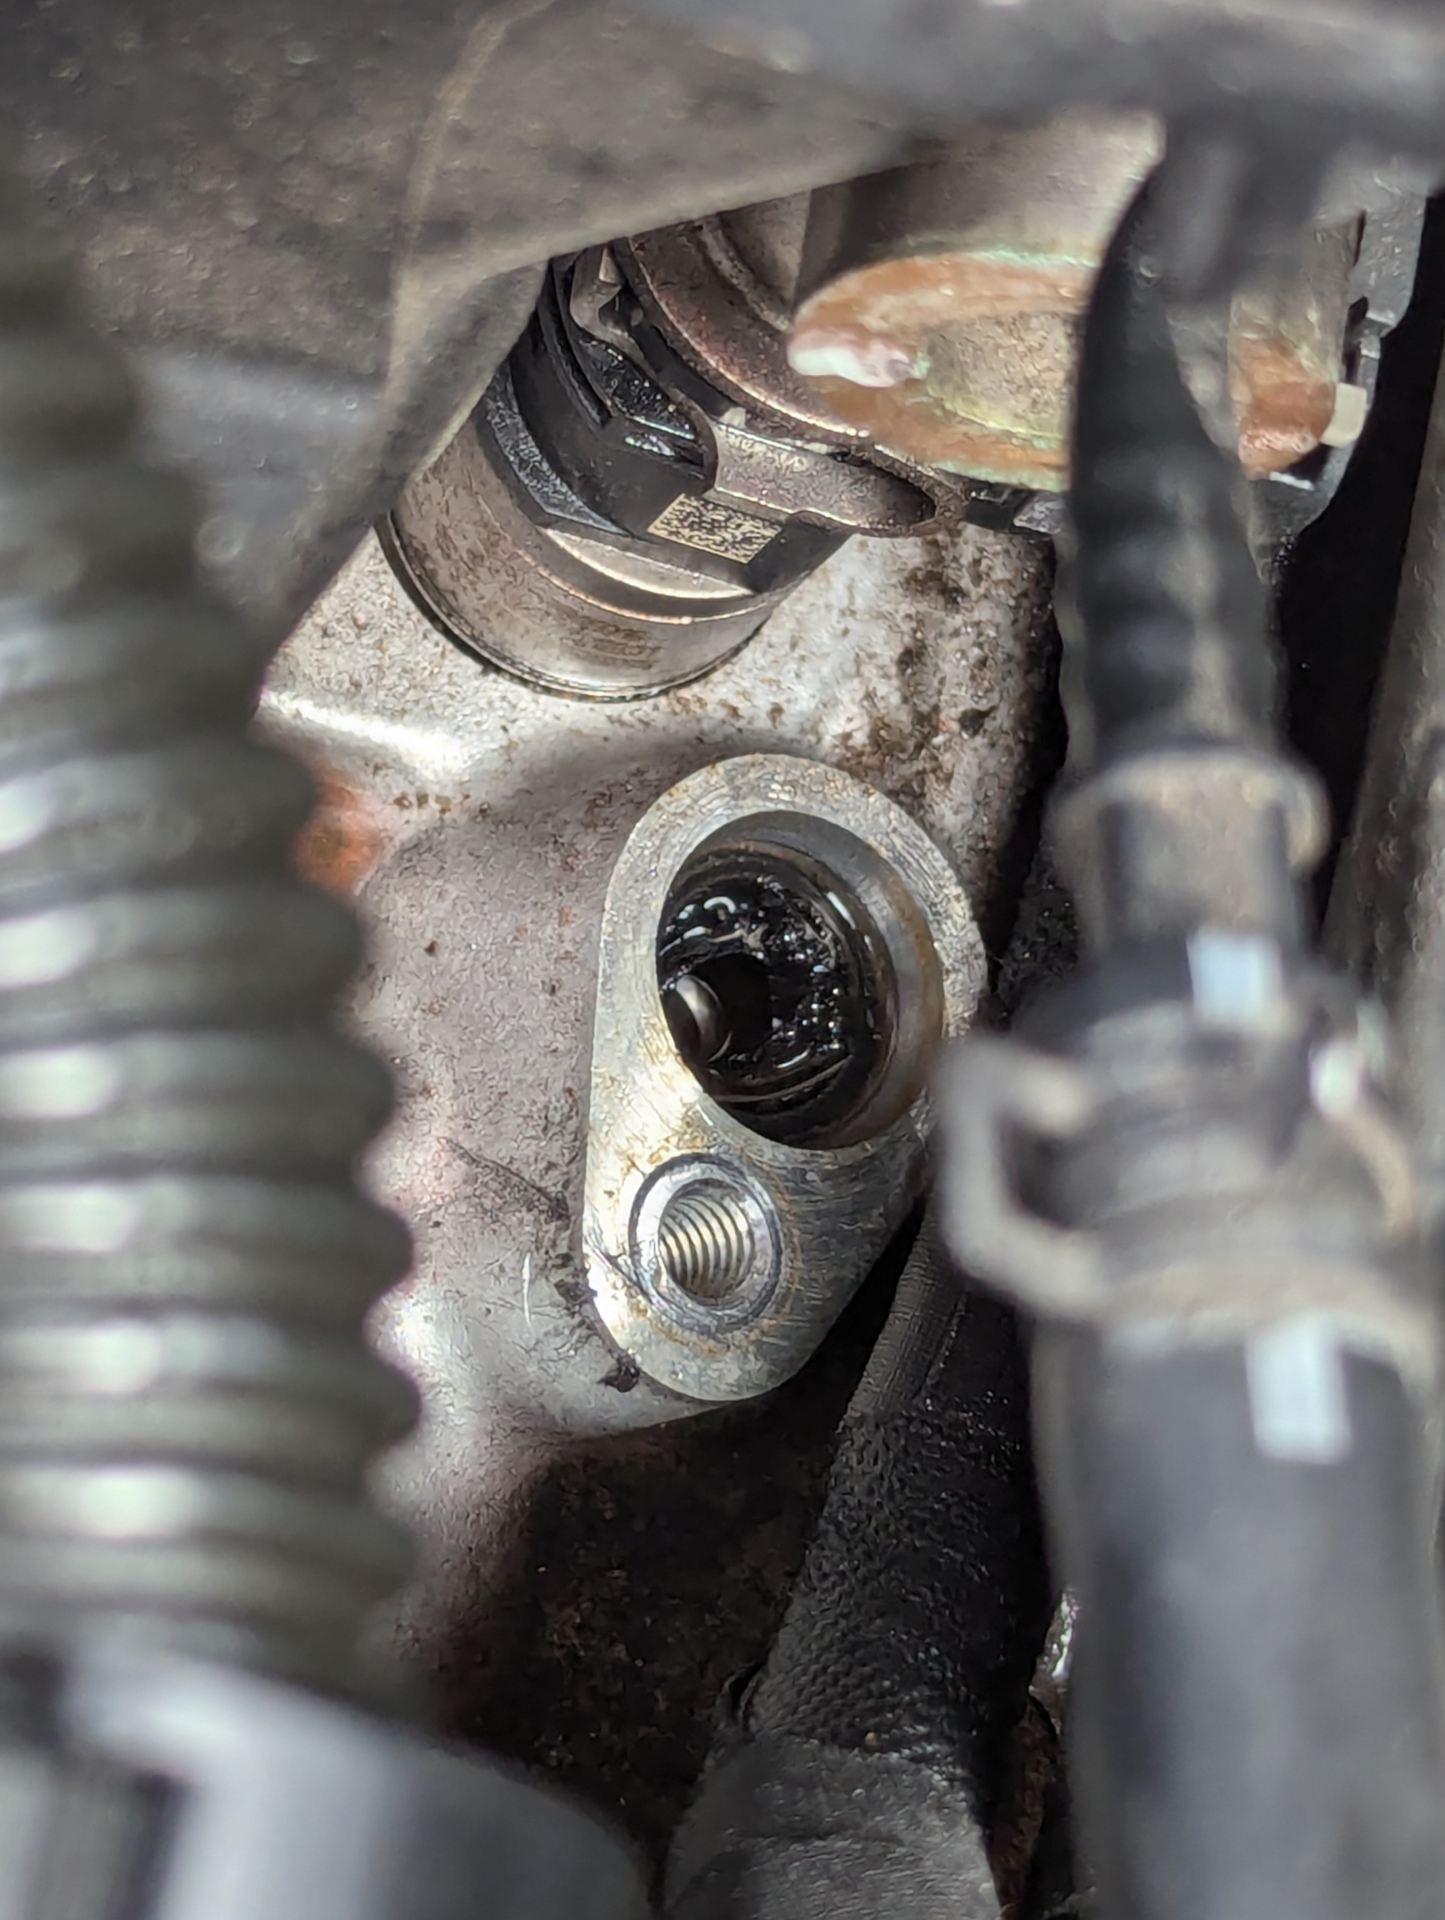
At the time I wasn’t sure where the failure had occurred, but I did notice coolant on top of the engine, which seemed odd to me.
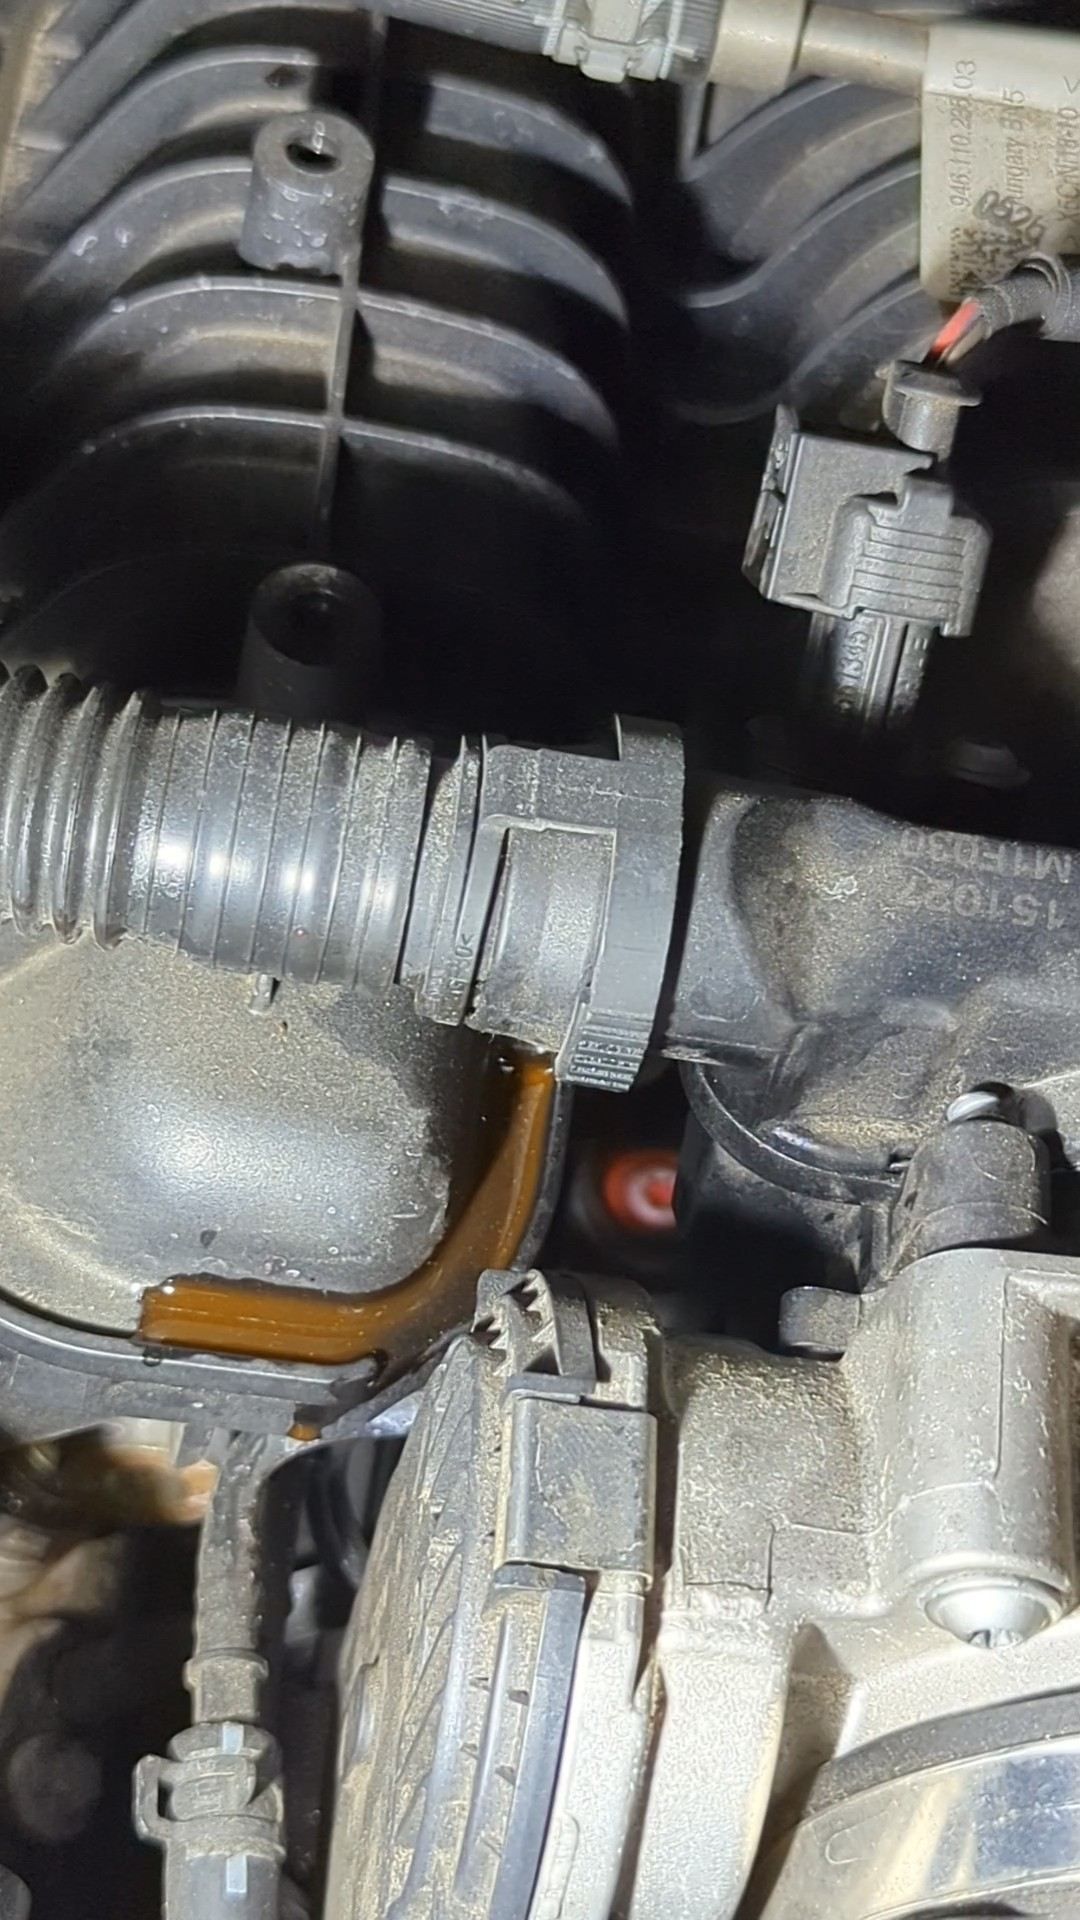 Note the puddle of red coolant on-top of the screw.
I waited a while for the engine to cool, filled the reservoir with more coolant so I could quickly move it into the street, hooked up the tow hook just in case, and left the car there.
My wonderful wife came to collect me, and was very nice to not make fun of another problem with my cars. (her Kia has never broken down, she reminds me 😁)
After some research online, I came across Santirx’ video on the problem. If you haven’t heard of his youtube channel please subscribe as he does amazing guides on maintenance for the Macan.
Santirx had collaborated with Radhaus to create a kit with sized silicone piping and proper aluminium machined fixtures, which could be installed without having to remove the intake. You can buy it here.
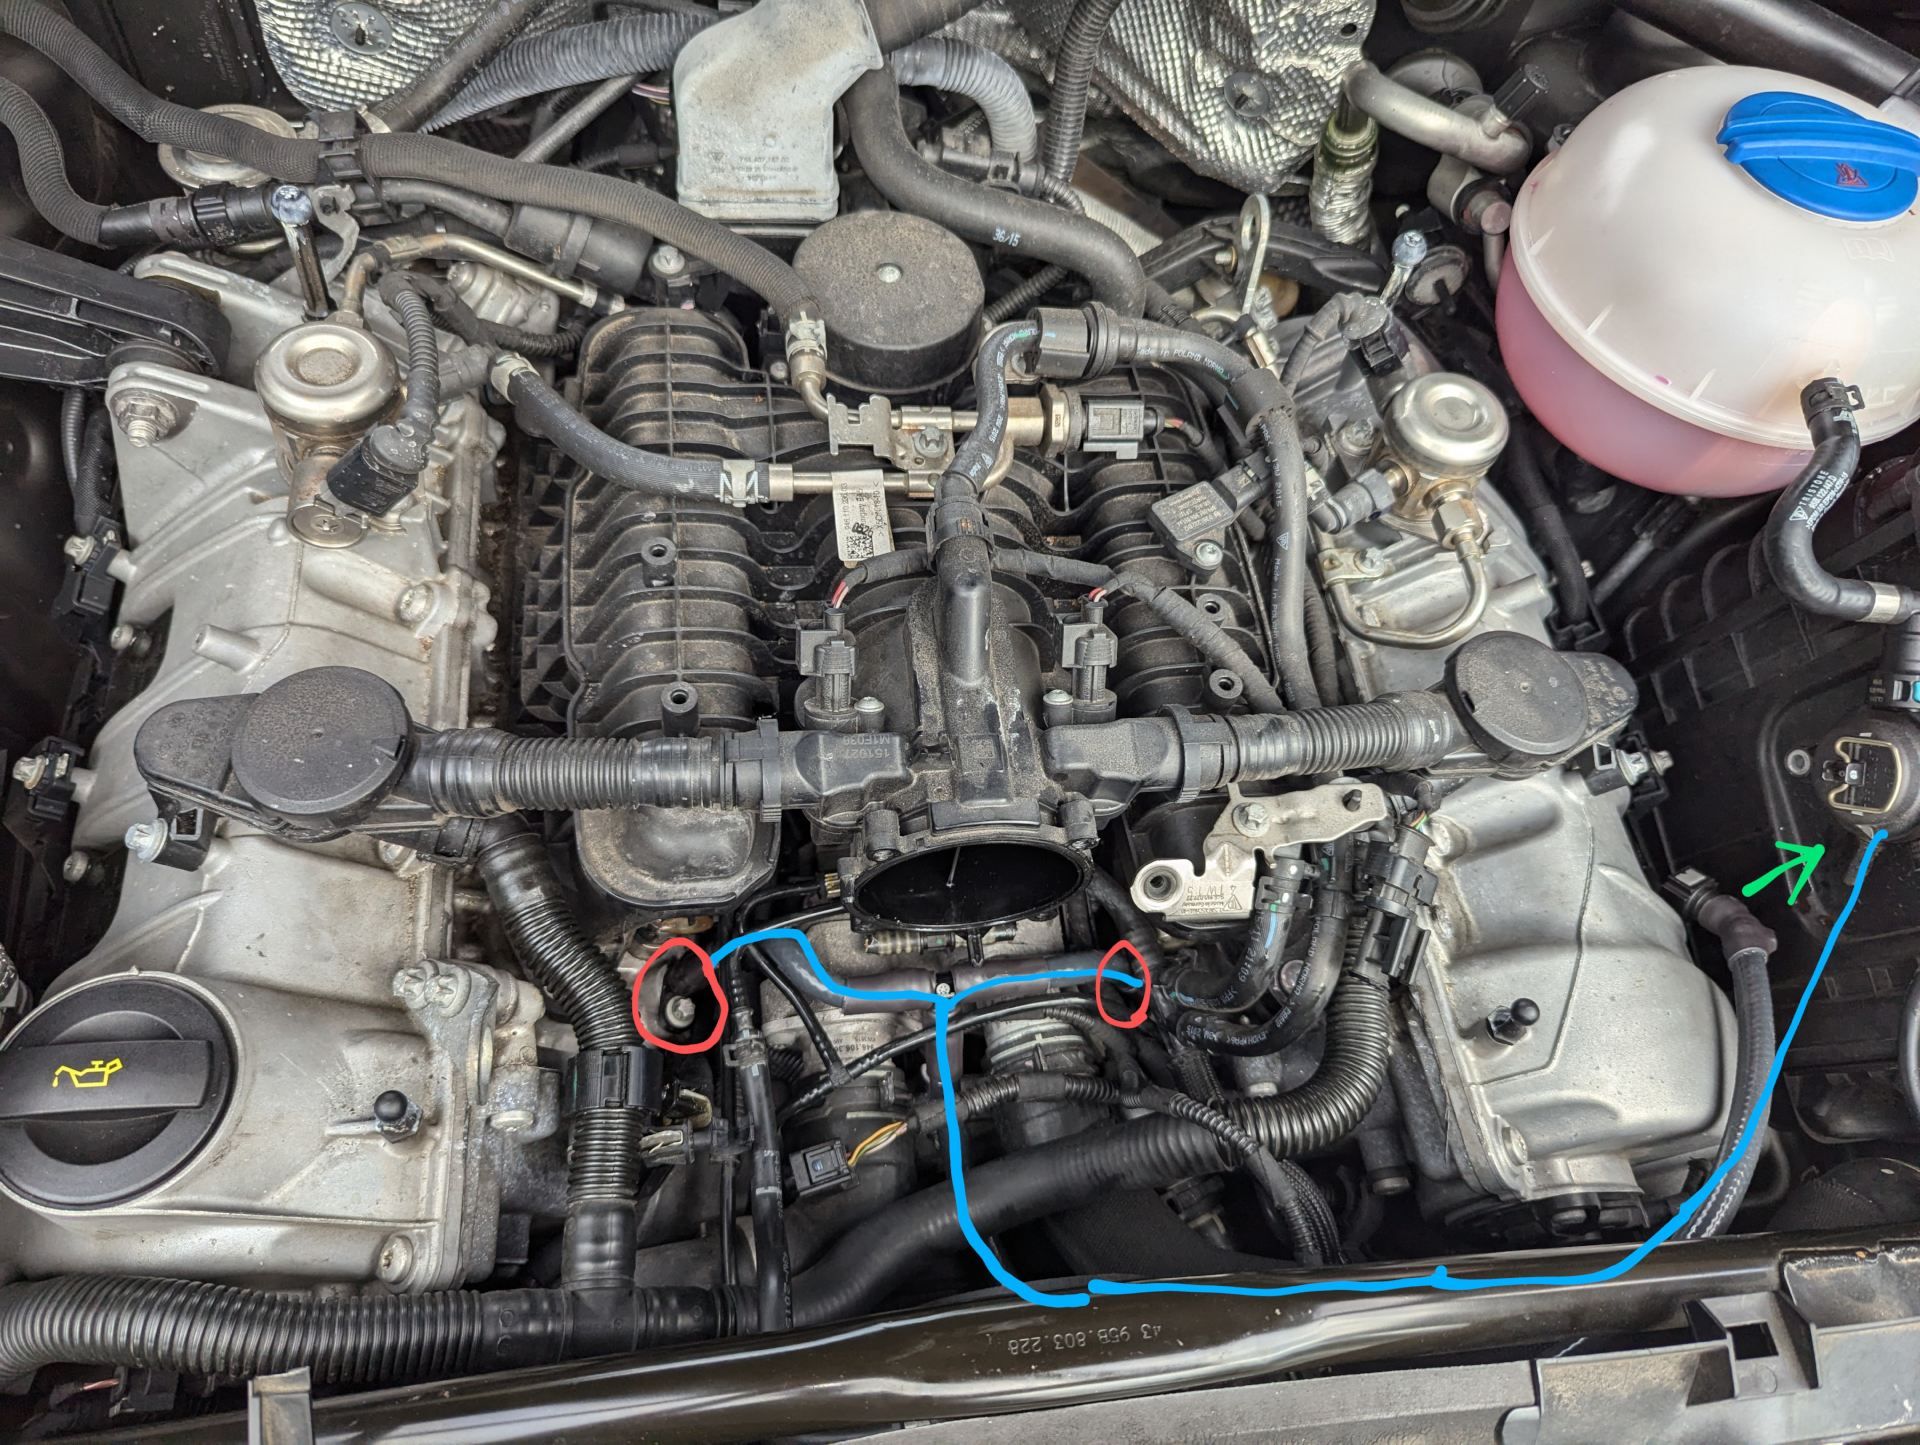 Another crude drawing showing how the Radhaus piping routes.
I watched Santirx video and thought it was something I could DIY, so I contacted Radhaus who were super helpful and shipped the kit out the very next day. It arrived in just 4 days to Australia from the US.
I thought the price was fair too, since an OEM pipe is only slightly cheaper, but requires pulling the intake, making for a much bigger job. Plus, it’ll just fail again in 100,000km.
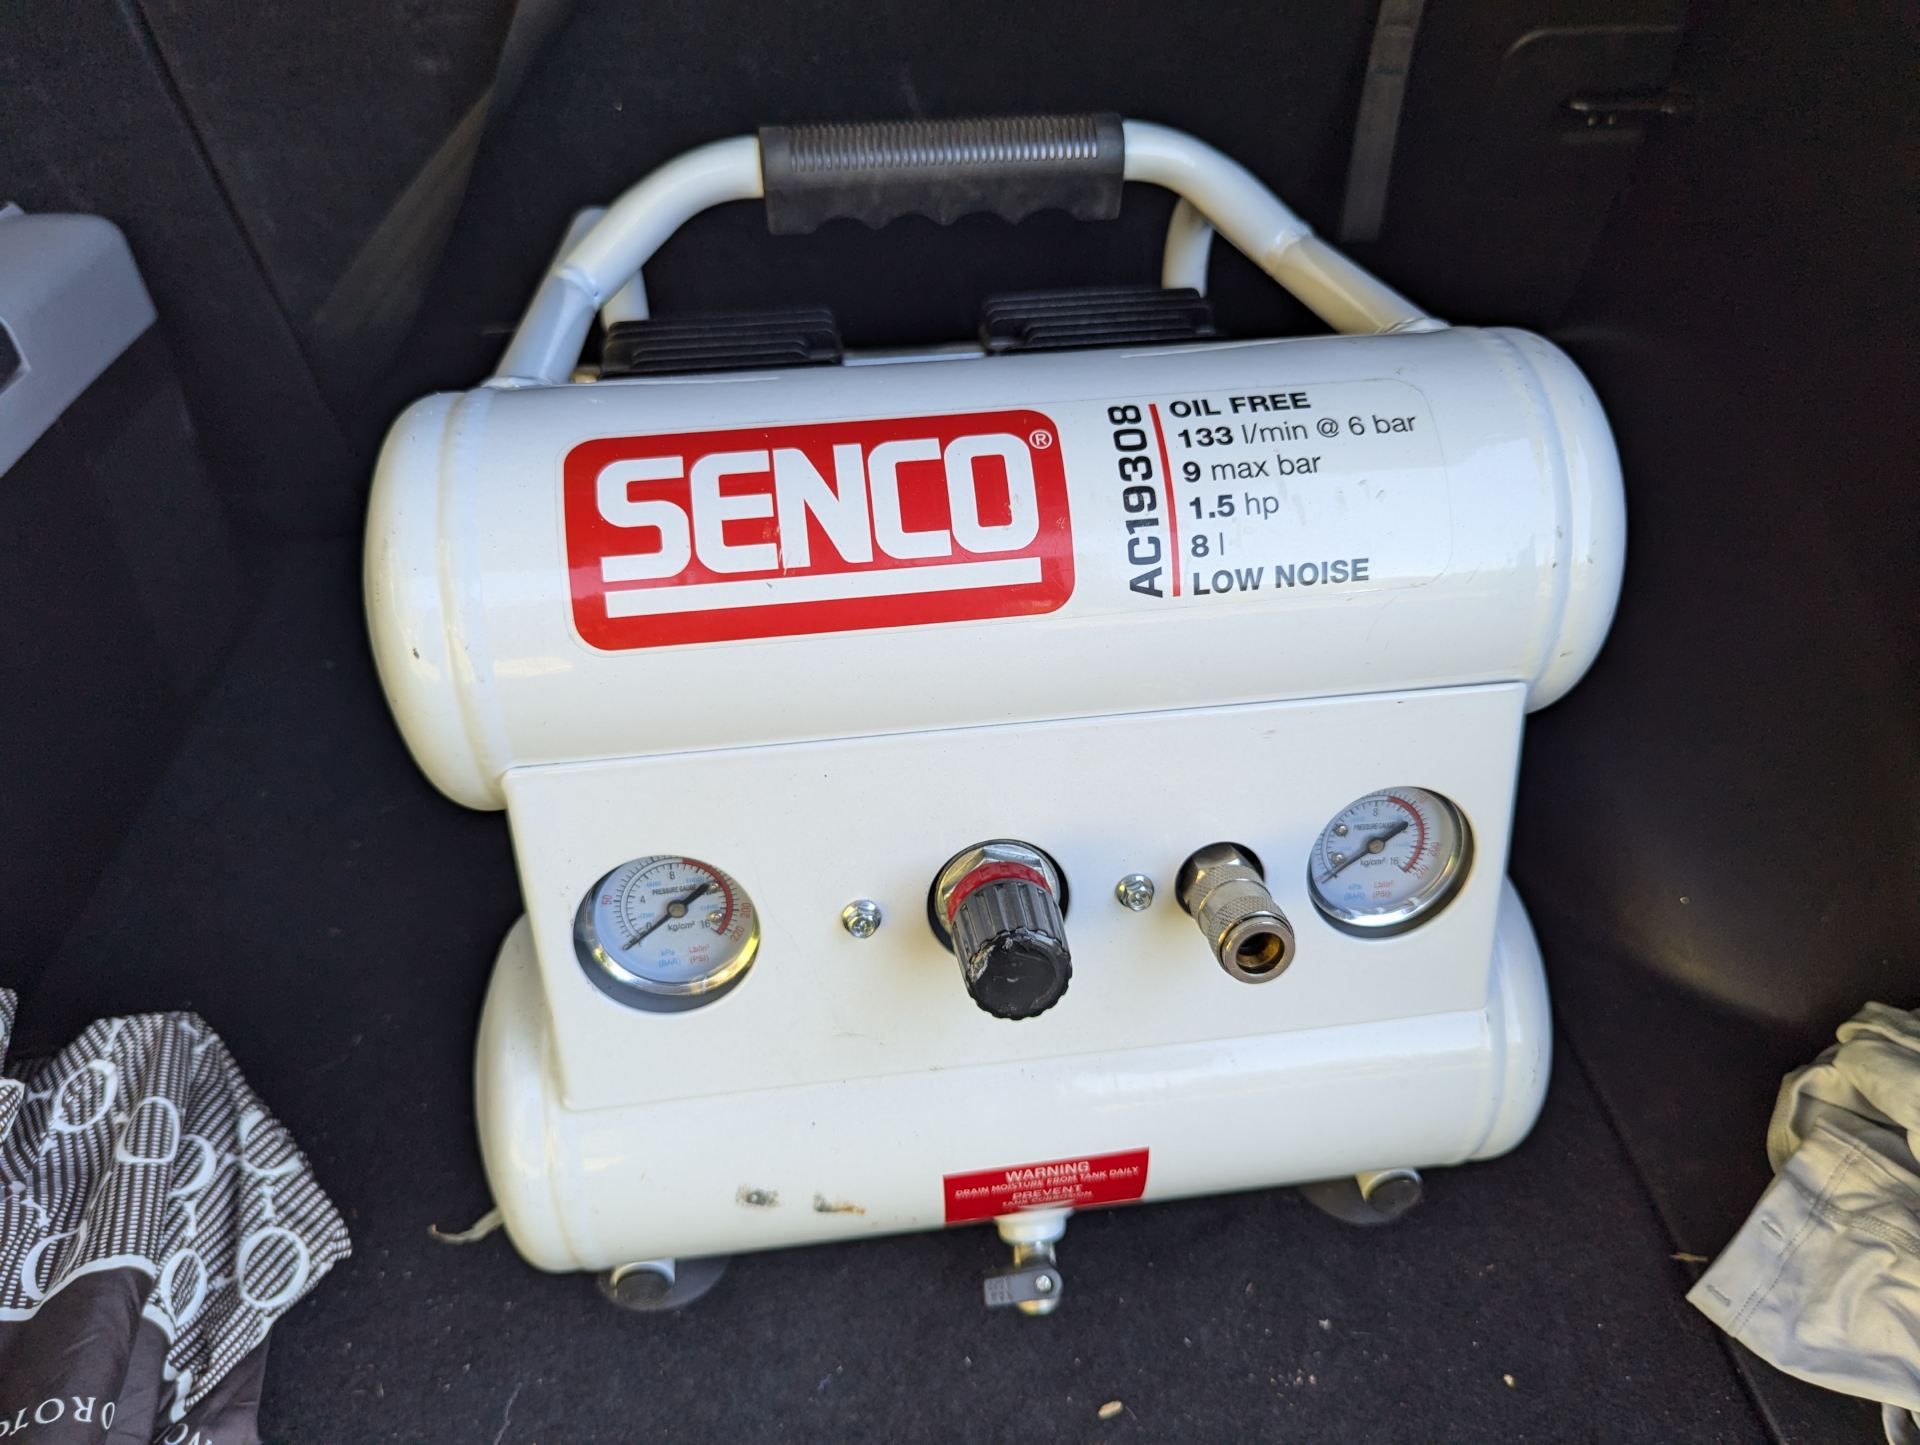
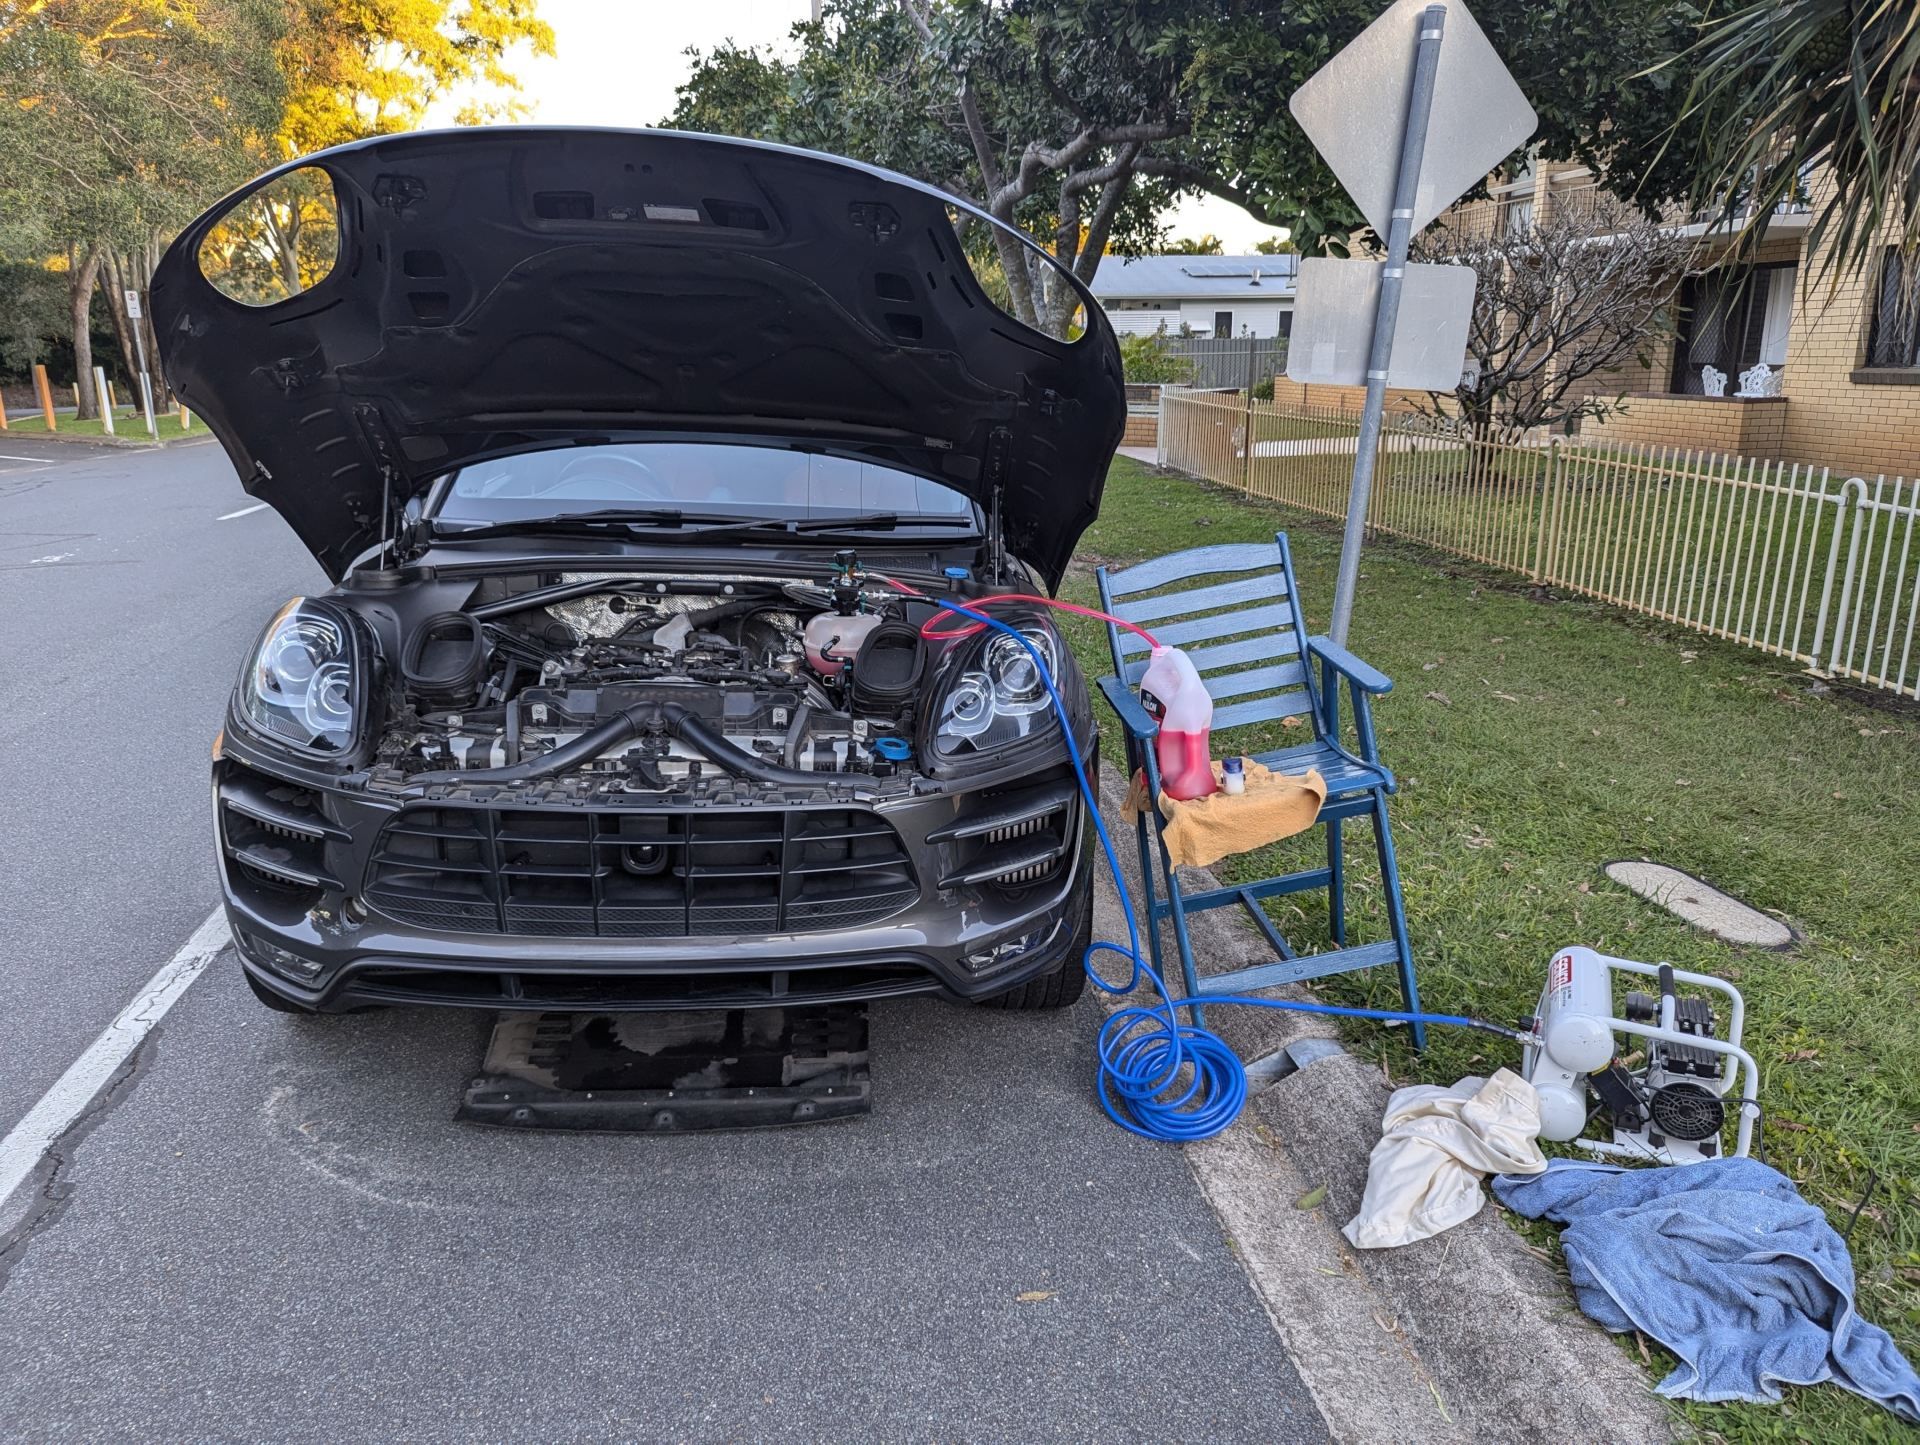
In addition to the radhaus kit, I needed a vacuum coolant filler and compressor to refill the coolant.
I bought a Draper 09544 Coolant Vacuum Refill kitfrom Amazon, and got a used compressor from Facebook marketplace, a small Senco AC19308.
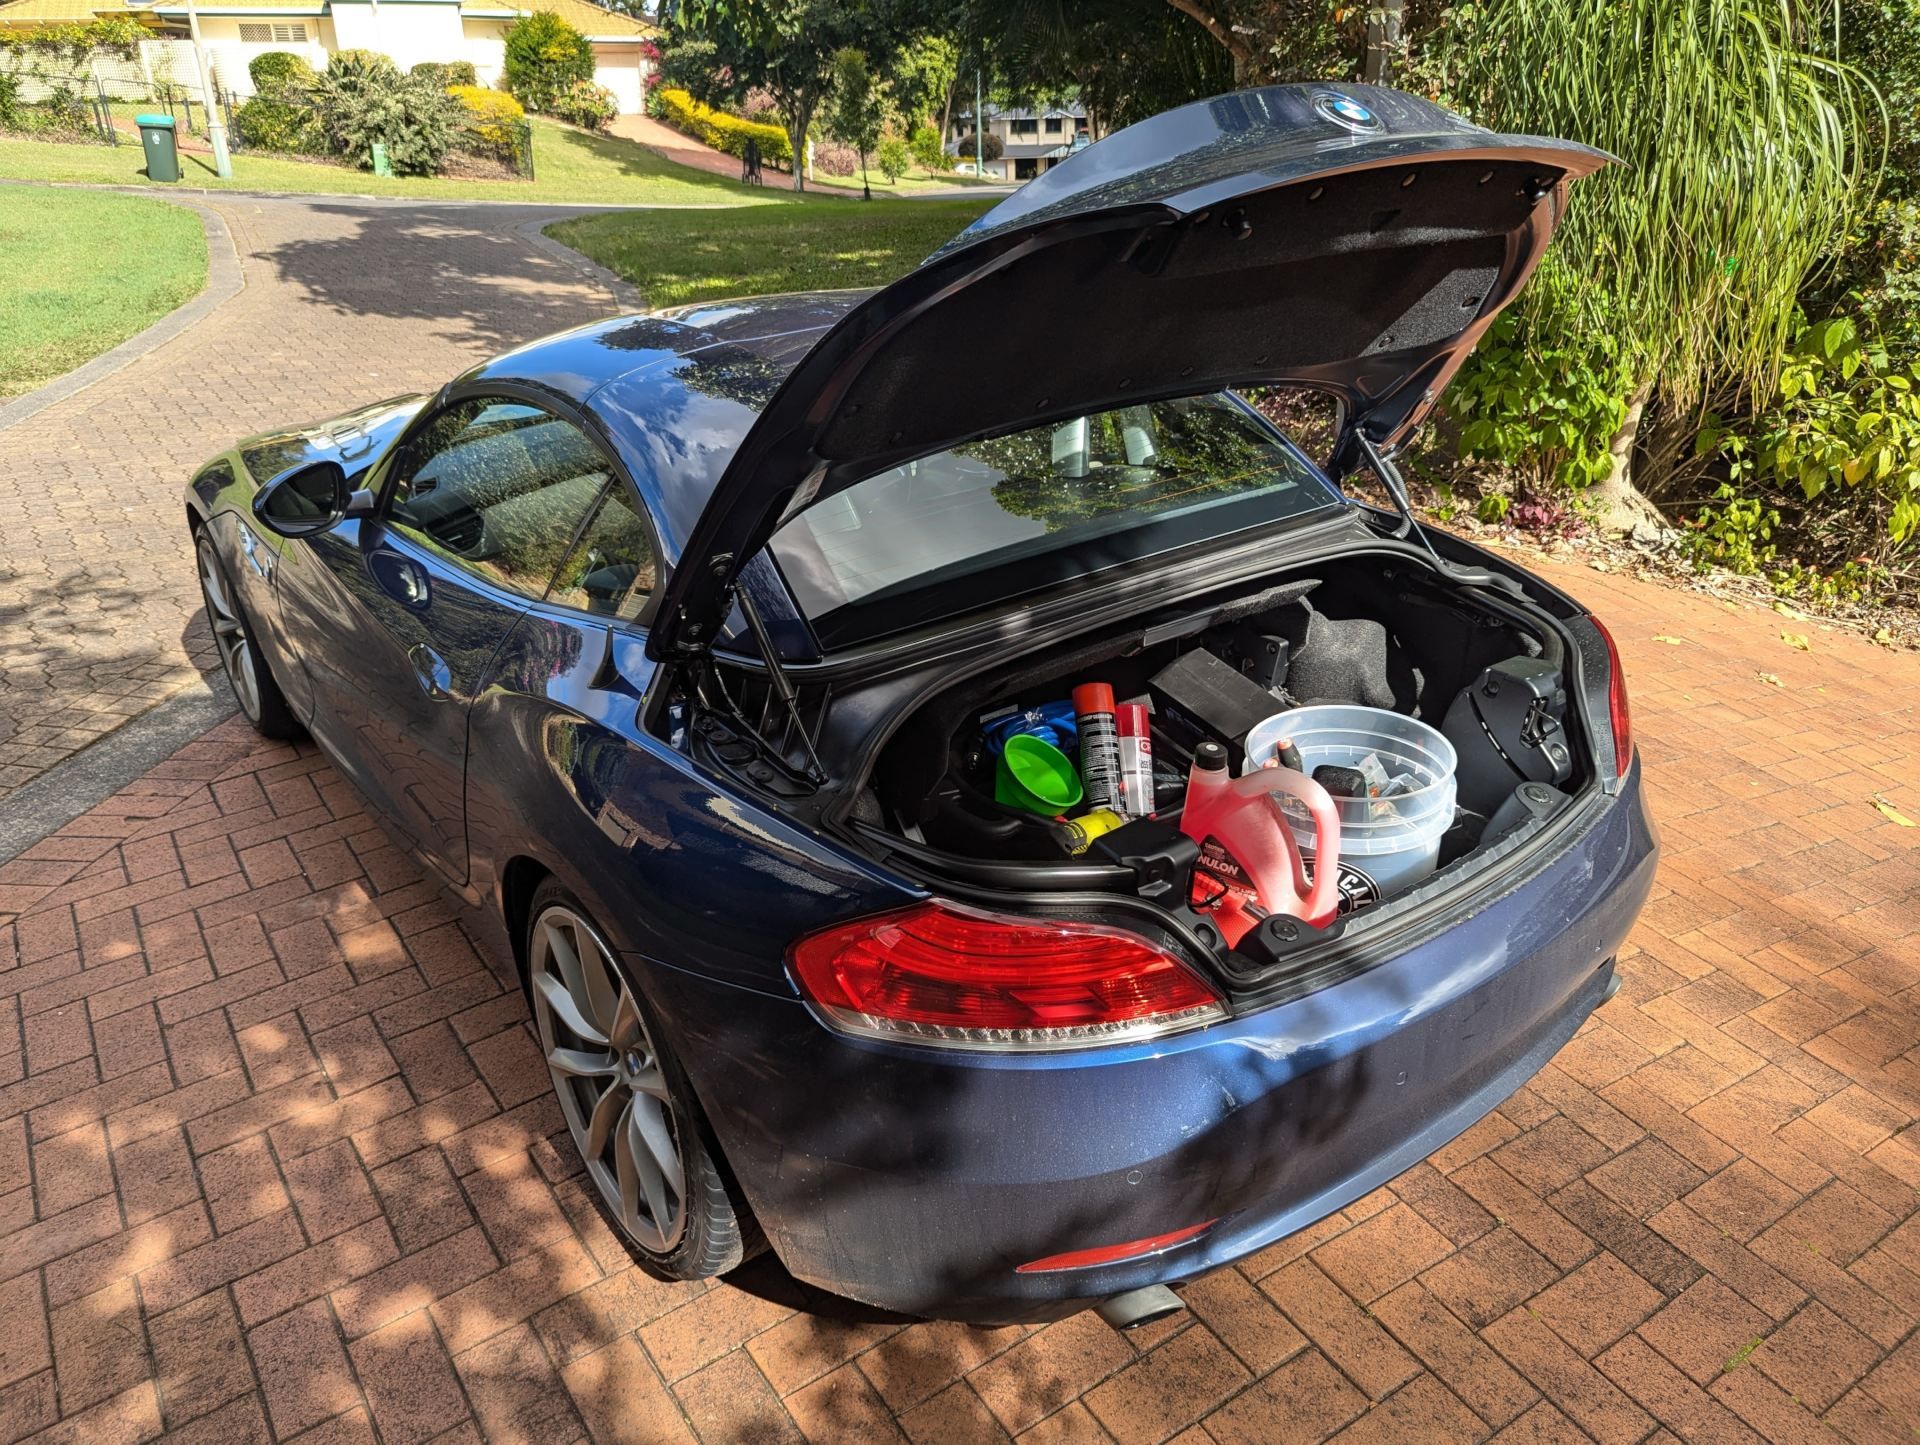
I packed my Z4 with my tools and set off on a rescue mission to repair the Macan.
The Radhaus kit is excellent quality, I was impressed with it. I set about following the steps for installation.
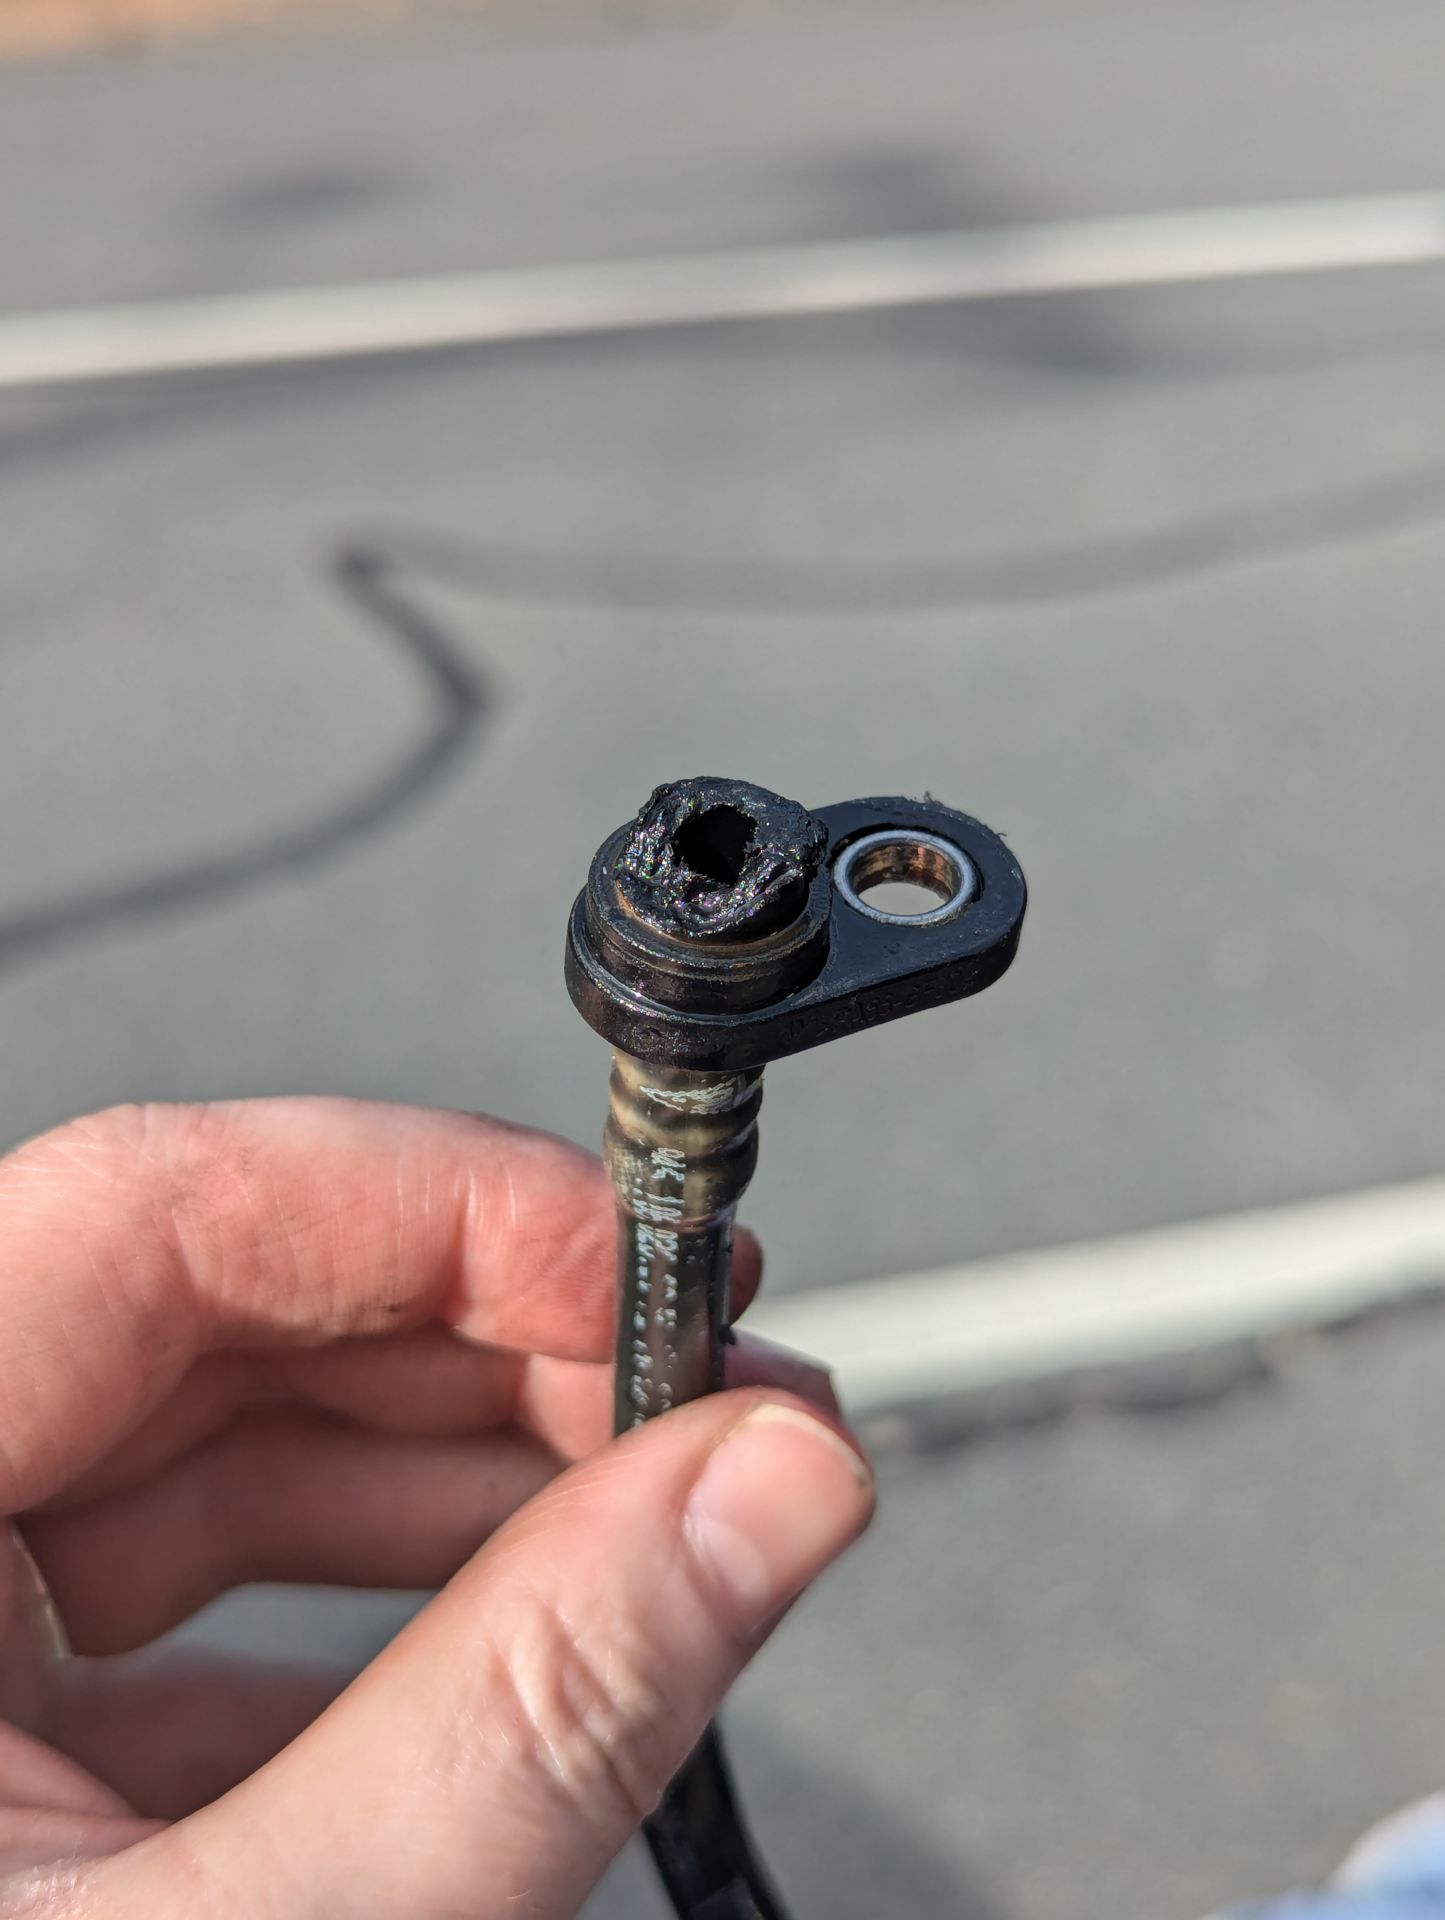
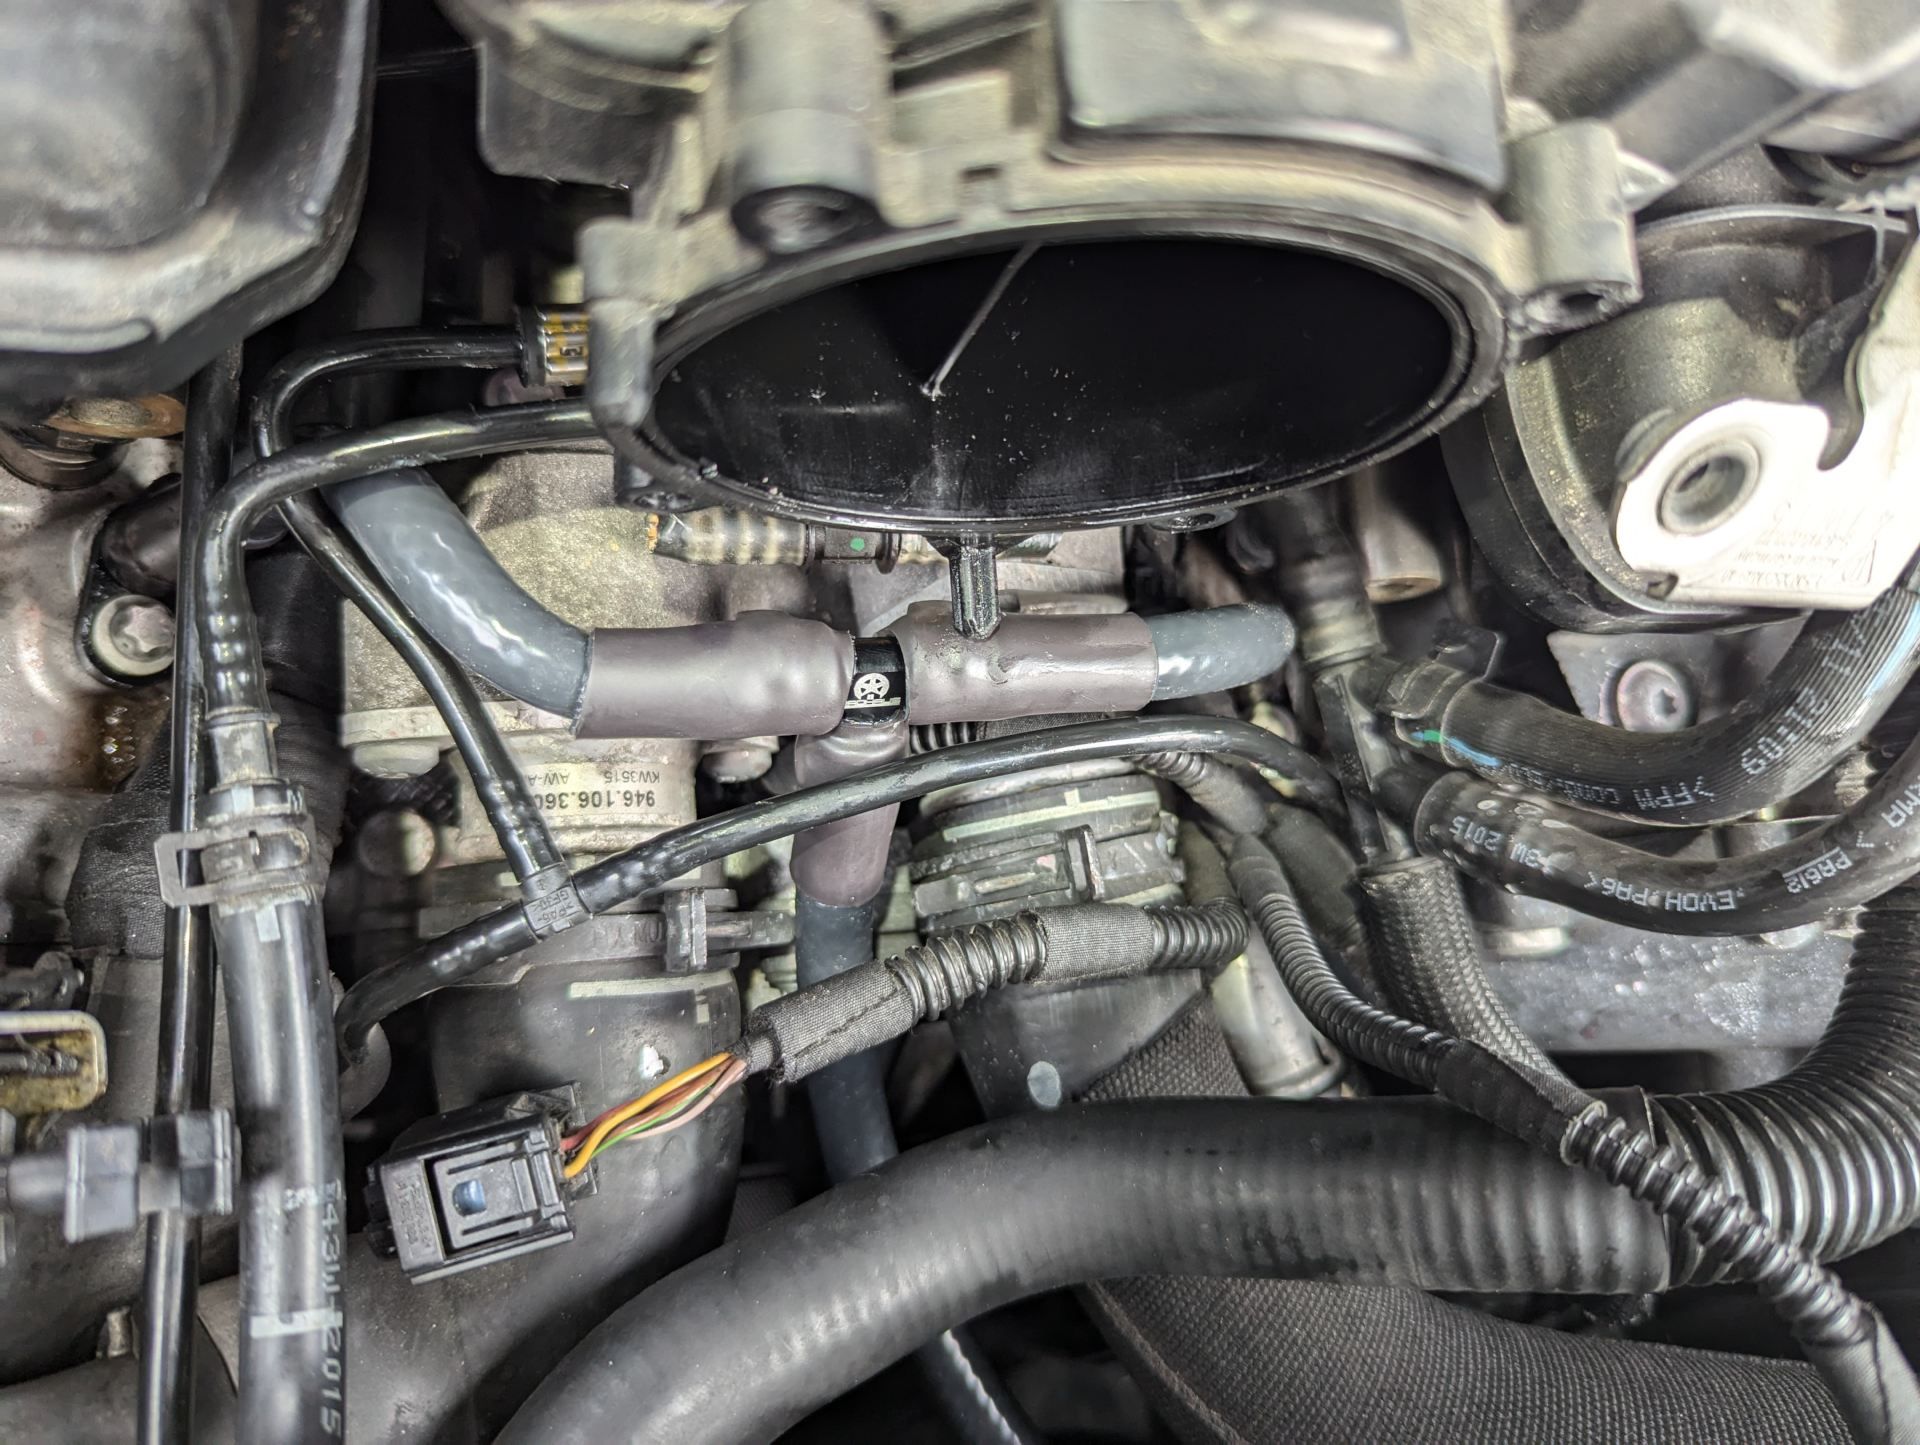
As I got access to the T-pipe, it became clear that it was well beyond its service life. The pipe crumbled and snapped with even a light touch.
 This section of pipe broke away when I bumped it.
The trickiest part was removing the plastic fixtures which connect to the engine itself.
I was extremely careful and slow when removing them, taking a good 10 mins to gentle wiggle them loose. Despite this, they crumbled apart as I removed them, and left plastic behind.
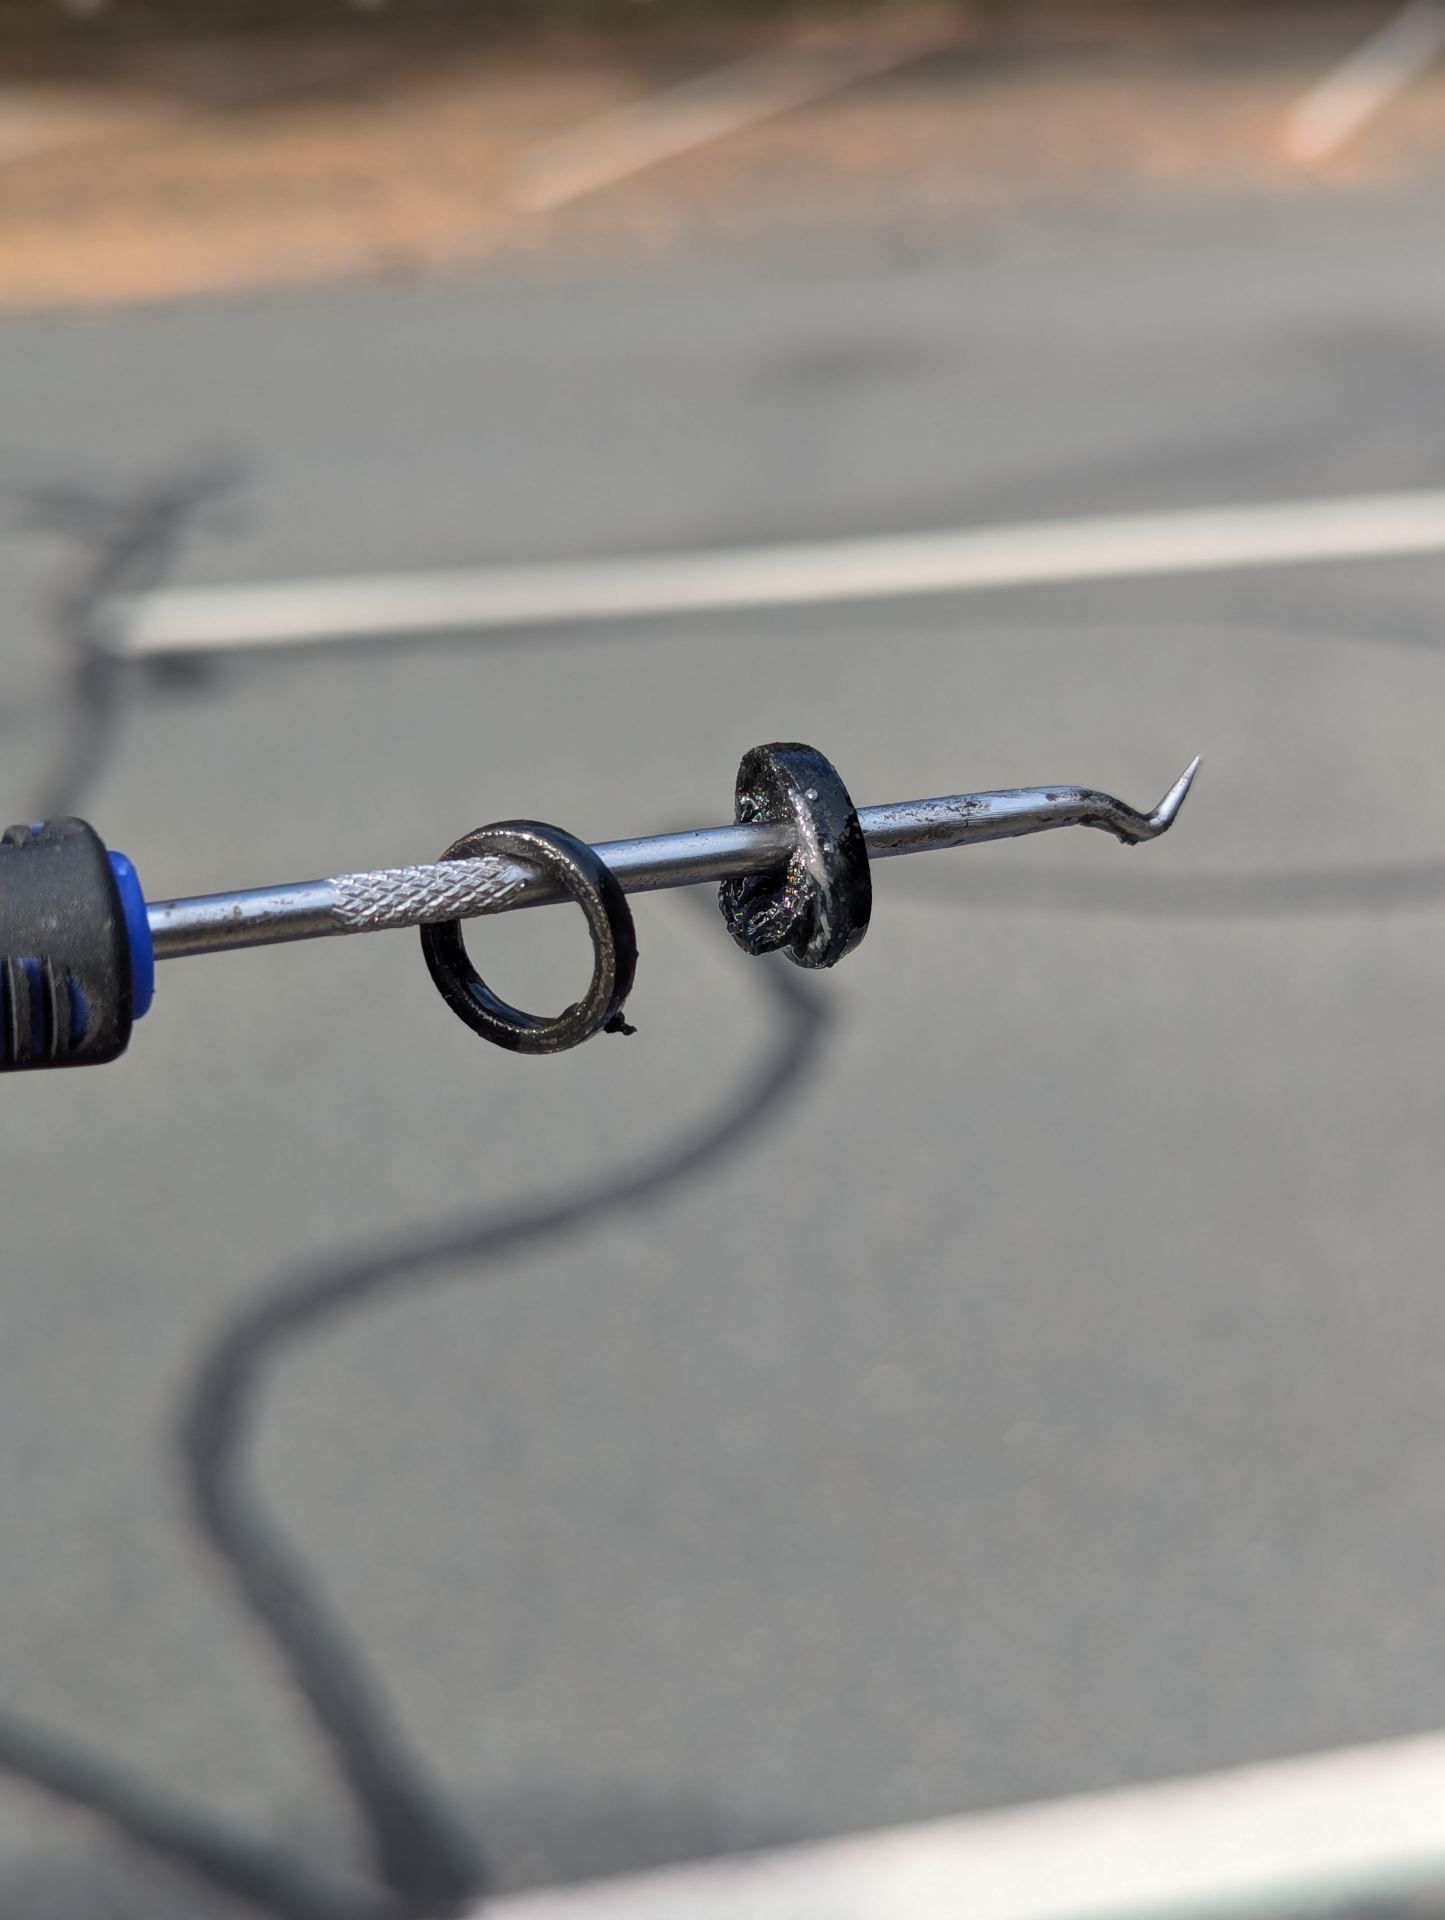
This process would have been easier with some longer pick tools. I have a set but they’re only about 12cm long. A bit more reach would help a lot.
 One of the plastic fixture removed. Note the rough edge.
 Bits of plastic and rubber O ring left behind.
With some careful fishing, I was able to remove the remaining plastic. I was paranoid it would fall into the engine but in hindsight that seems very unlikely due to the size of the hole.
I felt like a surgeon removing a bullet from a patient!
I installed the new Radhaus pipe which went in perfectly, and then connected it up to the reservoir. I cut off the ends of the old T pipe and just left them in place.
Next I had to refill the coolant. Pelican have a great video on the process.
This turned out to be harder than I expected, because I bought the wrong sized adaptor for between the compressor and Draper tool.
It’s a two person job anyway, because getting a good seal on the coolant tank is difficult. With some help from my father in law, we managed to get it done. He held the Draper tool in the coolant tank, and I held the compressor pipes together, enough to create a vacuum of -0.7 bar.
We then used that vacuum to suck coolant into the system. It seemed to work well despite my not draining the system entirely beforehand.
Afterwards, I opened the bleed valve and started up the car. I ran the heater on max and idled the car for about 20 minutes. Then I closed the bleed valve.
When everything seemed good, I packed up and drove the Z4 home, and returned the next day to collect the Macan.
Over the next few days I carefully monitored the coolant level. I had to add about 0.5L more coolant, and since then I’ve done another 1000km with no fluid loss.
I recommend anyone with a 1st-gen Macan replace the coolant pipe with the Radhaus kit as preventative maintenance, as had mine split on the motorway, it could have resulted in engine damage.
There was no warning from the car that something was wrong. I got lucky that it failed as I was pulling into the driveway and I noticed it straight away.
Many thanks to Santirx for producing great resources for us Macan owners, and Radhaus for their product and quick action to help me out!

Liqui-Moly Engine Flush review - fixing Porsche P0024 error code
I bought my 2015 Porsche Macan in January 2024. It had done about 87,000km, and was serviced in line with Porsche’s recommendations.
I immediately had the car serviced by my independent mechanic.
Everything went great until about 7 months later when the engine developed some hesitation.
When pulling away from a stop, there was a juddering. I knew it wasn’t the transfer case (a common fault with Macans) as it had been replaced already by the previous owner.
In addition, occasionally when stopped the idle revs would drop and the car would shudder like the engine was about to stall.
This continued for a few weeks, coming and going. I couldn’t discern any pattern. Eventually the car popped up with a warning.
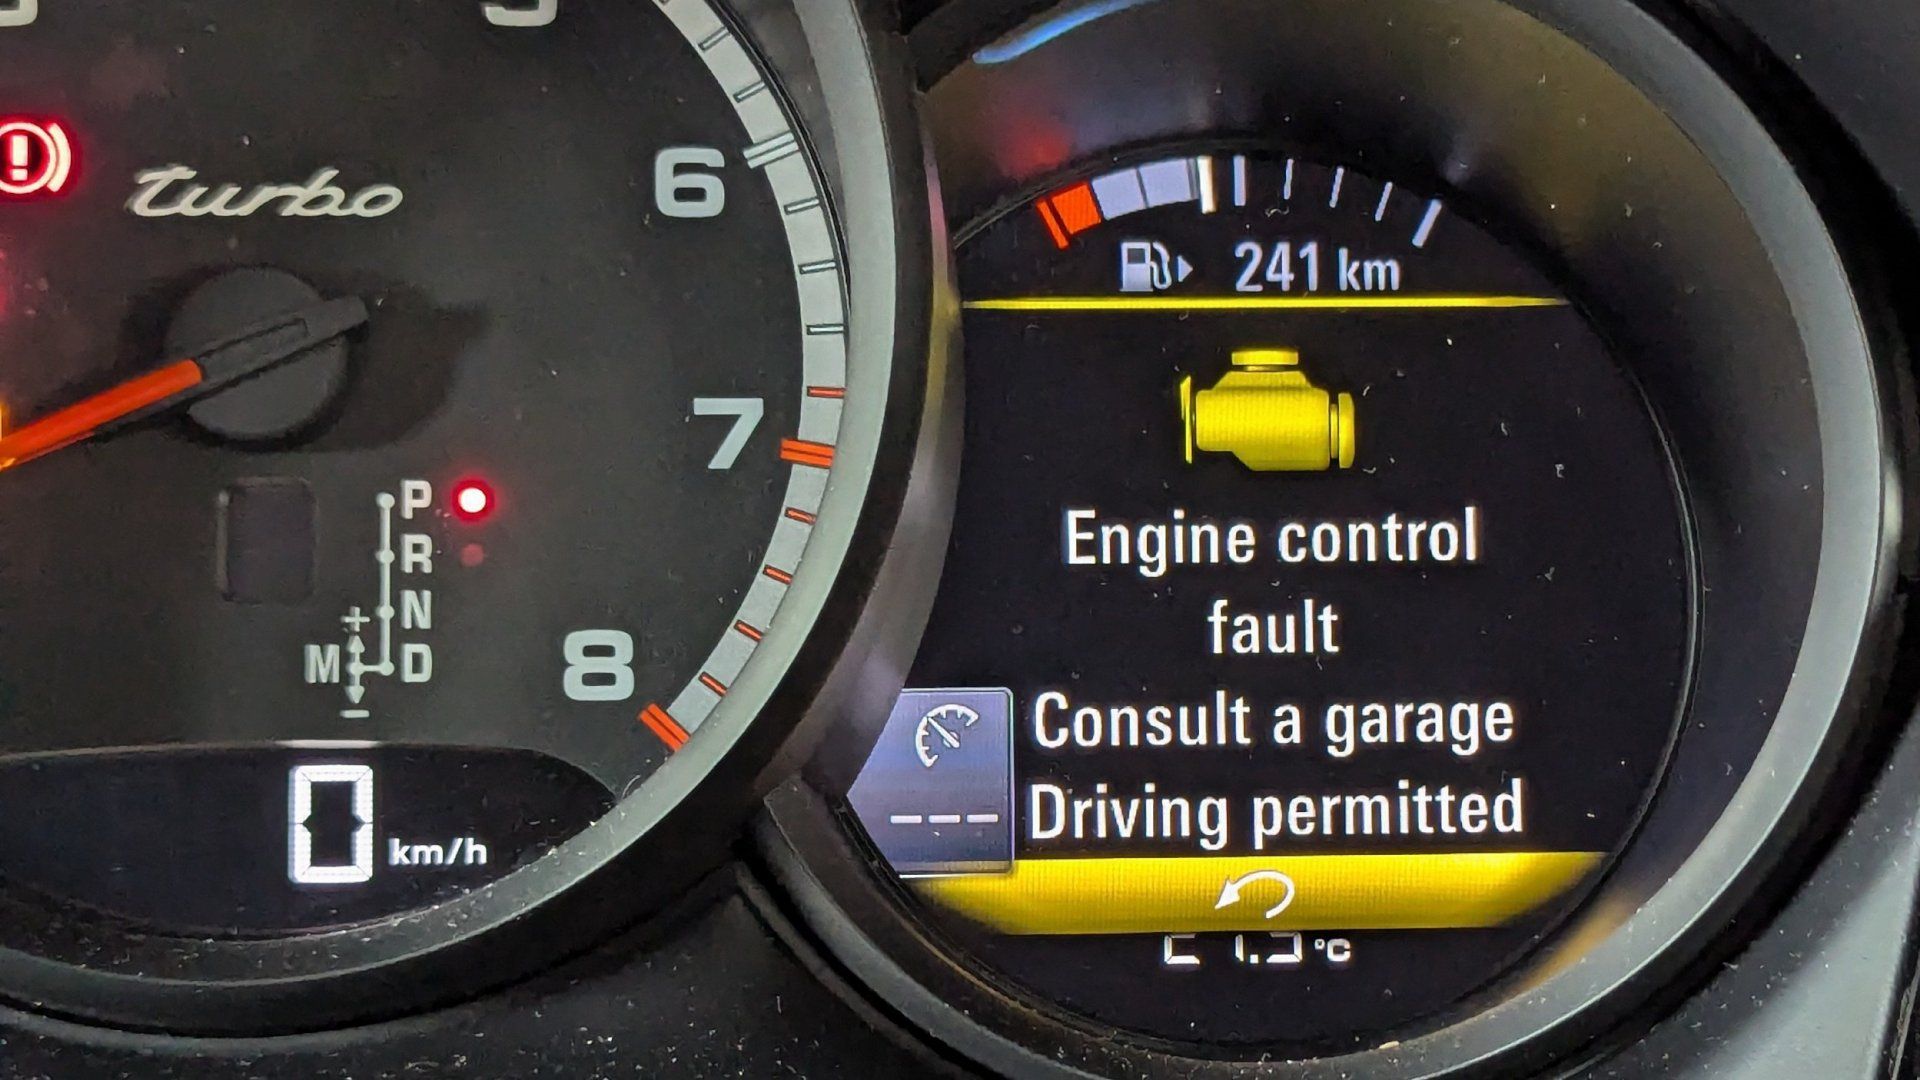 Engine control fault. Consult a garage. Driving permitted.
I took the car to my mechanic and they read the error code P0024 - Exhaust ‘B’ Camshaft Position - Timing Over-Advanced (Bank 2).
They experimented with swapping the solenoids over on bank 2 (passenger side) to see if the problem followed, but it did not, the problem remained on exhaust cam bank 2.
Next they wanted to swap the camshaft oil control valves over, but this required a special tool, and was difficult to access. So they recommended I take the car to the Porsche dealer.
I was nervous about doing this - it can be extremely expensive, and I prefer to work with mechanics I know and trust.
With little choice however, I booked the car in for diagnosis with Porsche, but there was a 4 month wait.
In the meantime, my mechanic also found an error for the thermostat which was stuck open. It did not produce a dash warning.
I had the thermostat replaced, which was luckily covered by warranty as it was an $1800 job.
At this point the car had done about 8,000km since it’s last service. I decided to do an oil change myself, as I think the 15,000km recommended intervals are too long.
As an aside: Porsche charge a whopping $800 for an oil change on my Macan! Considering the oil and filter costs less than $200, I don’t see the value. My mechanic is much more reasonable, but I enjoy doing the work myself and it’s more convenient than taking the car in.
As an experiment I decided to use Liqui-Moly engine flush, which aims to clear out sludge in the engine. I’ve not used any additives before now.
I put the product in and idled the car for 10 mins, then drained and replaced the filter and oil.
The difference afterwards was remarkable. The engine was running much smoother, and the problem with hesitation when setting off, and the rough idle were both fixed.
I was pleasantly surprised, but kept my booking with Porsche just in case.
I travelled another 6500km, and started to notice the occasional hesitation when setting off. It wasn’t bad, but it was there.
This was fortunate in a way, as it was nearly time for my booking with Porsche. I took the car in at 7500km, and braced myself for bad news.
Thankfully, they couldn’t find anything wrong. The P0024 error code had not returned since my mechanic cleared it, and they drove the car with diagnostics connected, and found the camshaft adjustment was all working within normal ranges.
The Porsche tech suspects a sticking camshaft adjuster, which perhaps explains why an engine flush and clean oil resolved the problem.
I’m now a Liqui Moly believer, engine flush probably saved me a few thousand dollars, not to mention the inconvenience of being without my car.
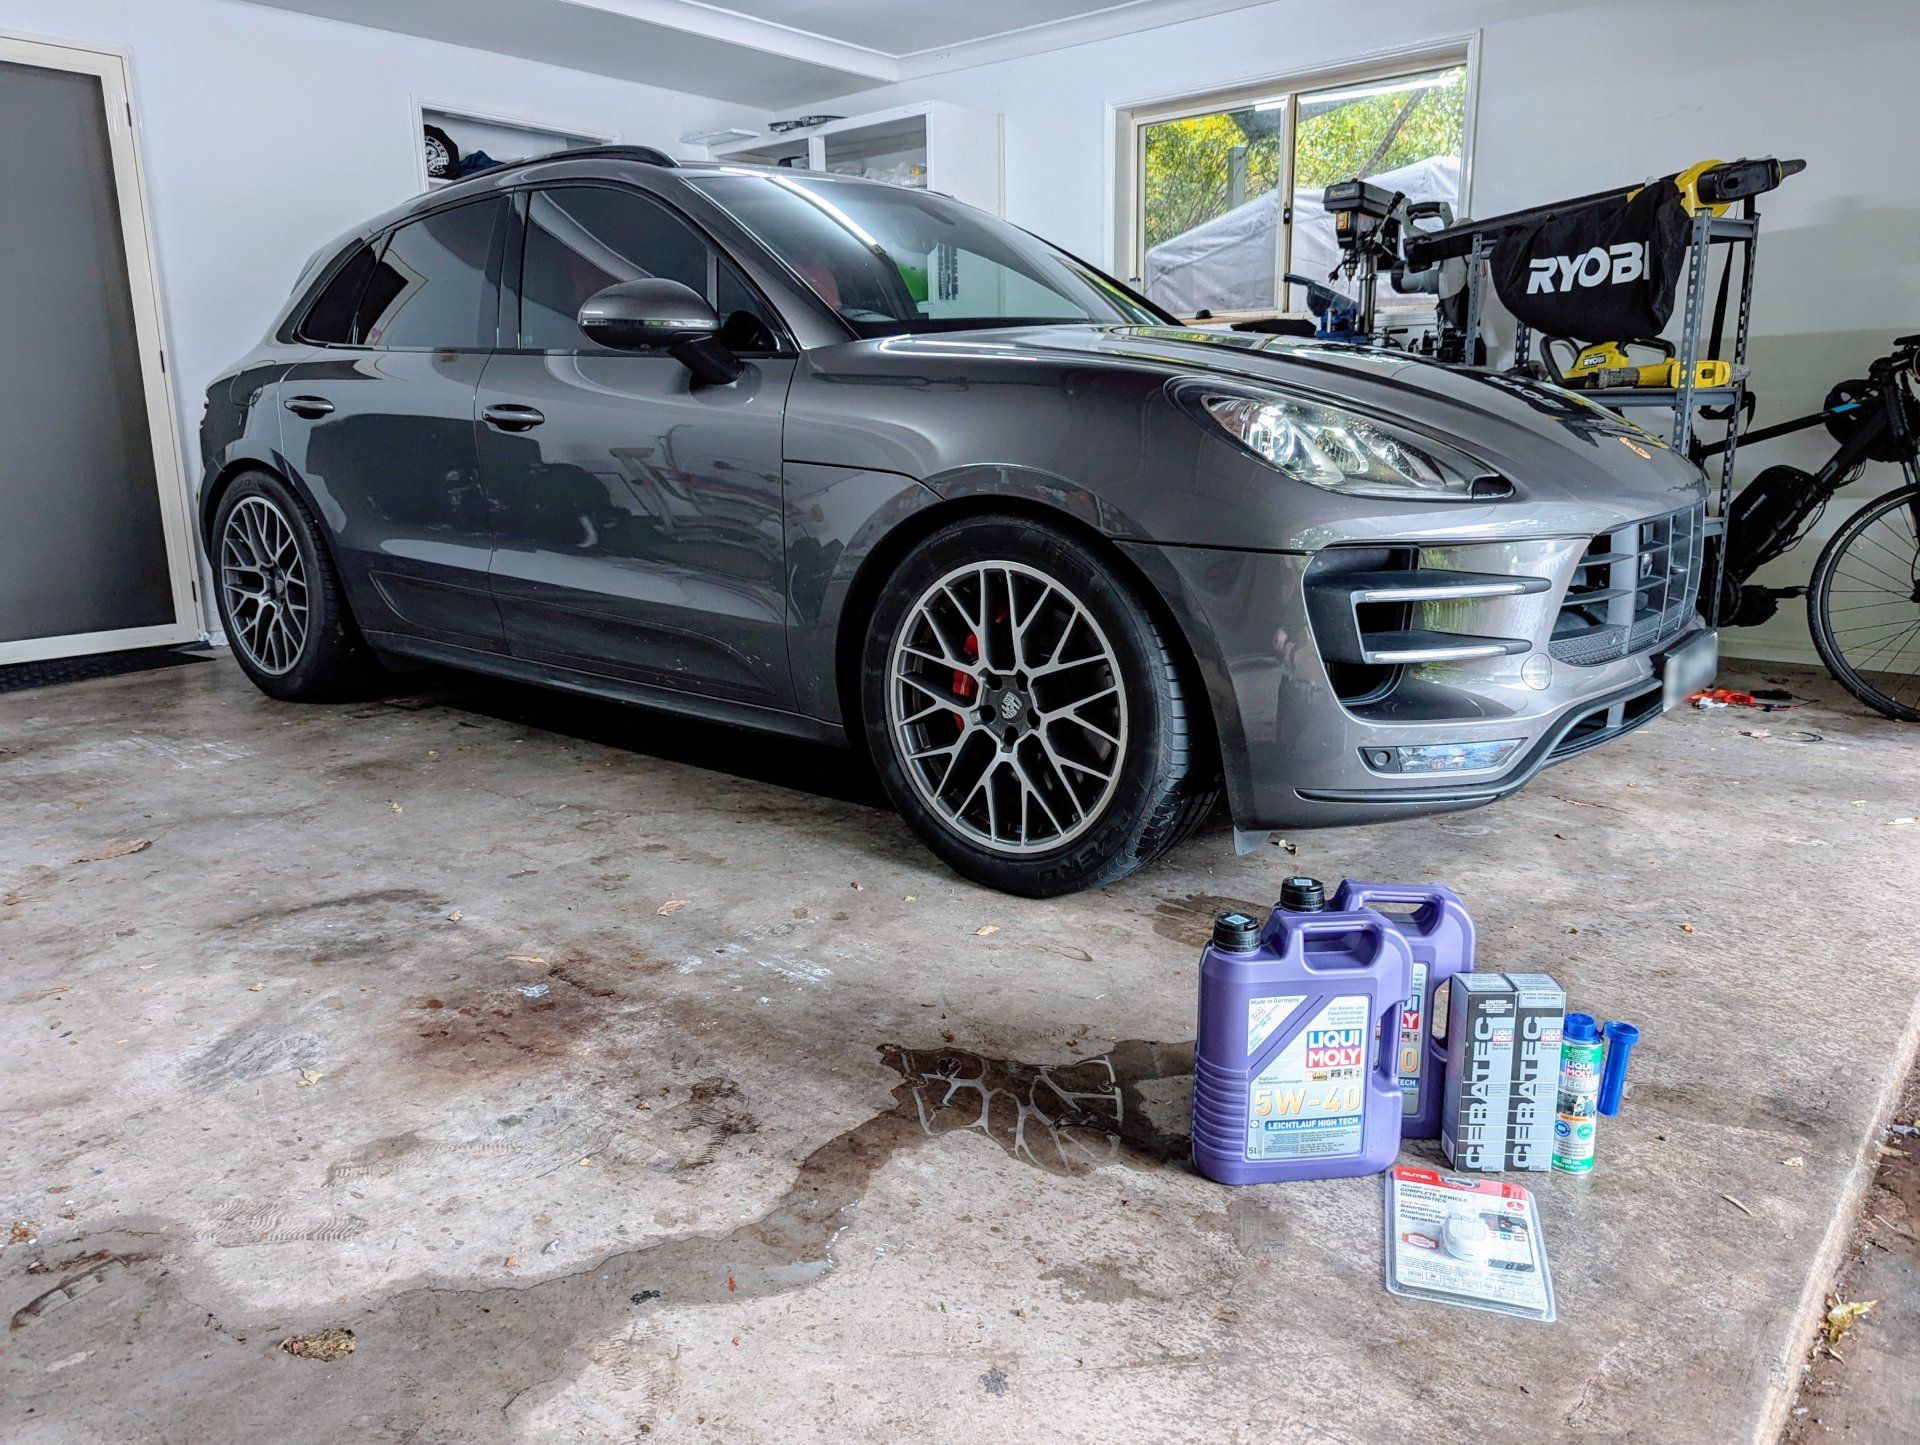
With a clean bill of health from Porsche, I went ahead with another oil change.
This time I decided to switch from Mobil Super 3000 Formula V 5W-30 to Liqui-Moly Leichtlauf High Tech 5W-40.
I contacted Liqui Moly support to ask a few questions, which I’ll share below in case it can help you:
Why did you recommend Leichtlauf over MolyGen?
In your specific case, Leichtlauf High Tech SAE 5W-40 is the premium formula for your vehicle. It was manufactured using the latest high-performance components and offers outstanding quality, the best engine protection and unrivalled performance. Of course, it is factory approved by well-known vehicle manufacturers such as Mercedes-Benz, BMW / Mini, Volkswagen / Audi, thus it is the first choice for your vehicle.
Even though the Molygen New Generation SAE 5W-40 is also a top product that meets the requirements for your vehicle, it does not reach the level of Leichtlauf High Tech SAE 5W-40 in terms of performance and is only the second choice in this particular case.
What additives are suggested for my cars? (Porsche Macan and BMW Z4)
At your next oil change use Engine Flush Plus then keep using every 2nd - 3rd oil change (may be used every oil change) to make sure deposits are removed from inside the engine. Deposits are abrasive and will contribute to additional wear as well as preventing proper oil flow throughout the engine. It will also remove deposits that form at the piston ring area that may contribute to decreased performance and increased oil consumption by preventing proper ring function due to binding in their groves. Overall, a great way to increase engine life and to optimize oil consumption.
Add Cera Tecto fresh motor oil to further increase wear protection and reduce friction. Cera Tec is a high-tech additive formulation that contains two active ingredients for less friction and wear. It has been proven worldwide and protects your engine even under tough operating conditions. For optimal protection, ideally use Cera Tec with every oil change.
Add Engine Oil Resealer to the engine oil, too, to help refresh rubber-based engine seals. Rubber based seals harden and shrink with age and Engine Oil Resealer will prevent or reverse that process. If your engine is consuming oil, it may be because your valve seals are aged and hard. In that case adding Engine Oil Resealer will soften these seals and reduce oil consumption. It will take approximately 600-800 km of driving before the treatment have completed. For prevention we recommend you use Engine Oil Resealer every 30,000 km / 2 years
To maintain the sensitive fuel system of your engine we recommend you using our DIJectron as preventive fuel treatment regularly every around 4000 km. DIJectron is a unique combination of state-of-the-art LIQUI MOLY additives, developed in order to keep clean and protect the sensitive fuel system of modern, direct fuel injected (GDI) engines. By using DIJectron, the risk of an LSPI event caused by deposits on the injectors and in the combustion chamber is significantly reduced. It will further optimize fuel consumption and increase engine efficiency.
Is it safe / recommended to add multiple additives at the same time? Eg: Ceratec and Engine Oil Reseller?
For engine oil additives, there’s no harm in mixing more than one product as long as the total amount of additives doesn’t exceed approximately 10% of the engine oil fill/sump capacity.
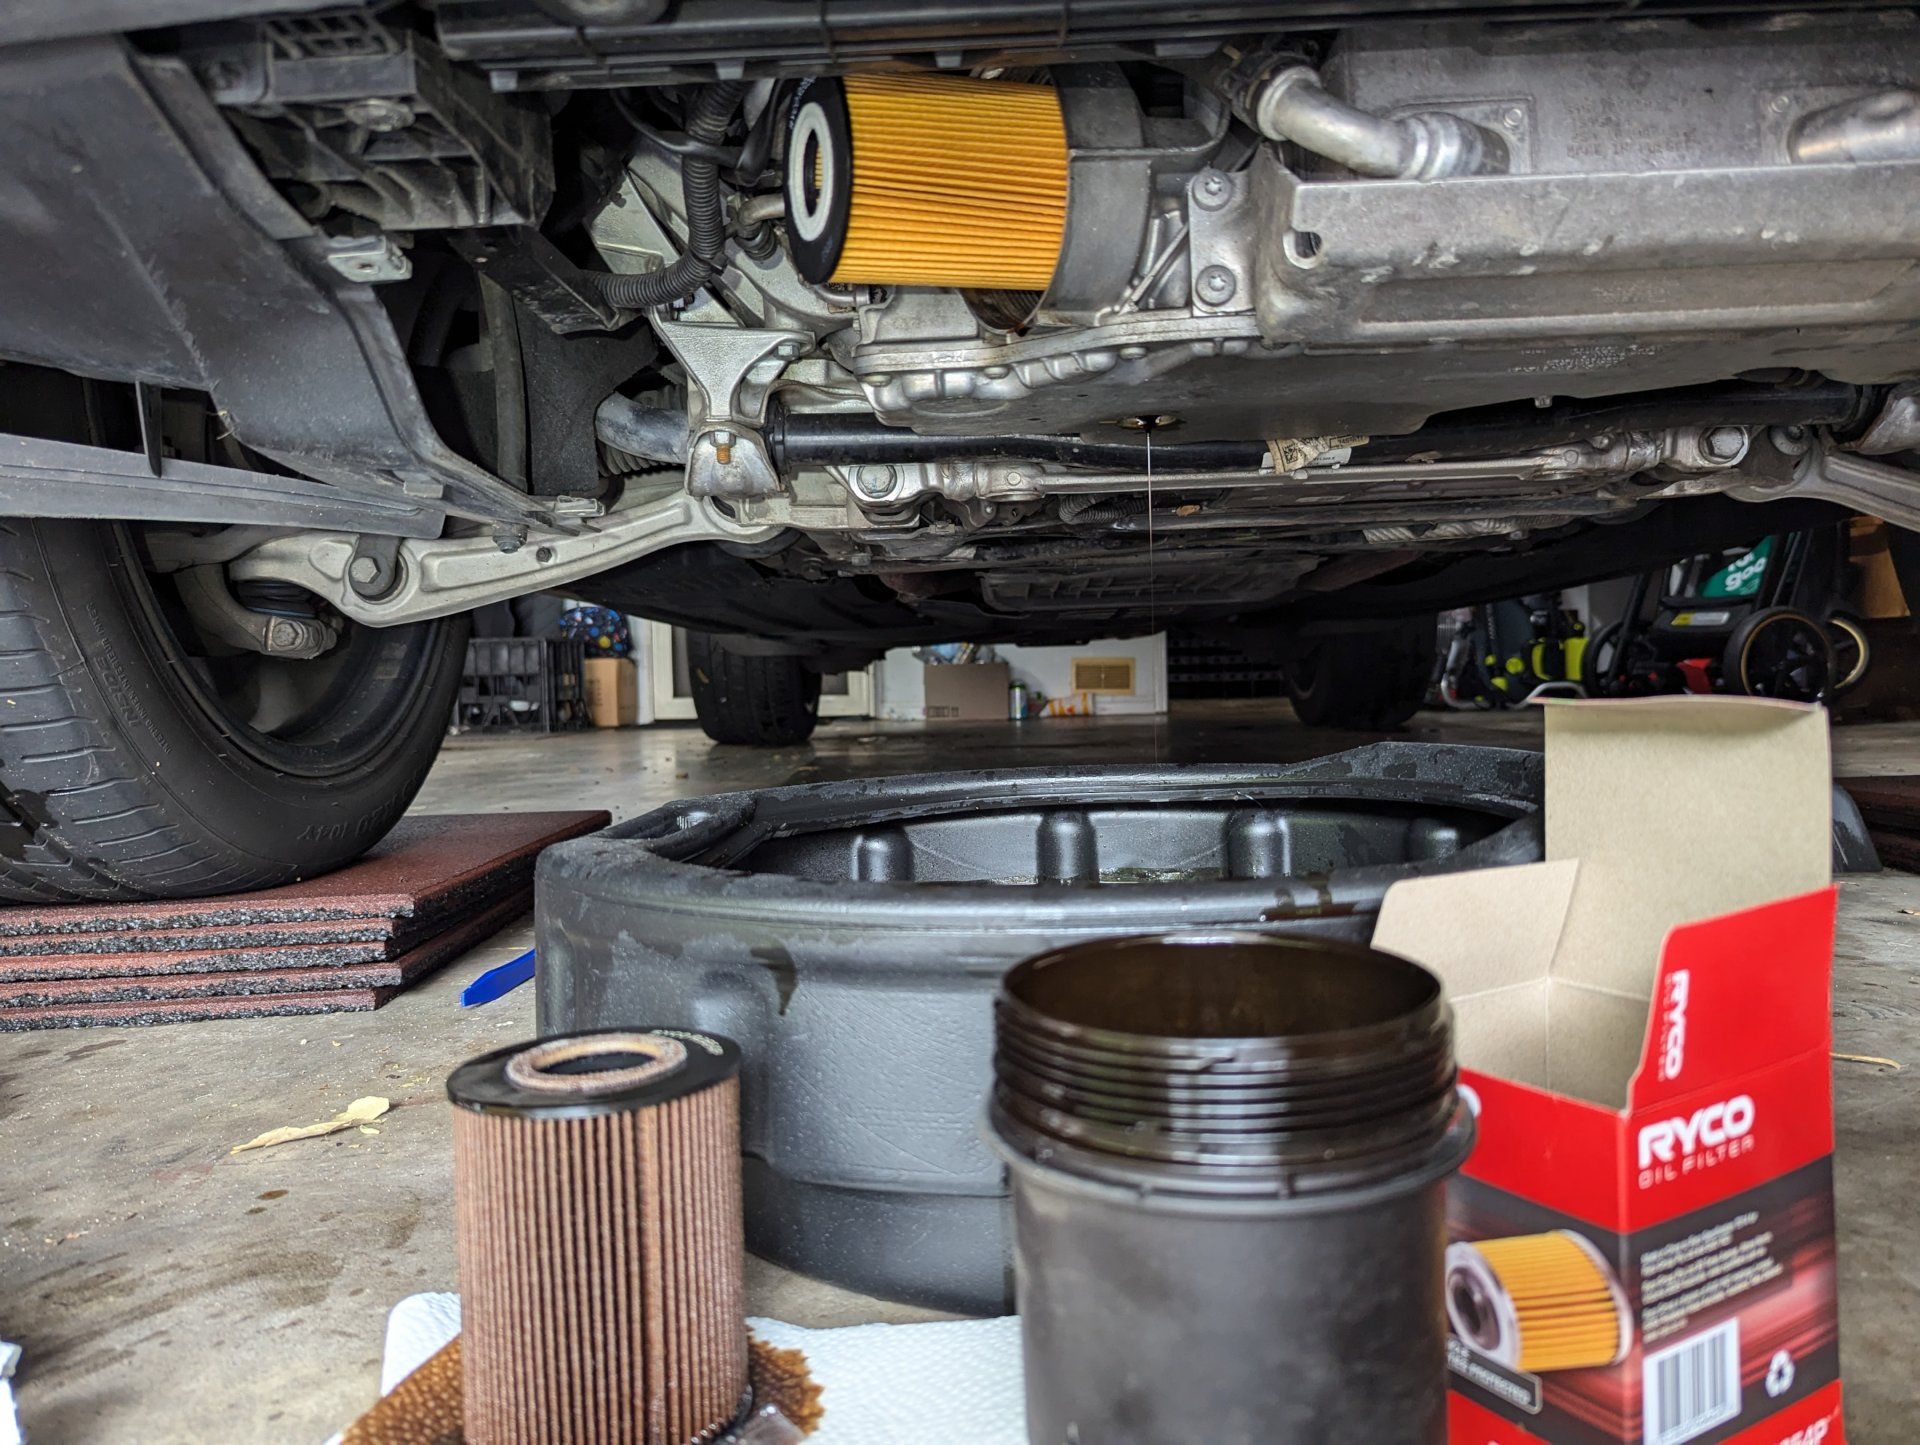
I went ahead with my oil change as usual, but ran into a problem.
After I refilled the oil (and Ceratec) I noticed a leak.
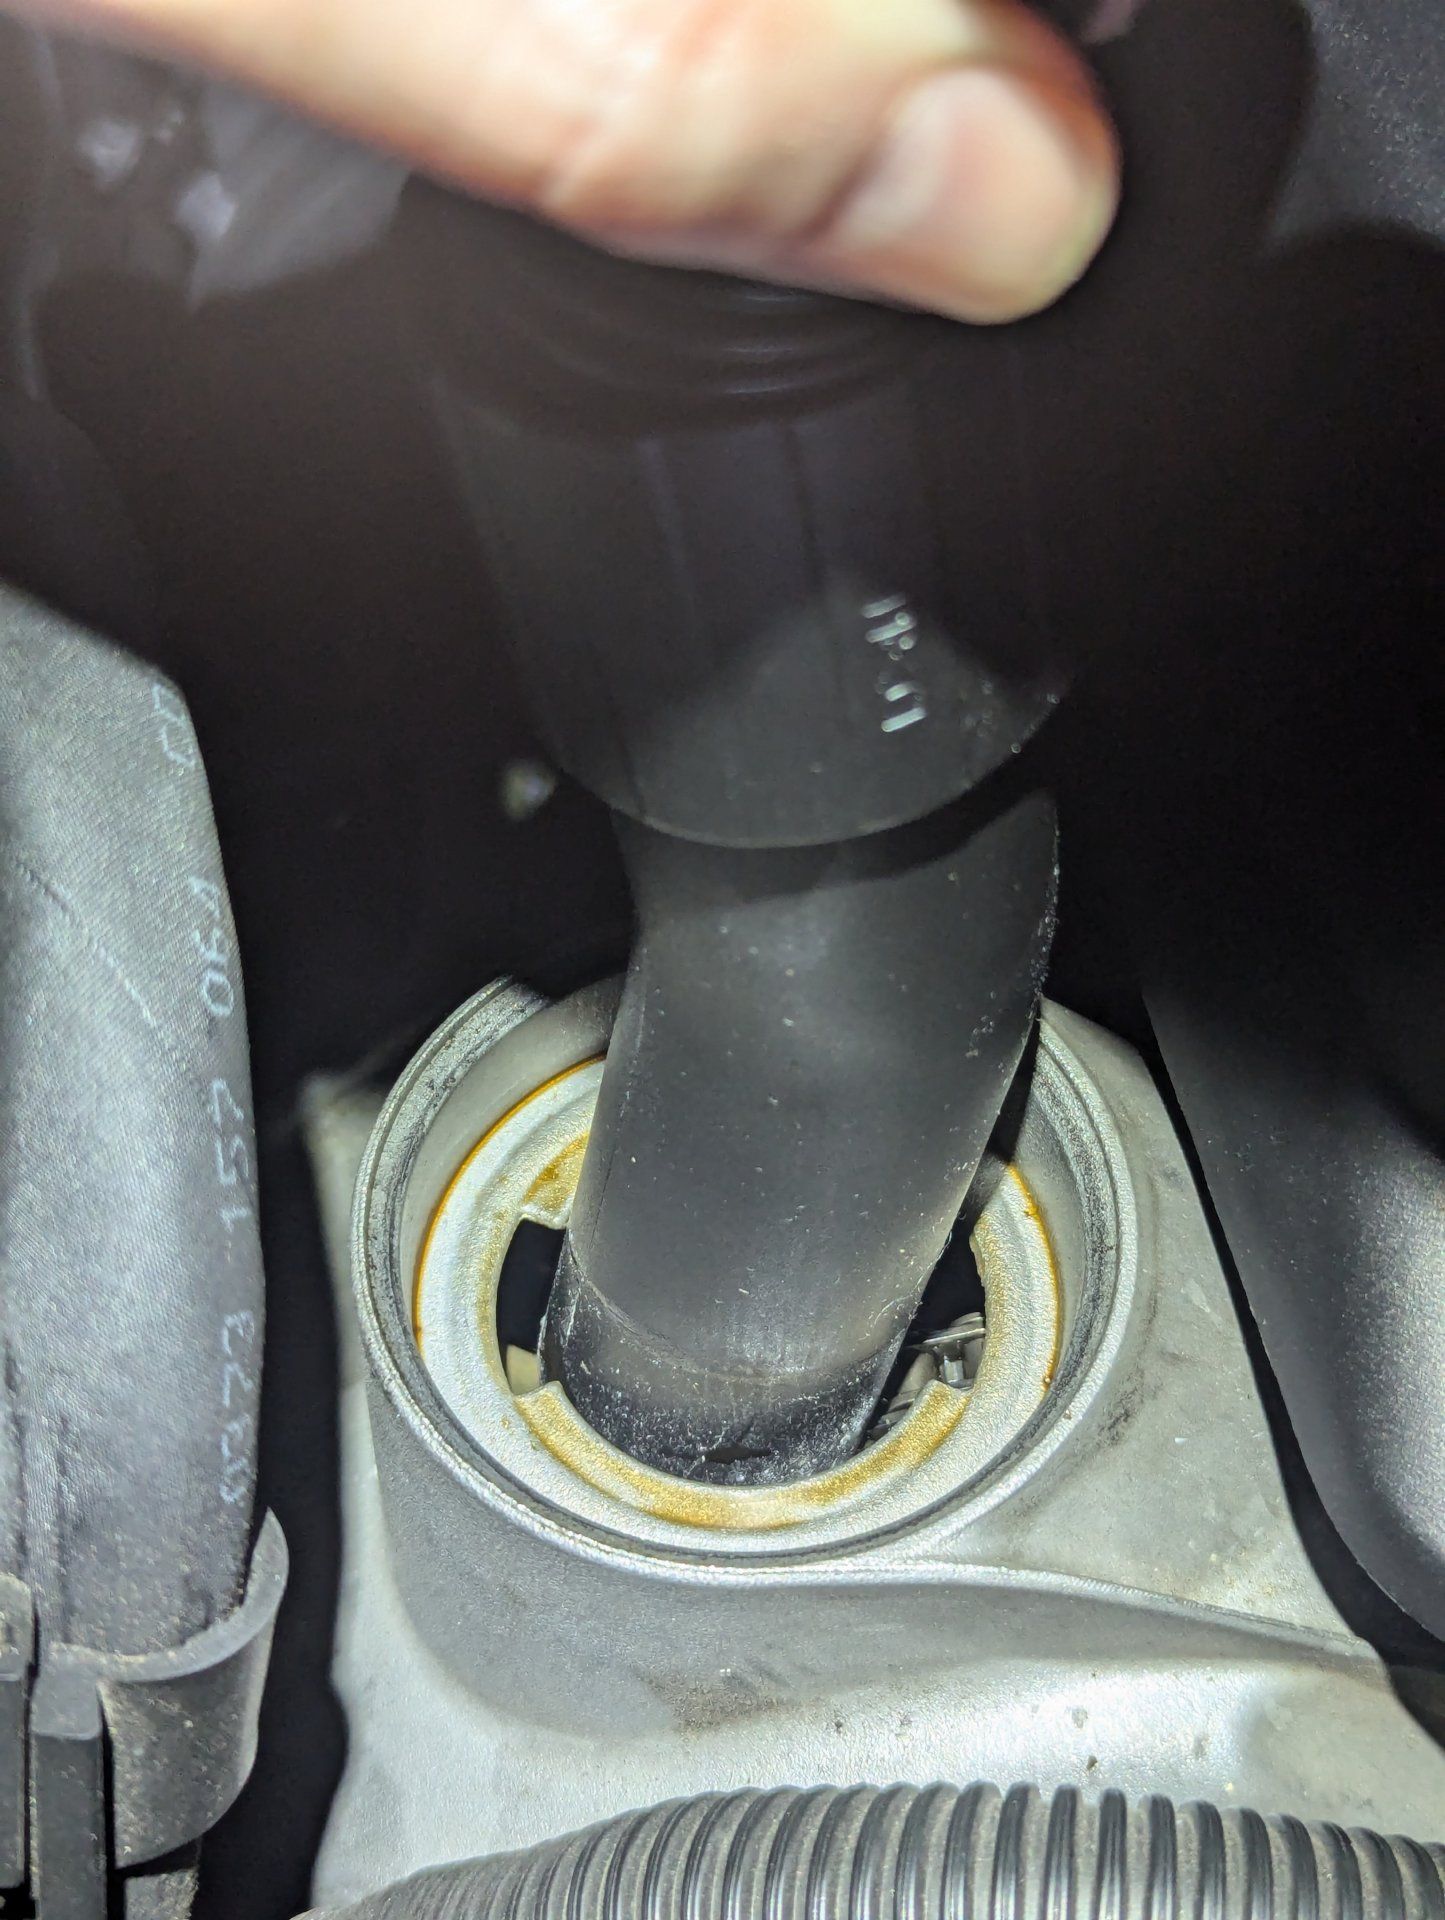
On closer inspection, it appeared that the washer had not gone in straight and was not sealing.
 You can see the washer protruding from the left side.
The washer came with the Ryco filter, and I noticed that it seemed a bit loose on the bolt. I’d used it fine the last time, but maybe I just got lucky.
I could replace the washer, but doing so would mean draining all the clean oil out, and my oil catch pan was pretty dirty. I’d rather not do that!
My friend Z helped me out with a genius idea. He suggested putting my shop vac in the oil filler, to create a vacuum and prevent the oil leaking out while I changed the washer.
I was surprised this could work, but I trust him, so I dashed down to Repco to grab a new washer. I bought a slightly smaller one, and noted it was different to the one in the Ryco filter kit. The Ryco washer was flat, whereas the crush washer I bought had a donut shape with a seam on one side.
I wrapped my shop vac in rags to fill the gap, and jammed a bit of extra rag around the edges to make a seal.
To my immense relief, this trick worked! The vacuum kept the oil from leaking out of the drain hole, and gave me plenty of time to swap the washer. I torqued it to spec and it was perfect.
The smaller 16mm washer fit better than the 18mm that came with the Ryco too. The washer part number is RSP2054.
Looking at the washer I removed, you can see the groove where the alignment has not been right. I guess I just got lucky last time. I won’t be using these included washers anymore, I’ll buy some proper crush washers.

Lastly, I needed to reset the oil change warning. I didn’t want to spend a lot of money on a scan tool, so I took a chance on an Autel Maxiap AP200 OBD2 bluetooth dongle, because it was half the price of other options.
This worked great, I was able to reset the warning with a few taps, and now my Porsche Macan is happy again. The hesitation is again fixed - I think regular oil changes help a lot with this.
In conclusion, I suspect that my oil became a bit sludgy through a combination of long oil change intervals (15,000km) and a faulty thermostat that was preventing the oil from reaching full operating temperature. This caused error P0024 and rough idle and hesitation when setting off.
If you want to do your own oil change, you just need some basic tools -
- Car ramps
- Power drill with torx attachment
- Torque wrench with large torx sockets
- Universal oil housing tool, or a socket driver for your specific car
- Oil catch pan and some old bottles to dispose the oil
- Shop rags & workshop degreaser spray
- Funnel for filling and disposing of oil
All up, it costs maybe $250 to get these tools. I suggest watching this video that outlines the process really well:
Happy wrenching!